This document will walk users through key functional areas of the Data Extract Tool (DET).
This document will cover the following functional areas:
- User Login
- Data Selection Management
- Data Extract to Templates
- Stakeholder's Report
- DET Refresh Report
This document is written for all DET users.
Users require GO Secure credentials to use the Data Extract tool. DET works best with Google Chrome, with the zoom setting at 100%.
For further technical support: efis.support@ontario.ca
1 User login
This section will walk the user through the login process and describe the main menu items.
Step 1. Click on the following link to access the EFIS Portal homepage.
https://efis.fma.csc.gov.on.ca/apex/f?p=EFISPORTAL:HOME_PAGE
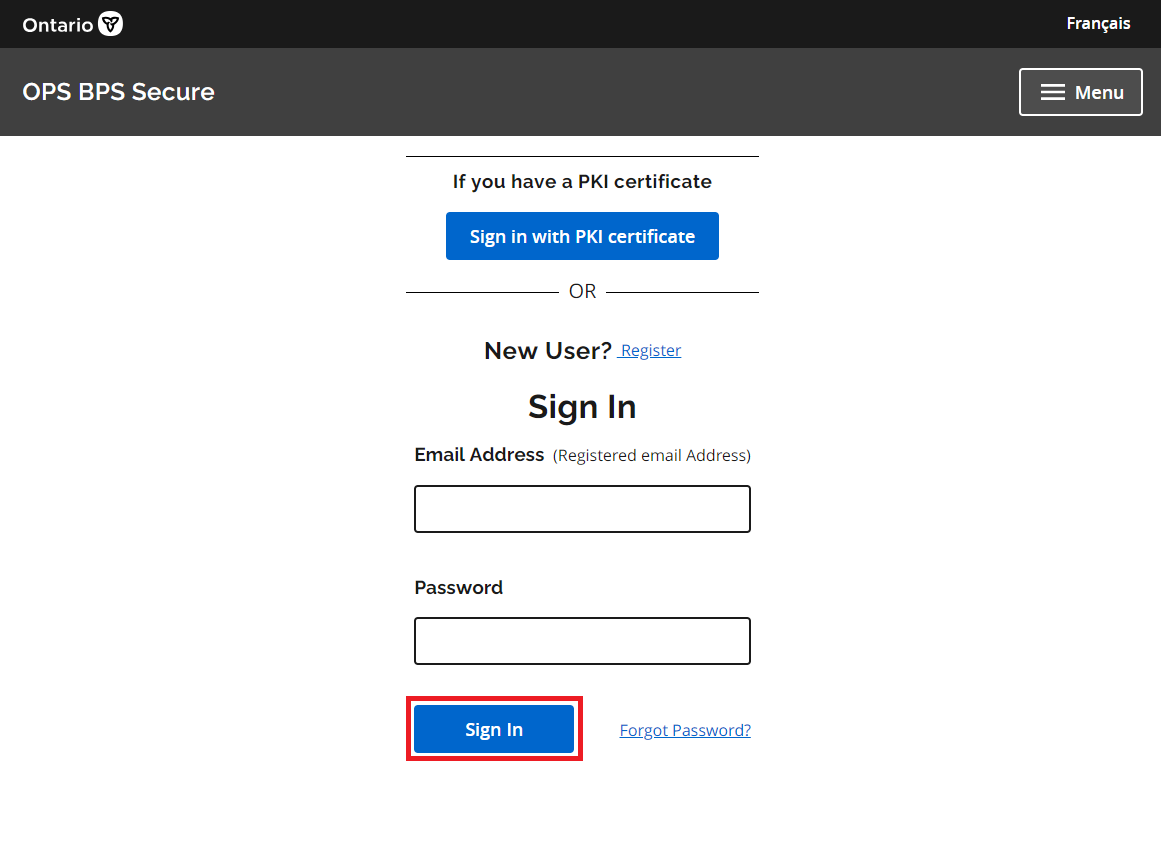
The login screen will be displayed.
Step 2. Enter GO Secure ID and Password or Login with PKI.
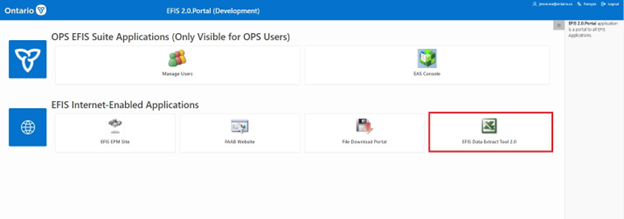
Step 3. Click on the EFIS Data Extract Tool 2.0 icon.
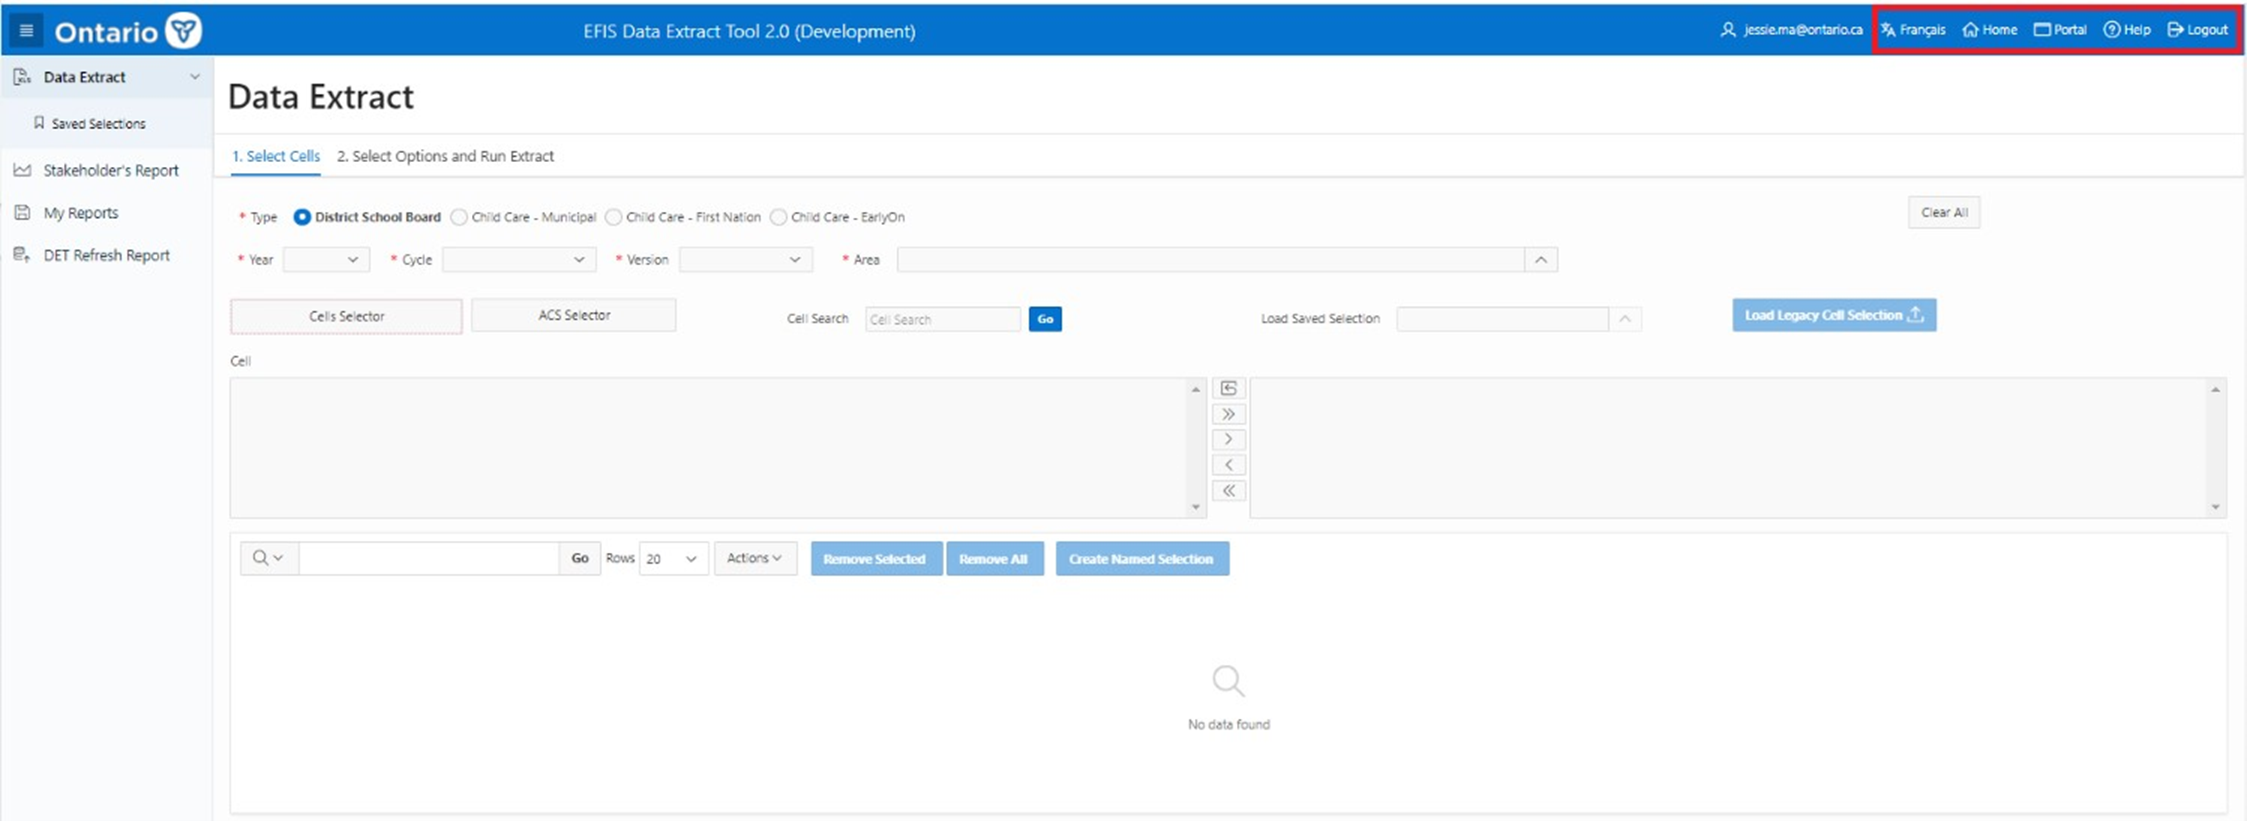
In the top right, the following functions are available:
- Option to translate to French.
- Home button to return user to DET Extract page.
- Portal button to return user to EFIS Portal homepage
- Help
- Logout
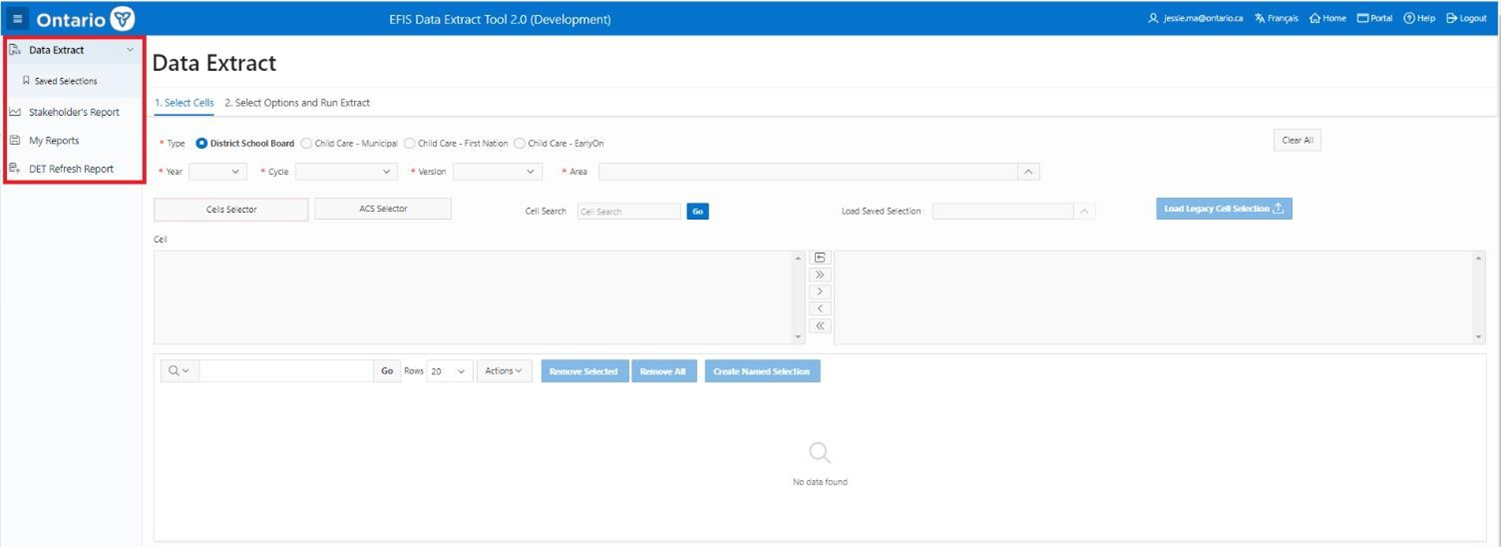
The left side menu contains the following pages:
-
Data Extract: Allows users to select data points and create a user-defined data extract.
- Saved Selections: A list of Saved Cells Sections that were created by the user for reuse.
- Stakeholder's Report: Allows user to extract stakeholder reports.
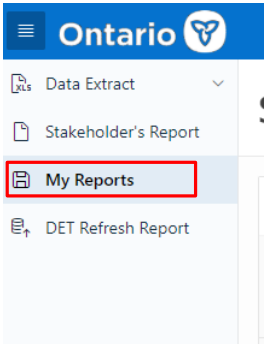
- My Reports: Stores user data extracts.
- DET Refresh Report: This report will display the last instance when a specific Doc Set was refreshed in the DET Data warehouse.
2 Data Extract: Data Selection Management
2.1 Overview
This section will show users how to build, save, edit and reuse data selection criteria. It will also explain to users how to run an extract. Data extract has two subpages:
- Select Cells
- Select Options and Run Extract
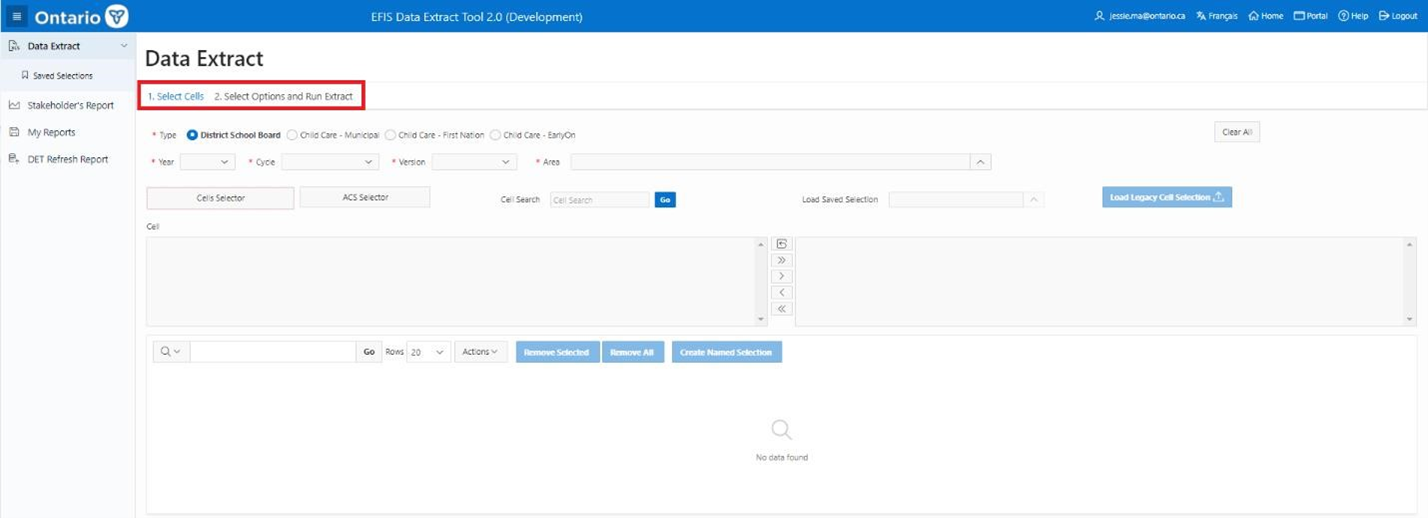
2.2 Select Cells
Overview of steps:
- Step 1: Select Type
- Step 2: Select Year
- Step 3: Select Cycle
- Step 4: Select Version
- Step 5: Select Area
- Step 6: Cell Selection
- Step 7: Cell Name Reference Document
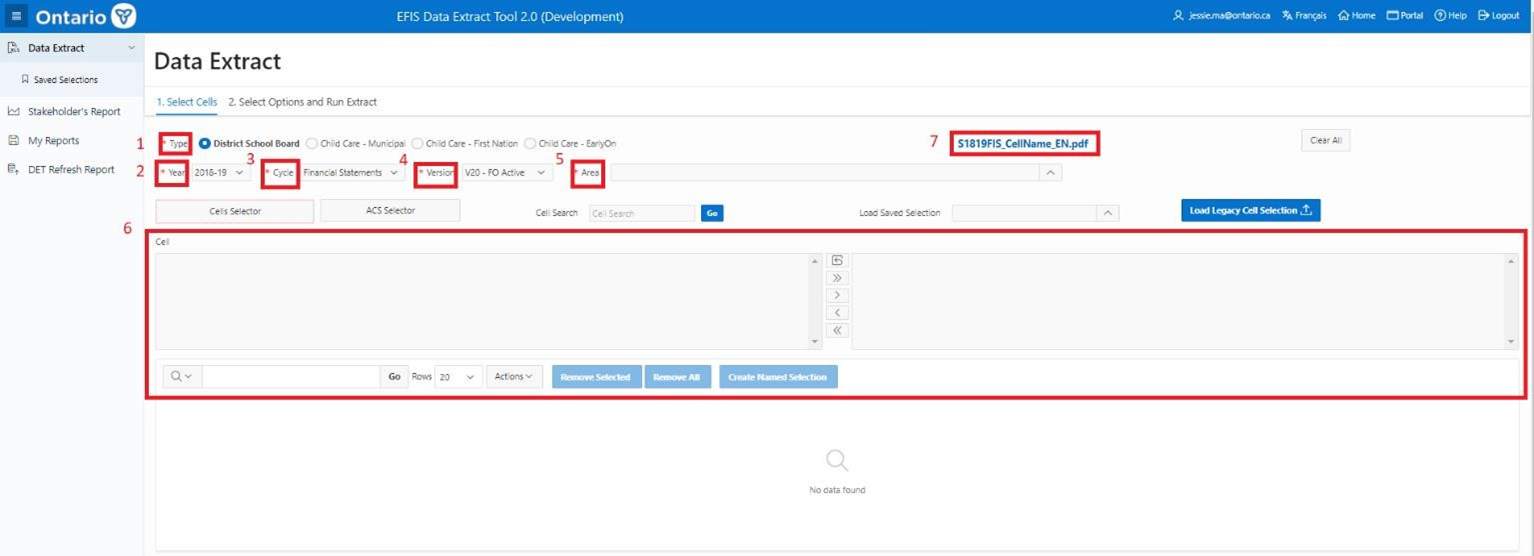
Fields marked with a red asterisk * are mandatory. A detailed explanation of each step is provided next.
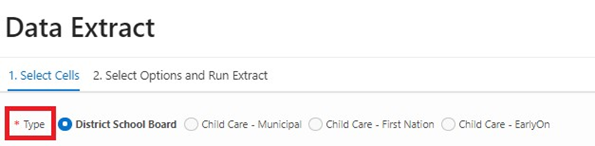
2.2.1 Select Type
District School Board (DSB) is the default recipient type. In Release 1, External Users have access to District School Board (DSB) only. For Internal Users who have access to other Types, they may switch to:
- Child Care - Municipal (CCM)
- Child Care - First Nation (CCF)
- Child Care - EarlyOn (OTP)
Users will have access to one or multiple recipient
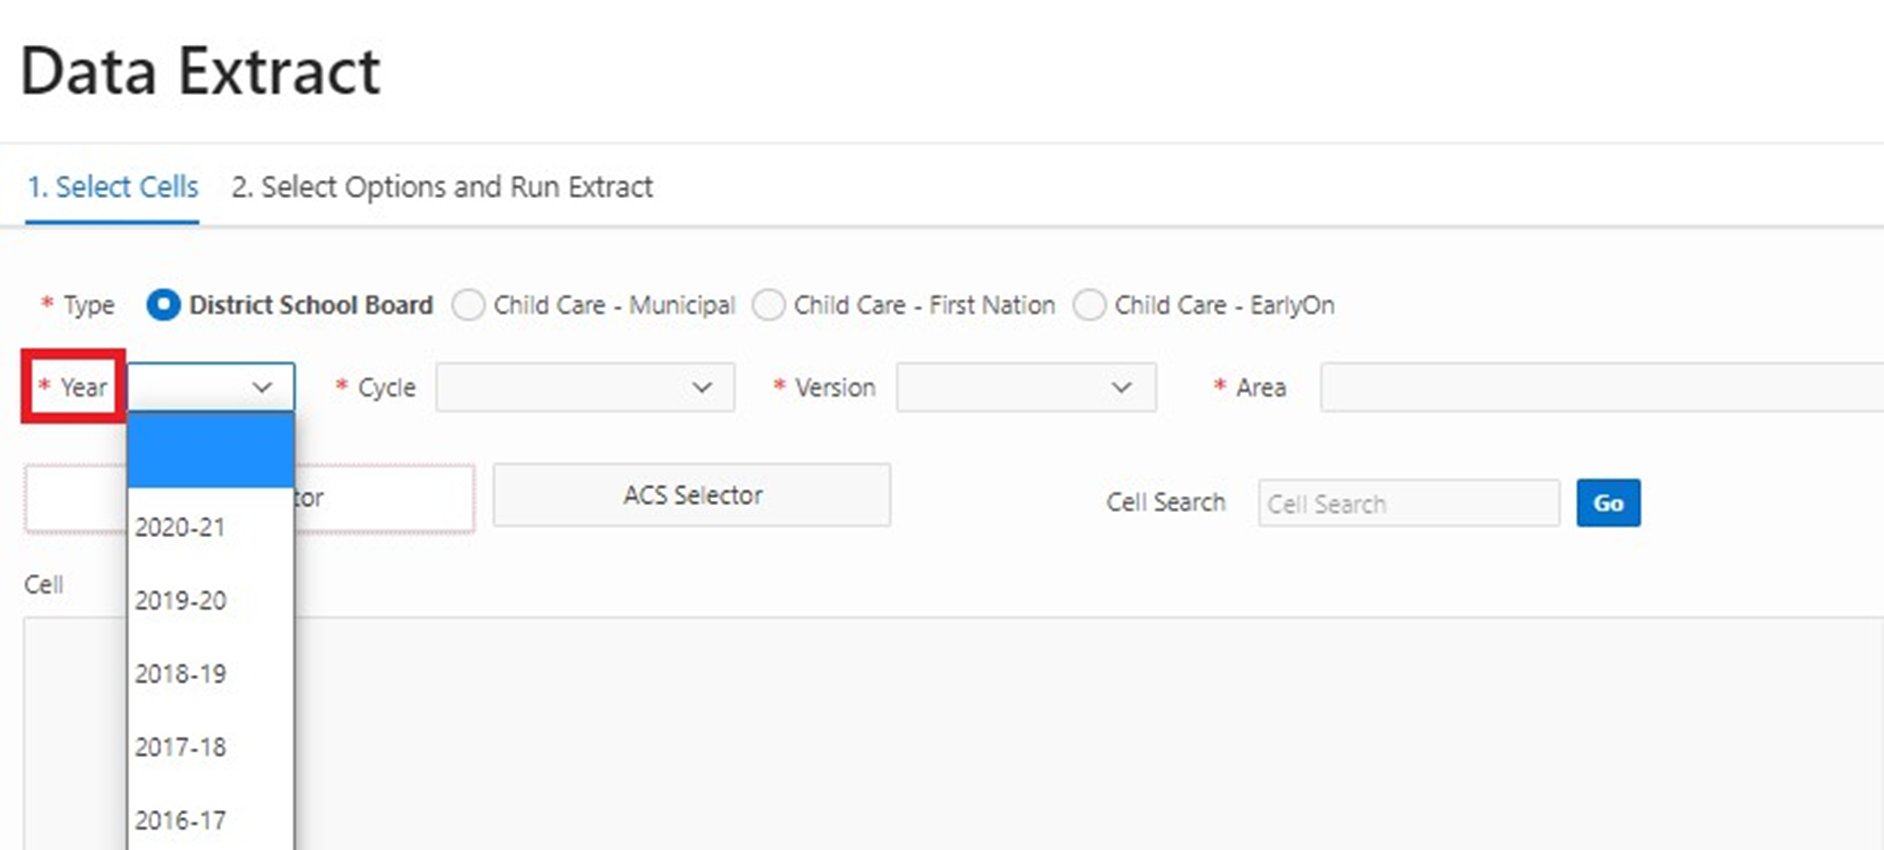
2.2.2 Select Year
A list of all available Years for a Type will appear via the dropdown arrow. Only available years within the DET Data Warehouse will be displayed. Only ONE Year can be selected at a time.
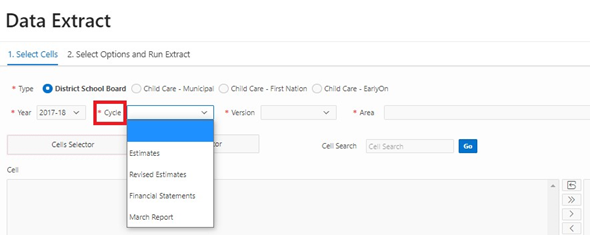
2.2.3 Select Cycle
A list of all available Cycles for the selected Year and Type will appear by clicking on the dropdown arrow.
Available Cycles are:
- Estimates
- Revised Estimates
- Financial Statements
- March Report
Once the Year is selected, the Cycle box is automatically populated with available cycles for that Type and Year. Only ONE Cycle can be selected.
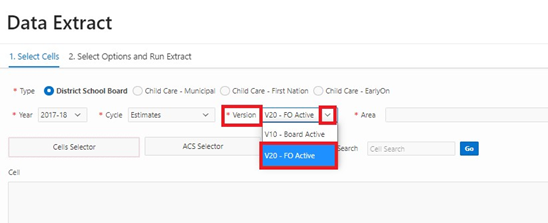
2.2.4 Select Version
External users will only have access to V10-Board Active.
Internal users have access to both V10-Board Active and V20-FO Active. V20-FO Active is the default option. Internal Users can switch to V10-Board Active using the dropdown menu. Users may only extract one version per extract. Once the first cells have been selected, the Version selection will be locked for the remaining data selections within the active session.
Note
Extracted data will be color-coded to note which version is displayed. Green will be used for V20 data and purple will be used for V10 data. In cases where V20 data is unavailable, V10 data will be substituted and color-coded accordingly (see 2.3.6 Download Extract for sample extracts).
2.2.5 Select Area
The list includes all schedules, sections, data forms, and appendices available for a specific Type, Year, and Cycle combination.
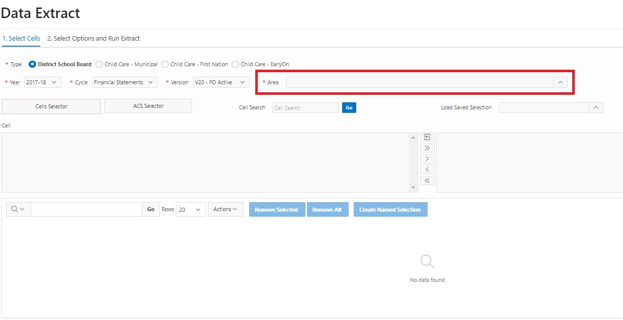
Users may locate the relevant Area by scrolling down the list.
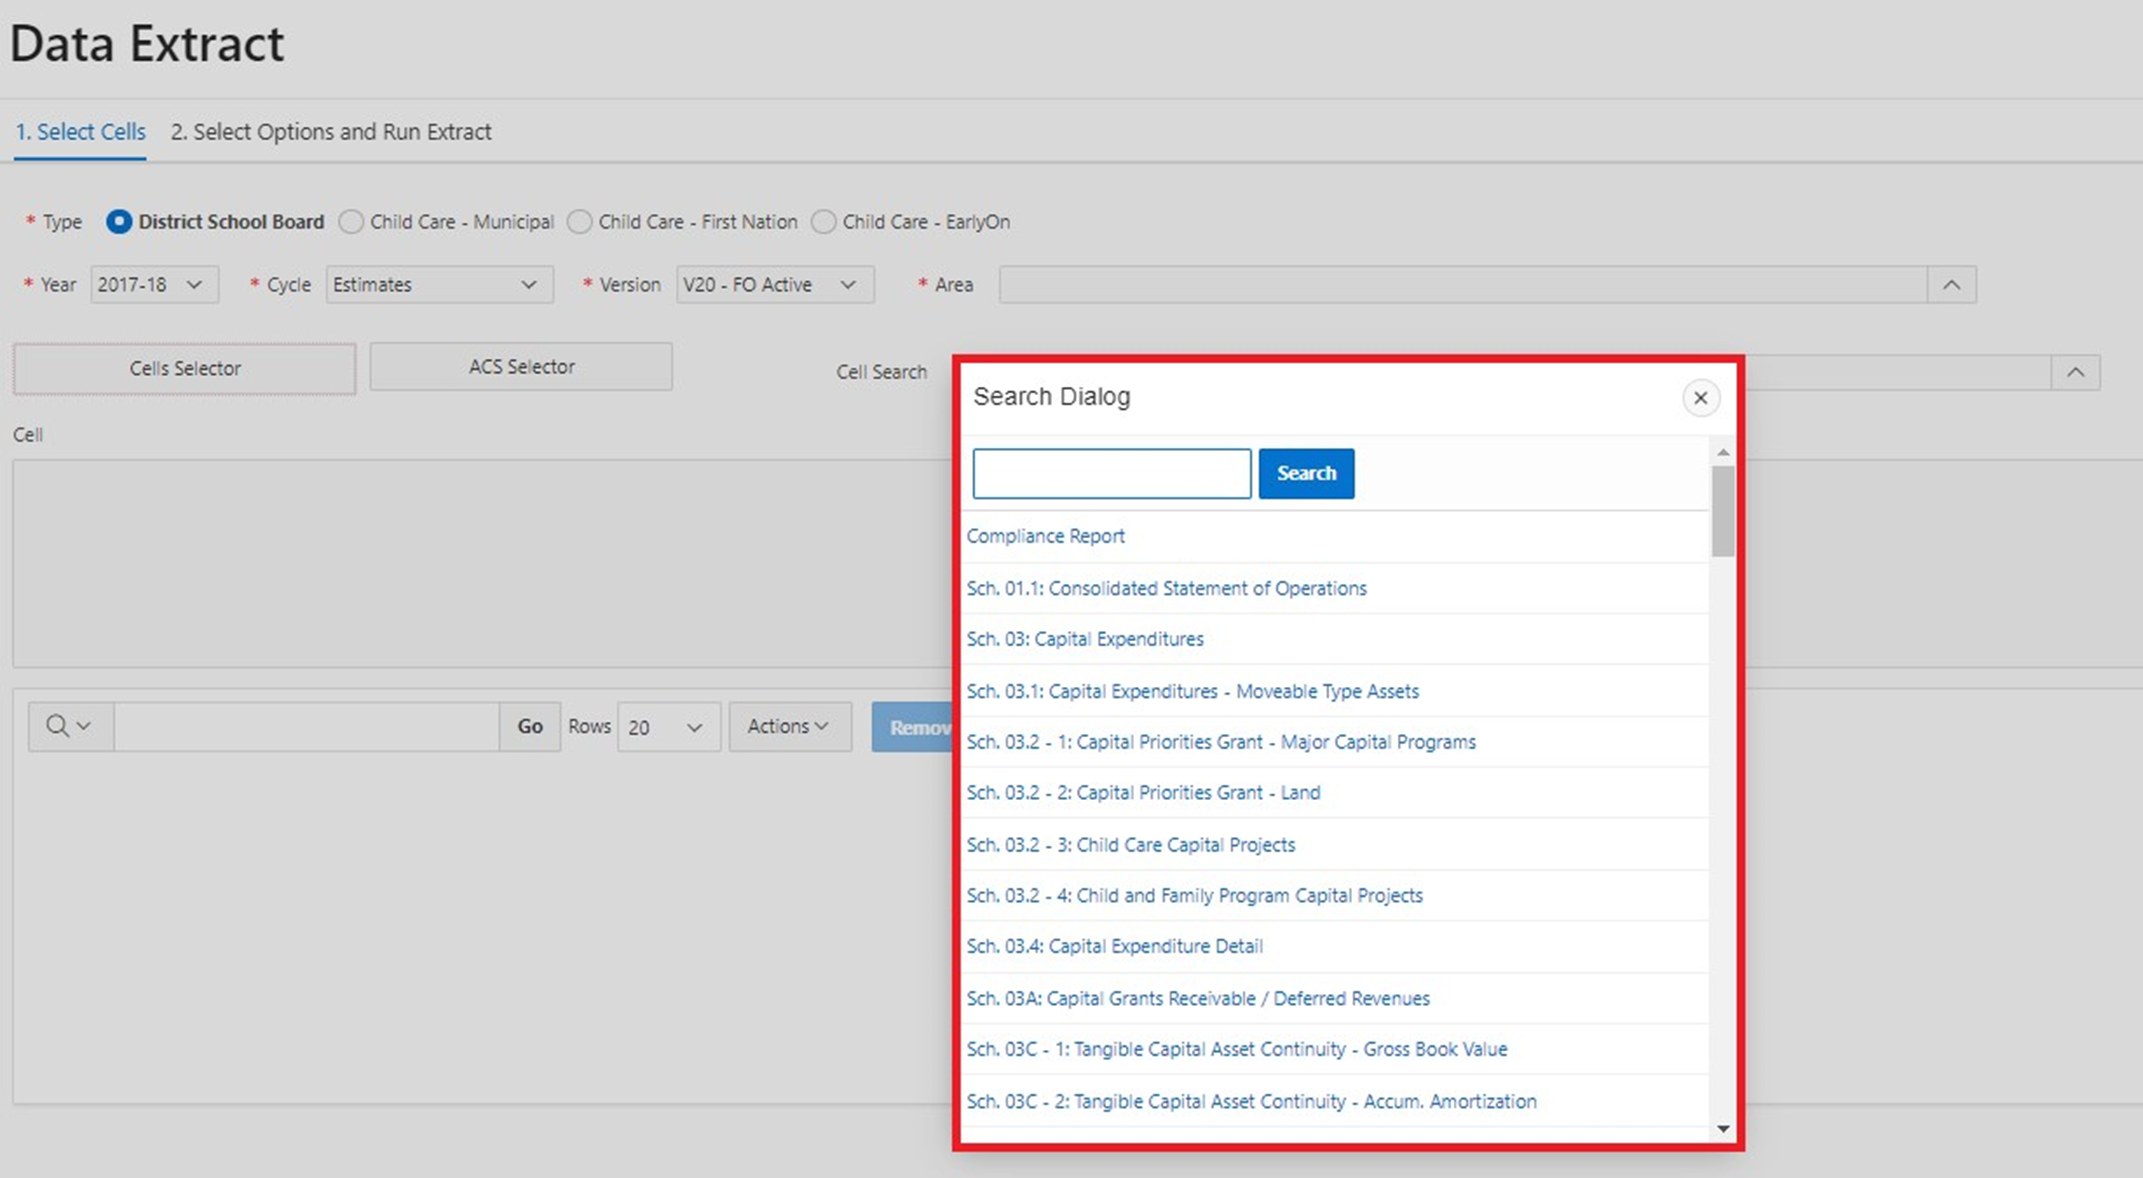
A search box is also available to find specific area(s).
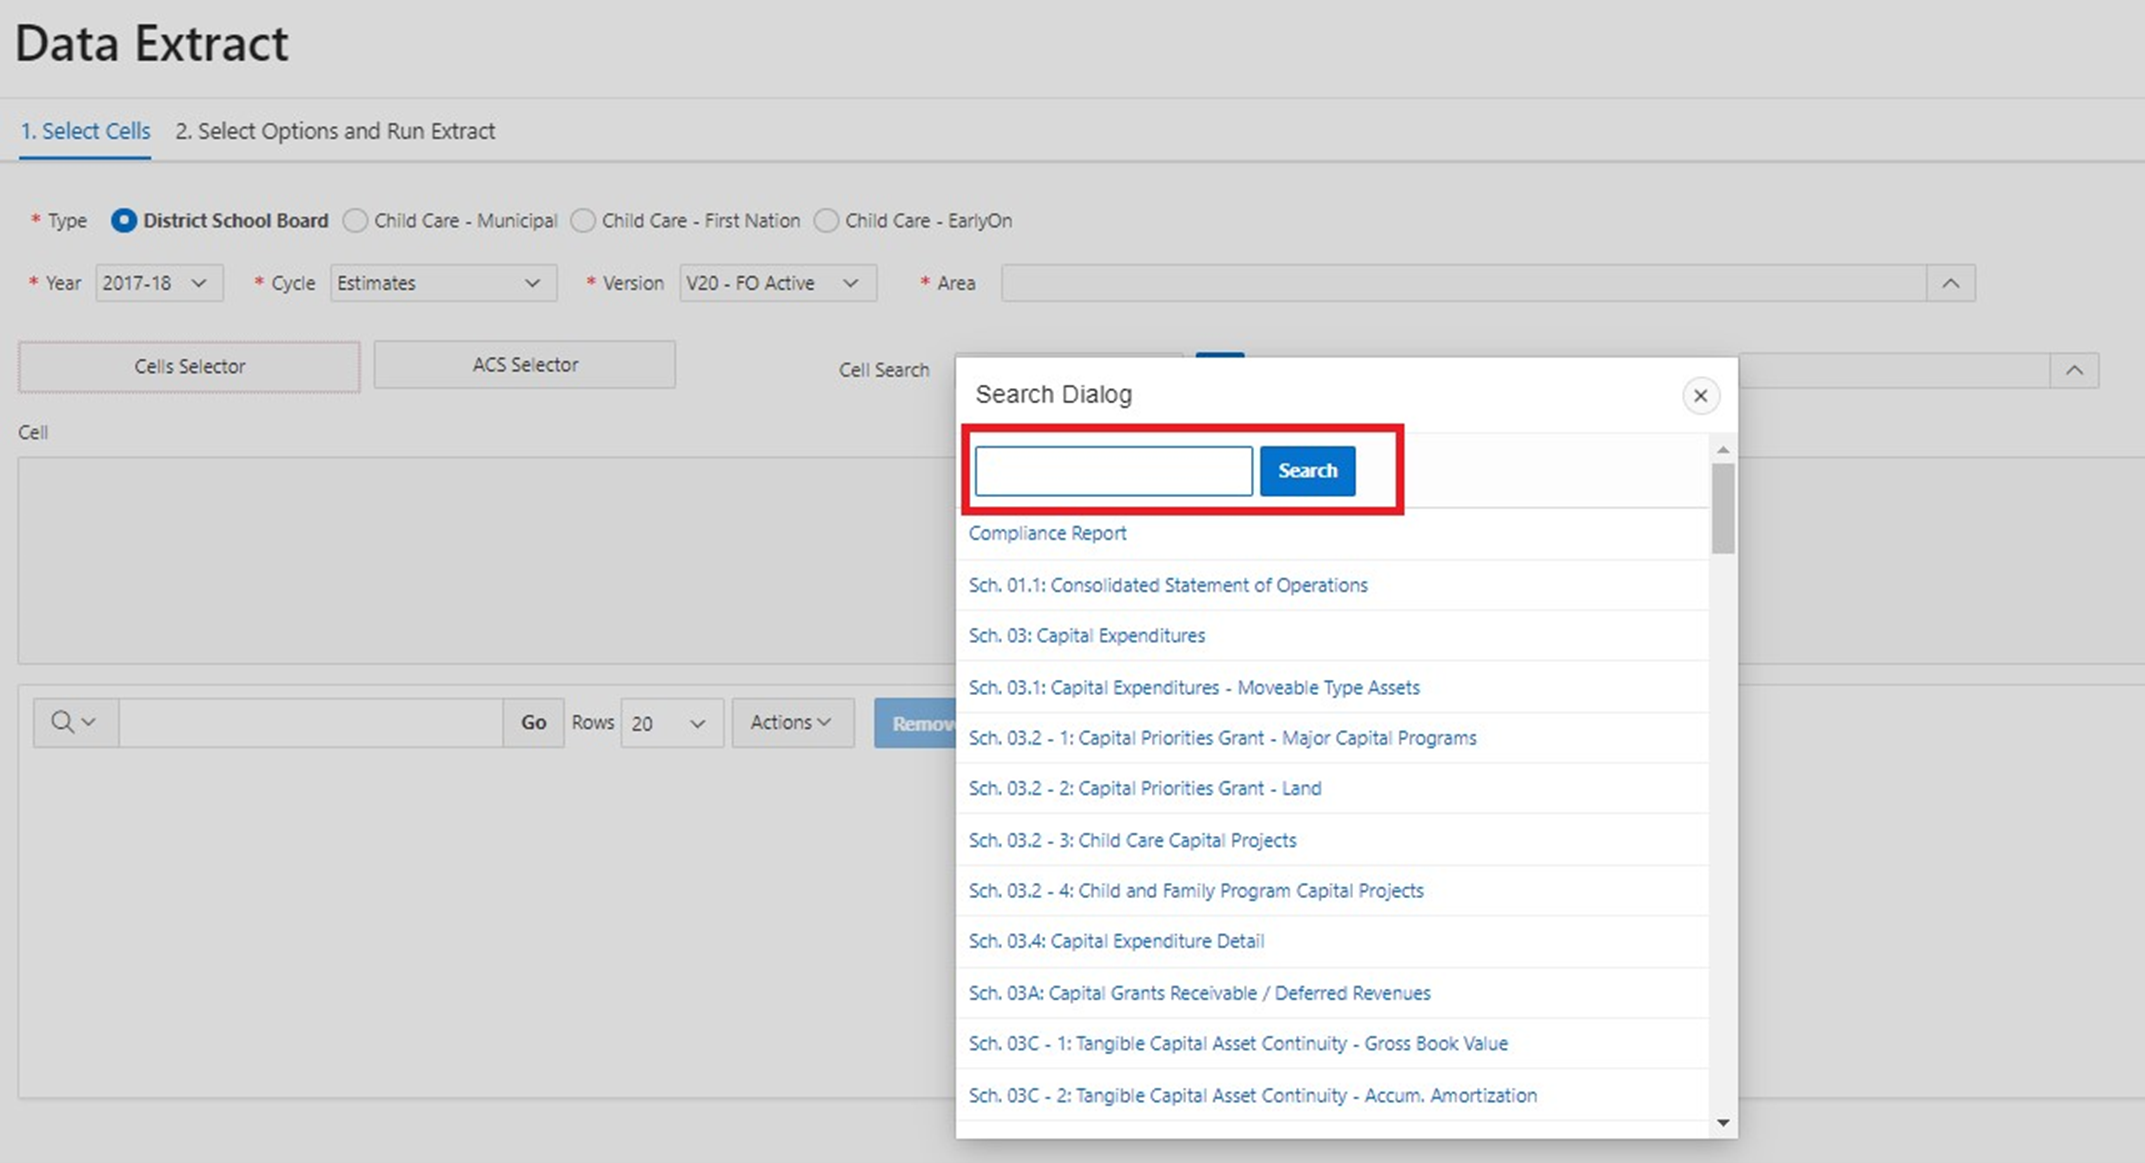
For example, below is a search for “expenditures.” Users will now only see Areas that have “expenditures” in the name.
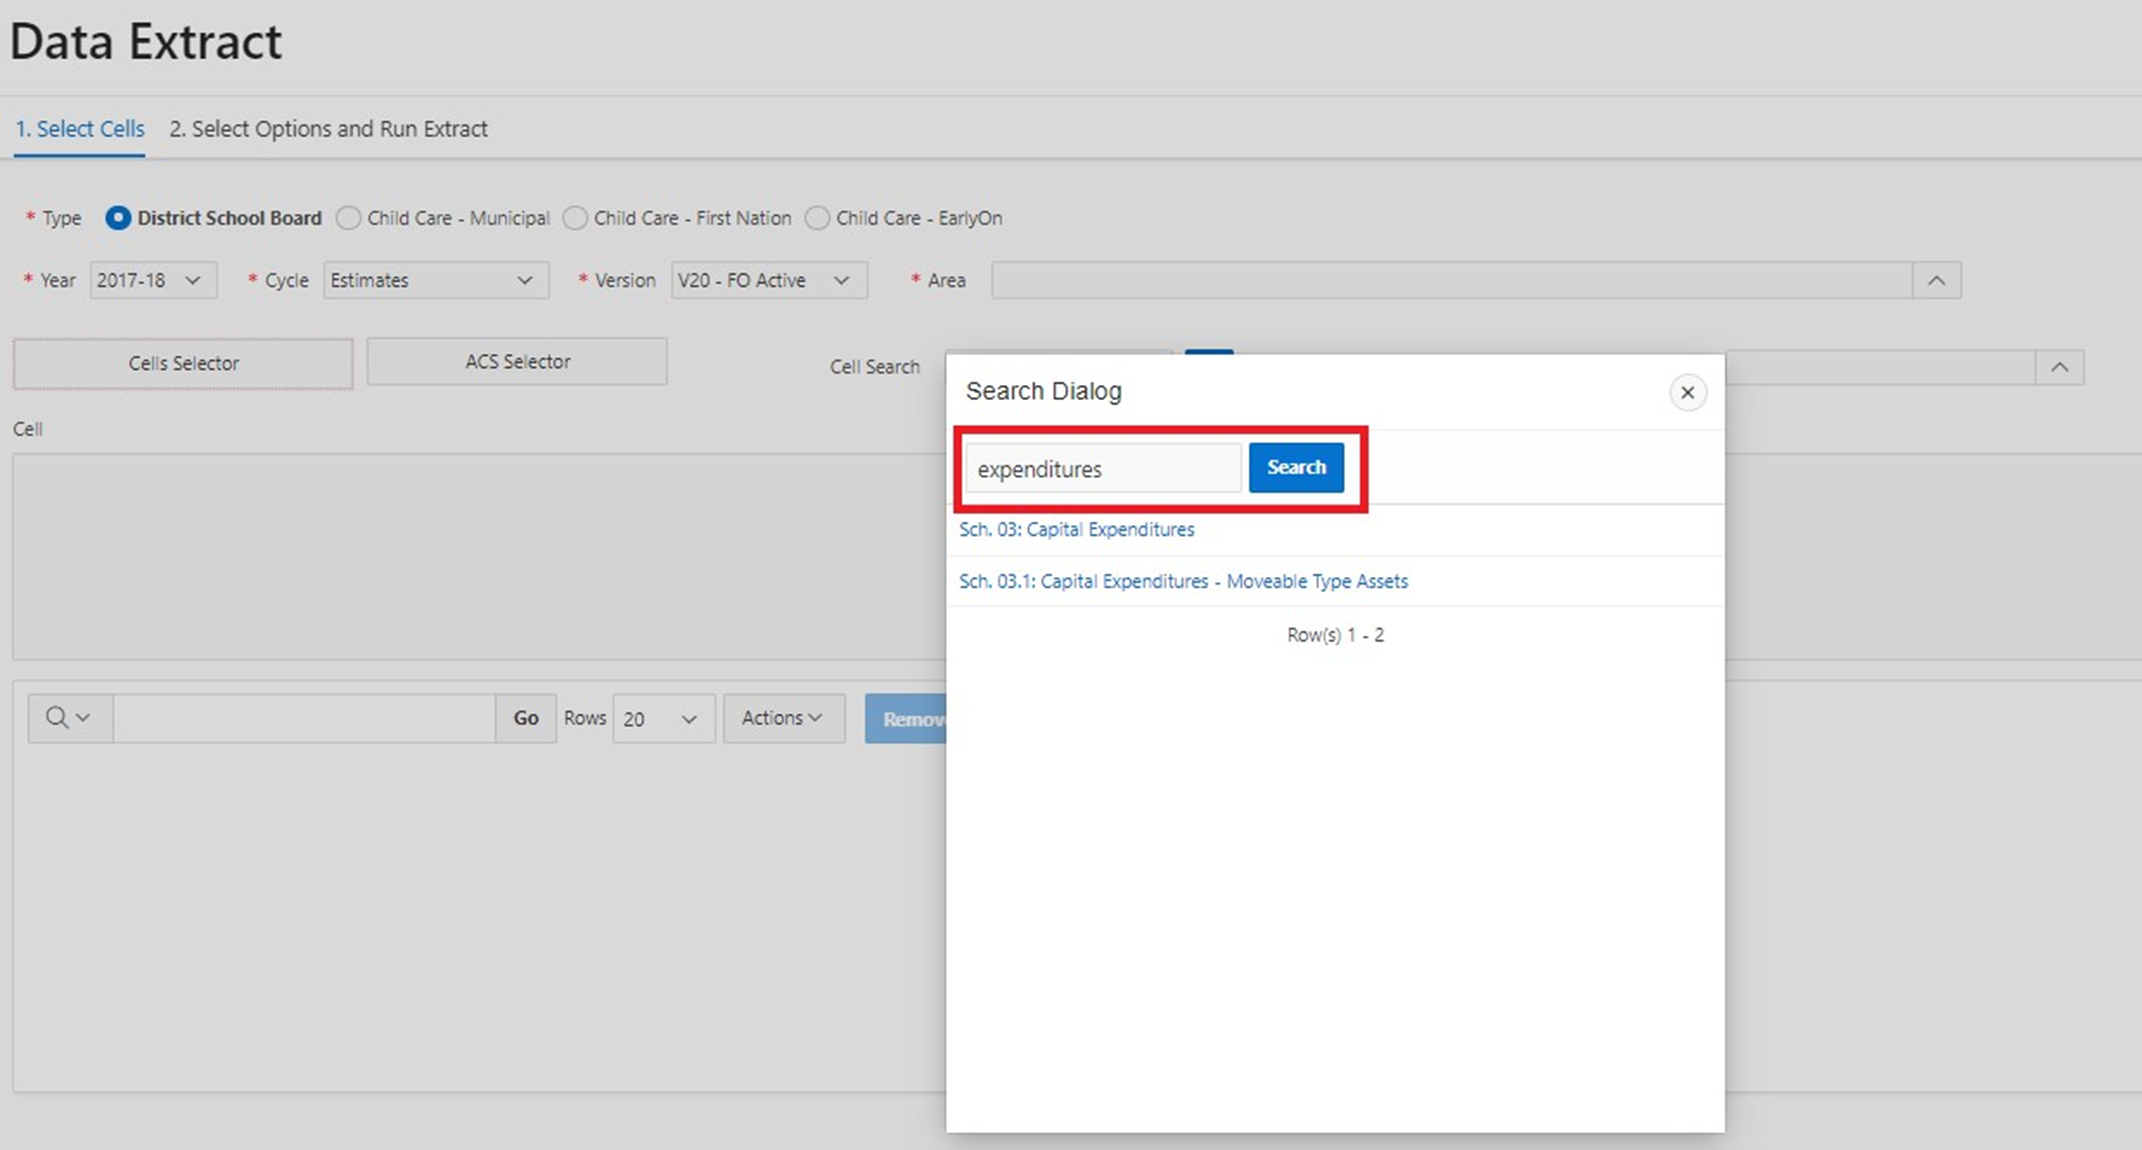
Partial words (i.e. the letters “exp”) are also allowed. All Areas that contain the letters “exp” will be returned. To view the complete list of Areas, clear out the search box and click on Search again. Once an Area is specified, the cell box below will be populated with all available cells. Only the Cells under the selected Area and Doc Set (Year, Cycle, Version) are displayed.
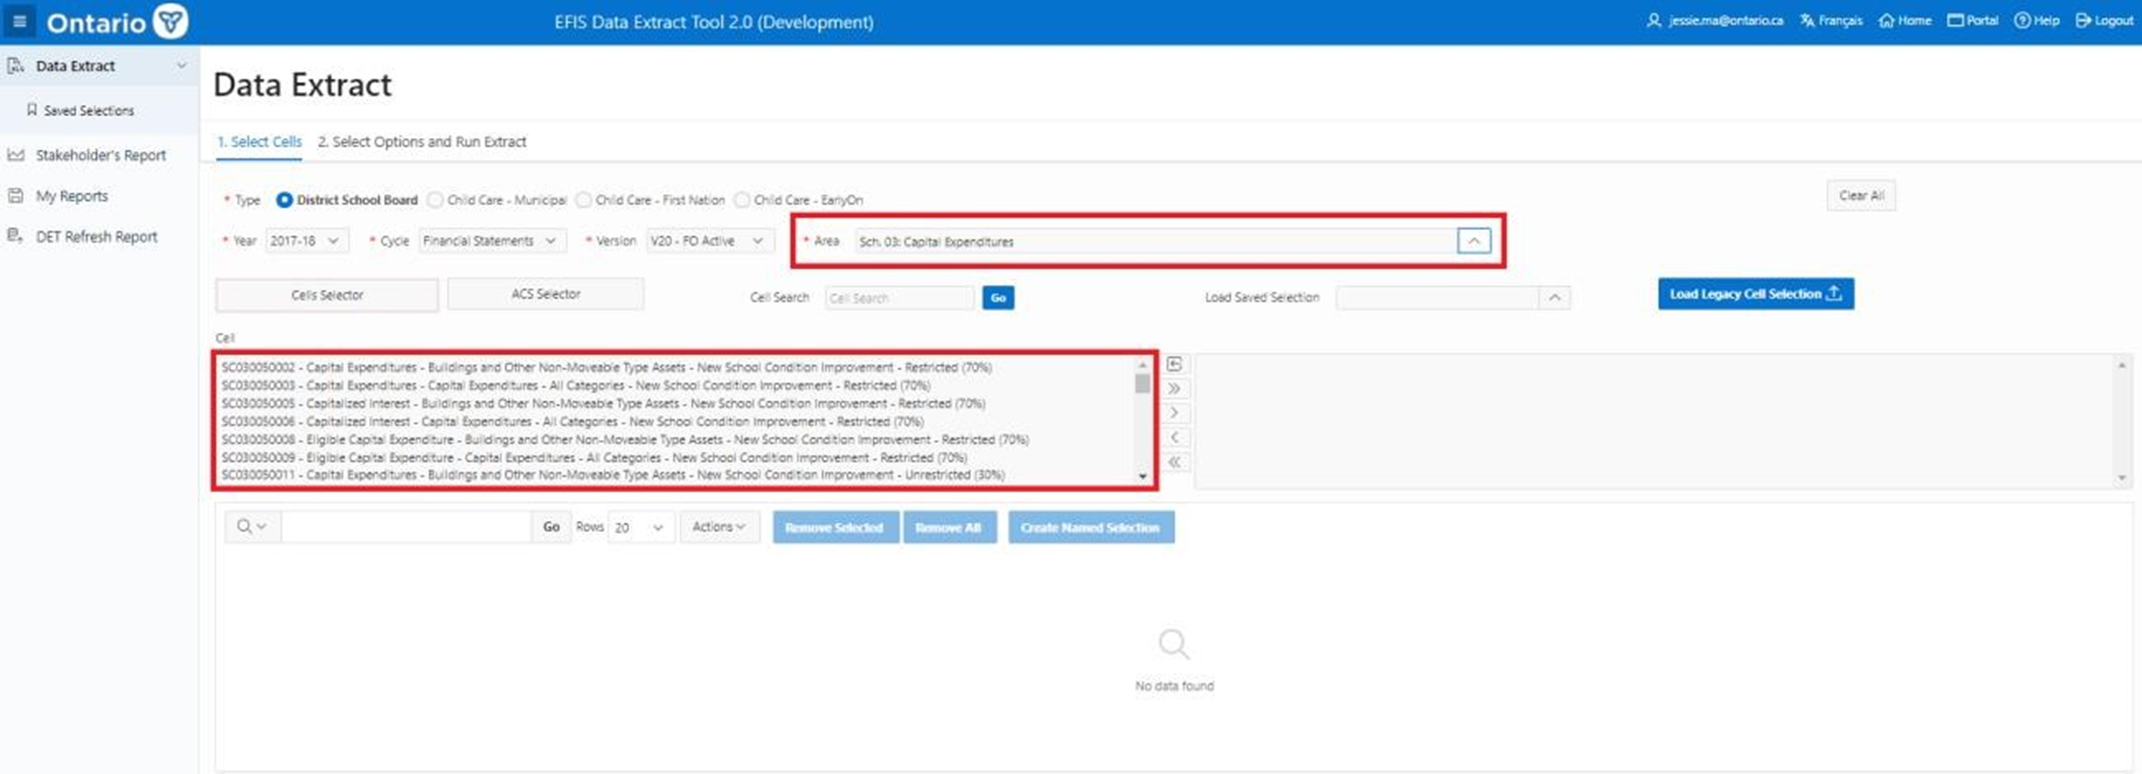
2.2.6 Cell Selection
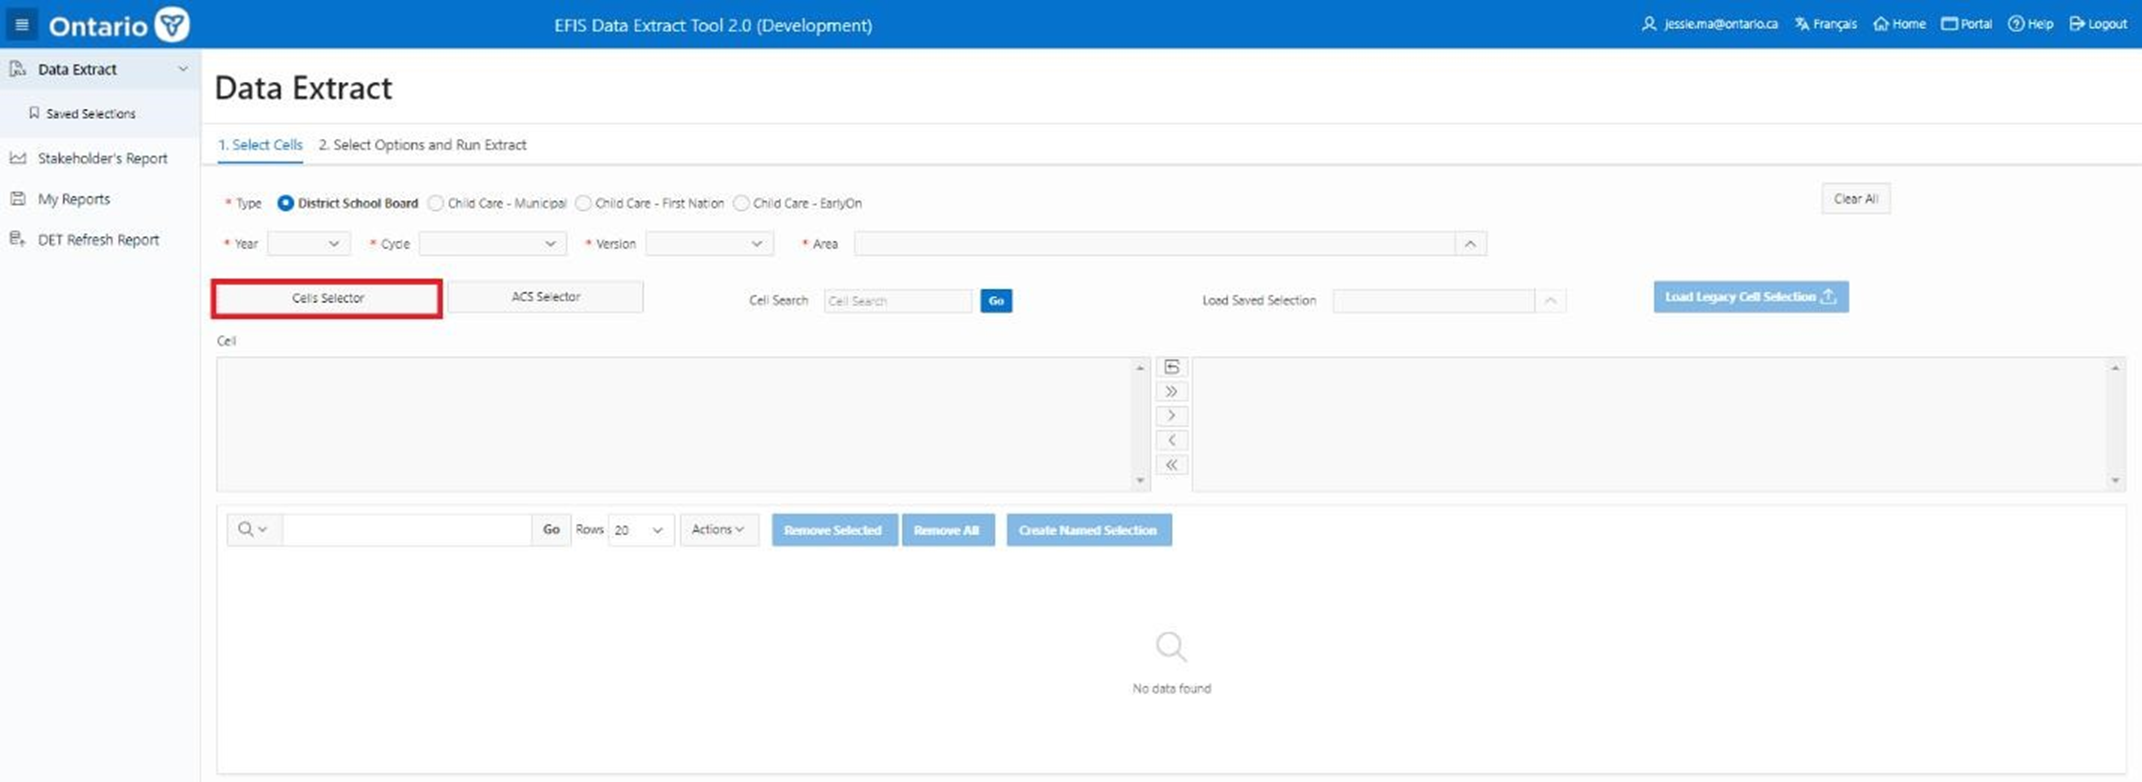
Two options are available for selecting cells:
-
“Cells Selector” Button (default option)
Users can now select one, multiple, or all cells for an Area by using the menu bar in between the two cell boxes.
When selecting cells, users will use the following center menu bar icons. Multiple cells can be selected by clicking and dragging the mouse to highlight.
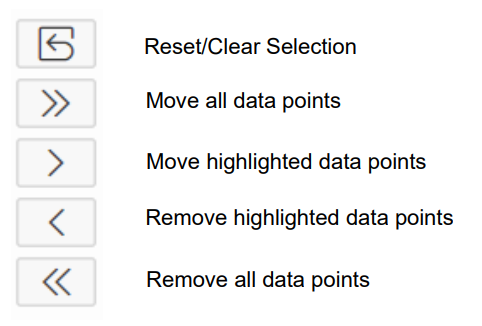
Note
Users may also double click on a cell to add it to their selection.
Selected cells will appear in the right-hand box and in the session selection area, which is the highlighted green area underneath the cell boxes.
-
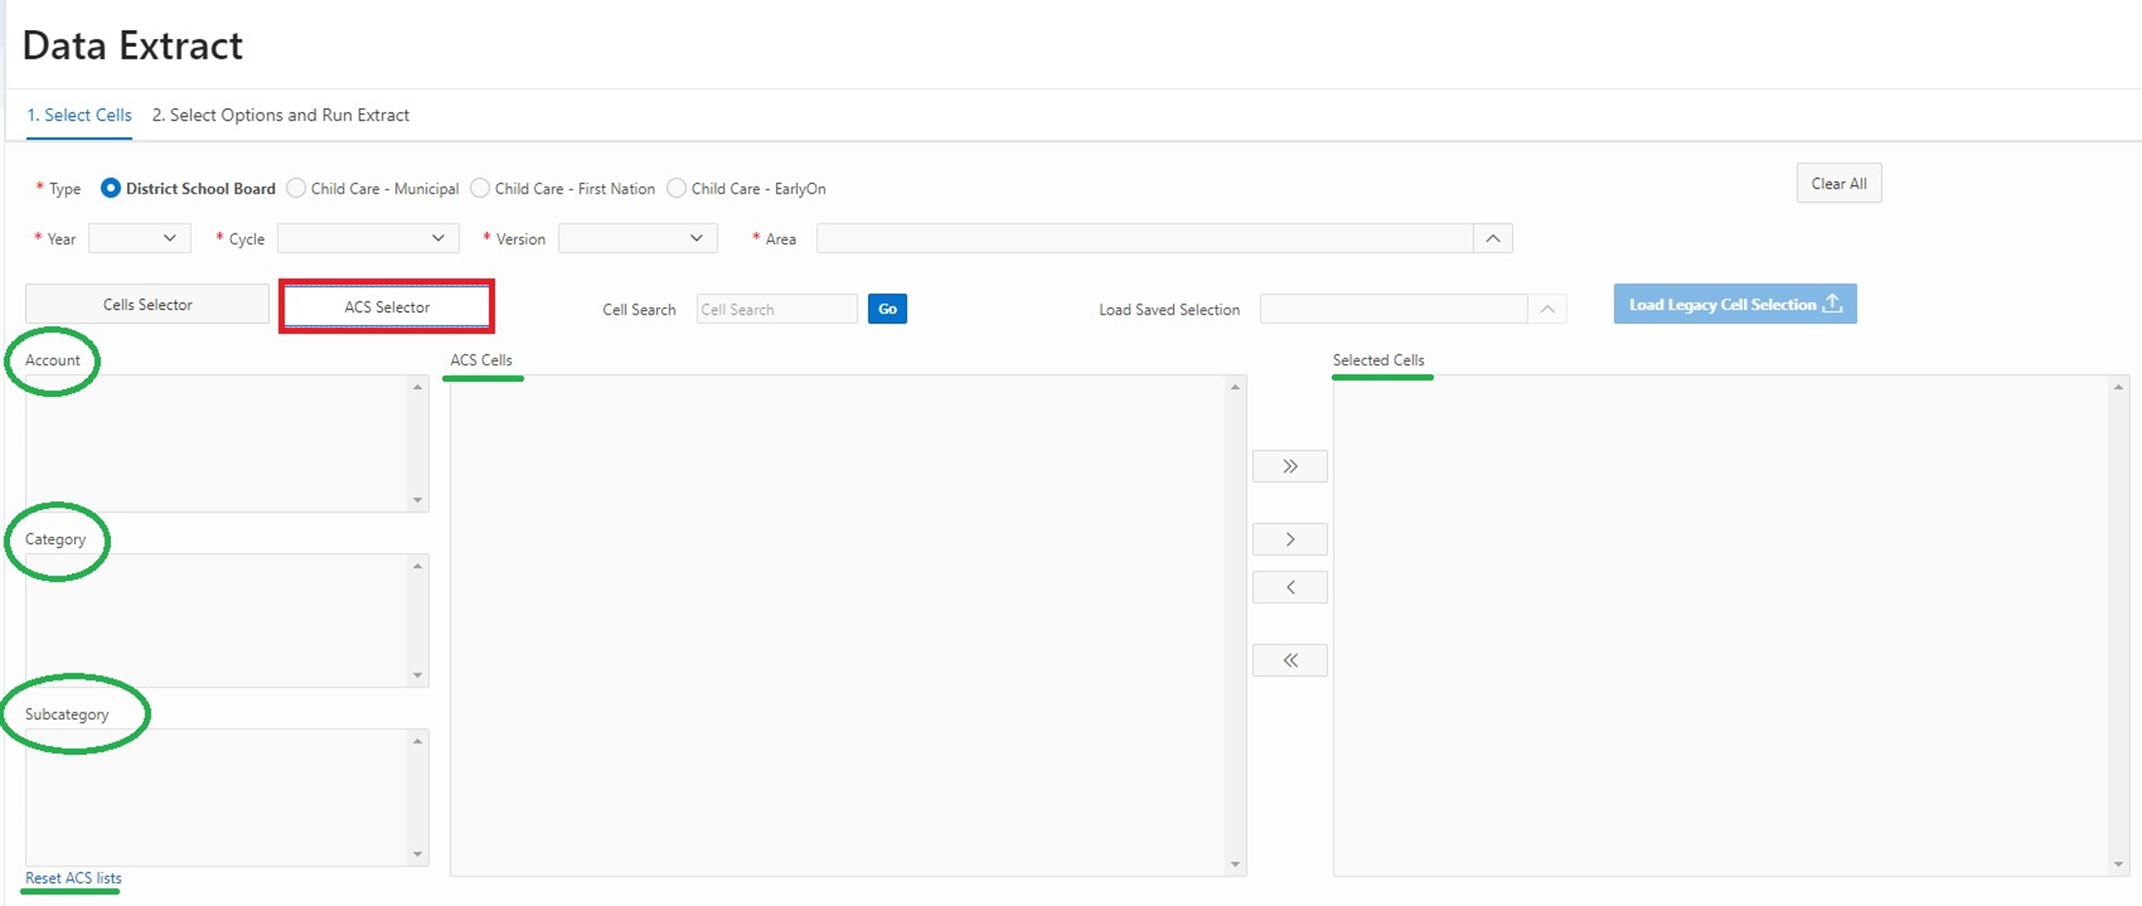
“ACS Selector” Tab
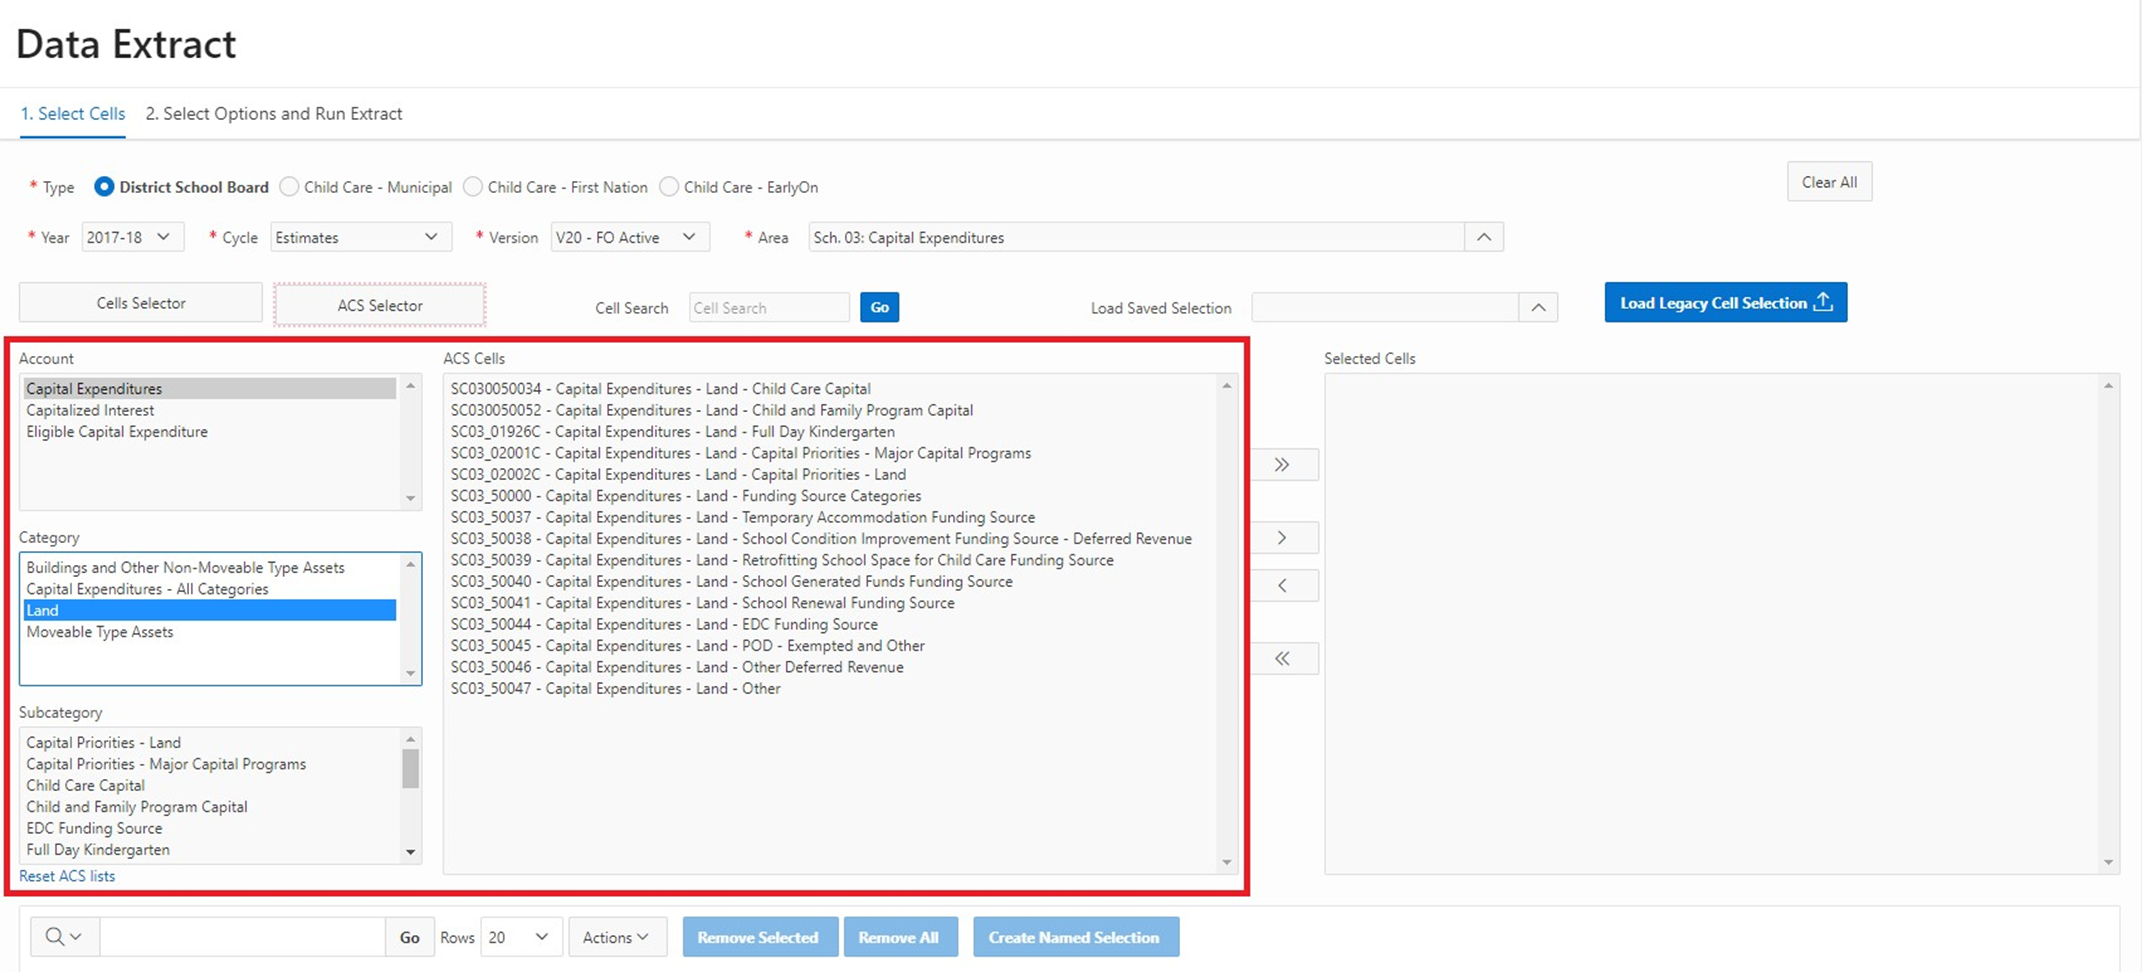
This provides users with the option to select cells via an Account, Category, and Subcategory (ACS) combination. Once the ACS Selector tab is clicked, the page will display the following sections: Account, Category, Subcategory, ACS Cells box, Selected Cells box, as well as a Reset ACS lists button.
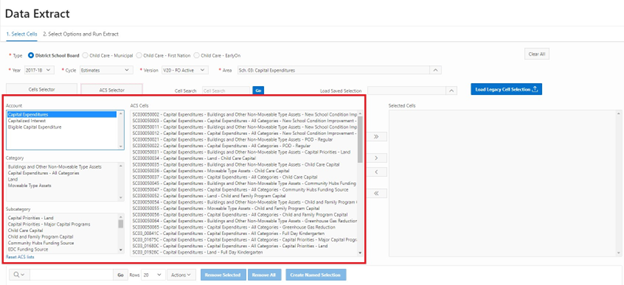
Users can narrow down cells using the Account, Category, or Subcategory boxes. In the example below, “Capital Expenditures” was the selected Account. The ACS Cells box in the center displays all cells within the “Capital Expenditures” Account.
To further narrow down results, the user may select a Category (e.g. “Land”) as per the example below.
User can filter down further by using the Subcategory. In the example below, “Child Care Capital” was used to arrive at the ACS Cell. The ACS Cells box in the middle will automatically display the specified cell(s).
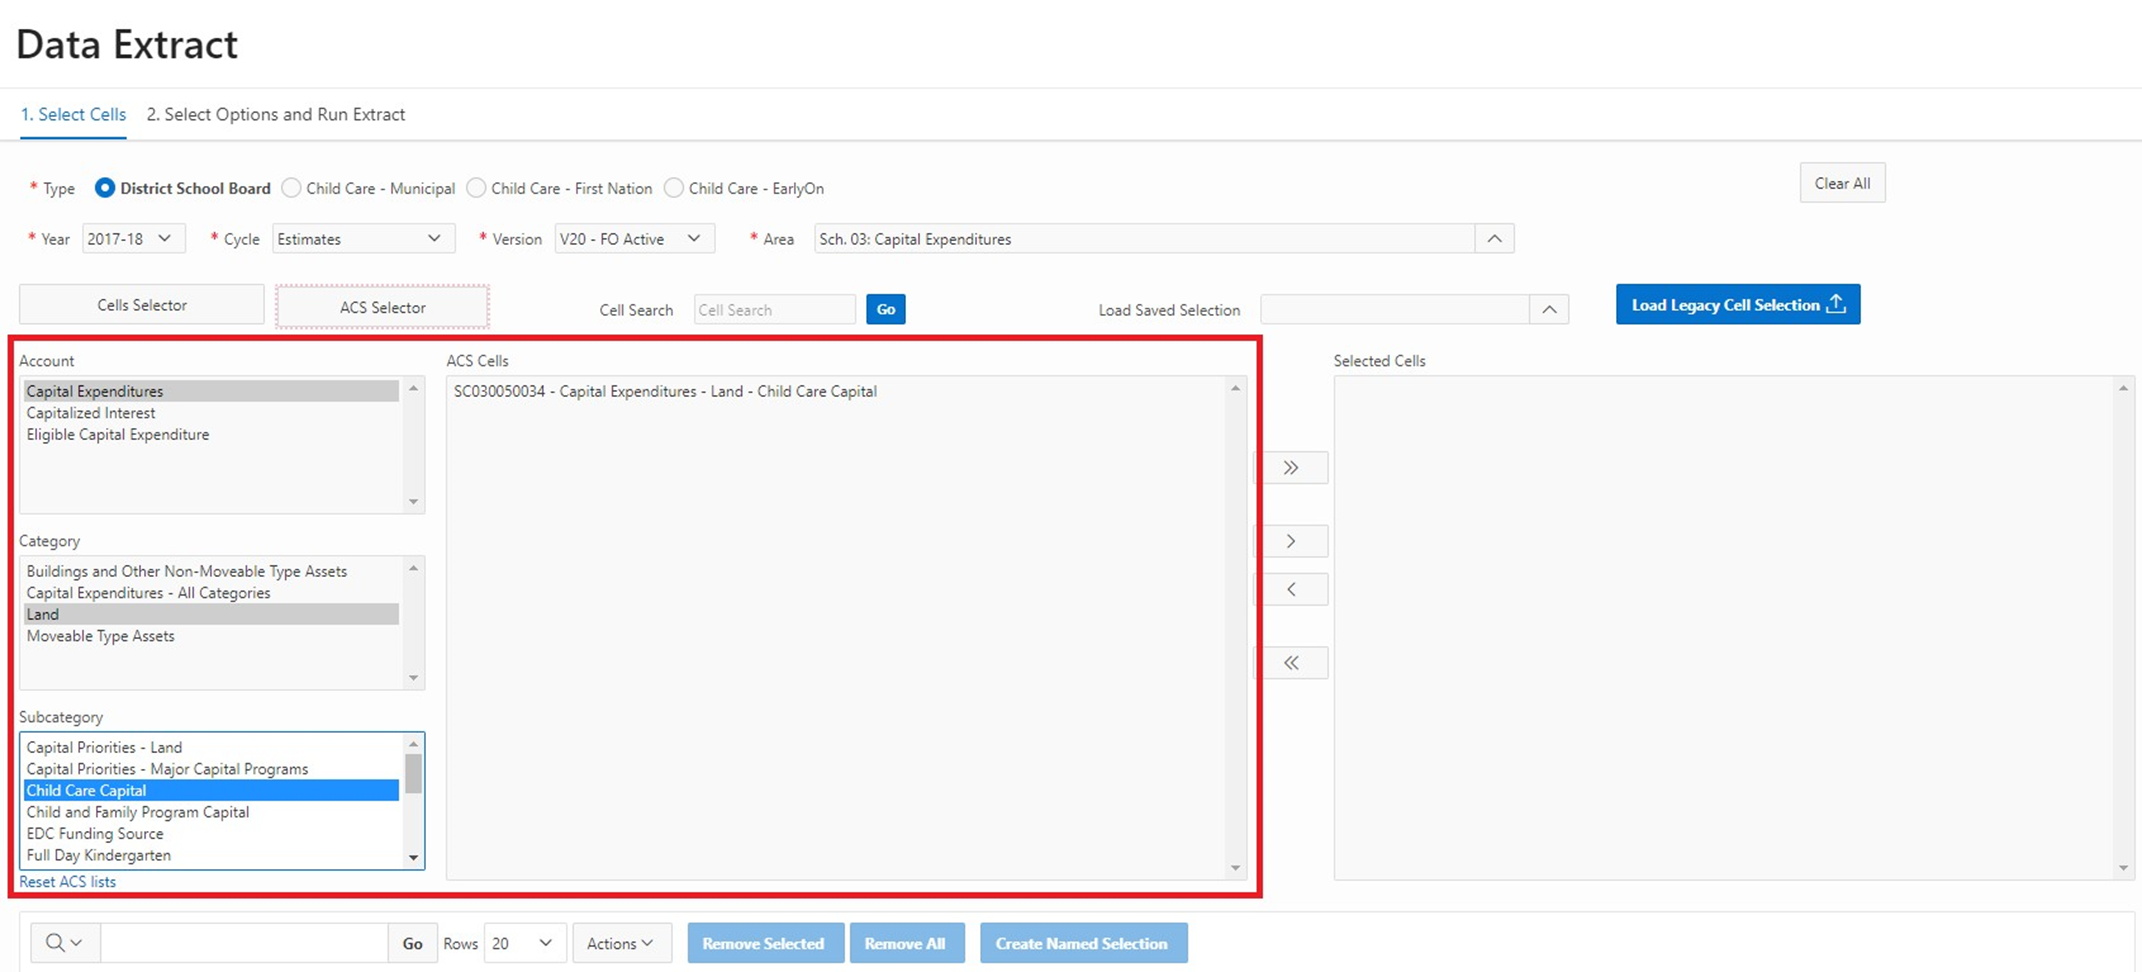
In this case, only one cell appears. This cell can now be selected.
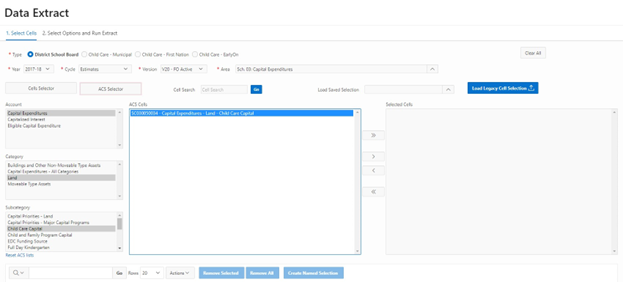
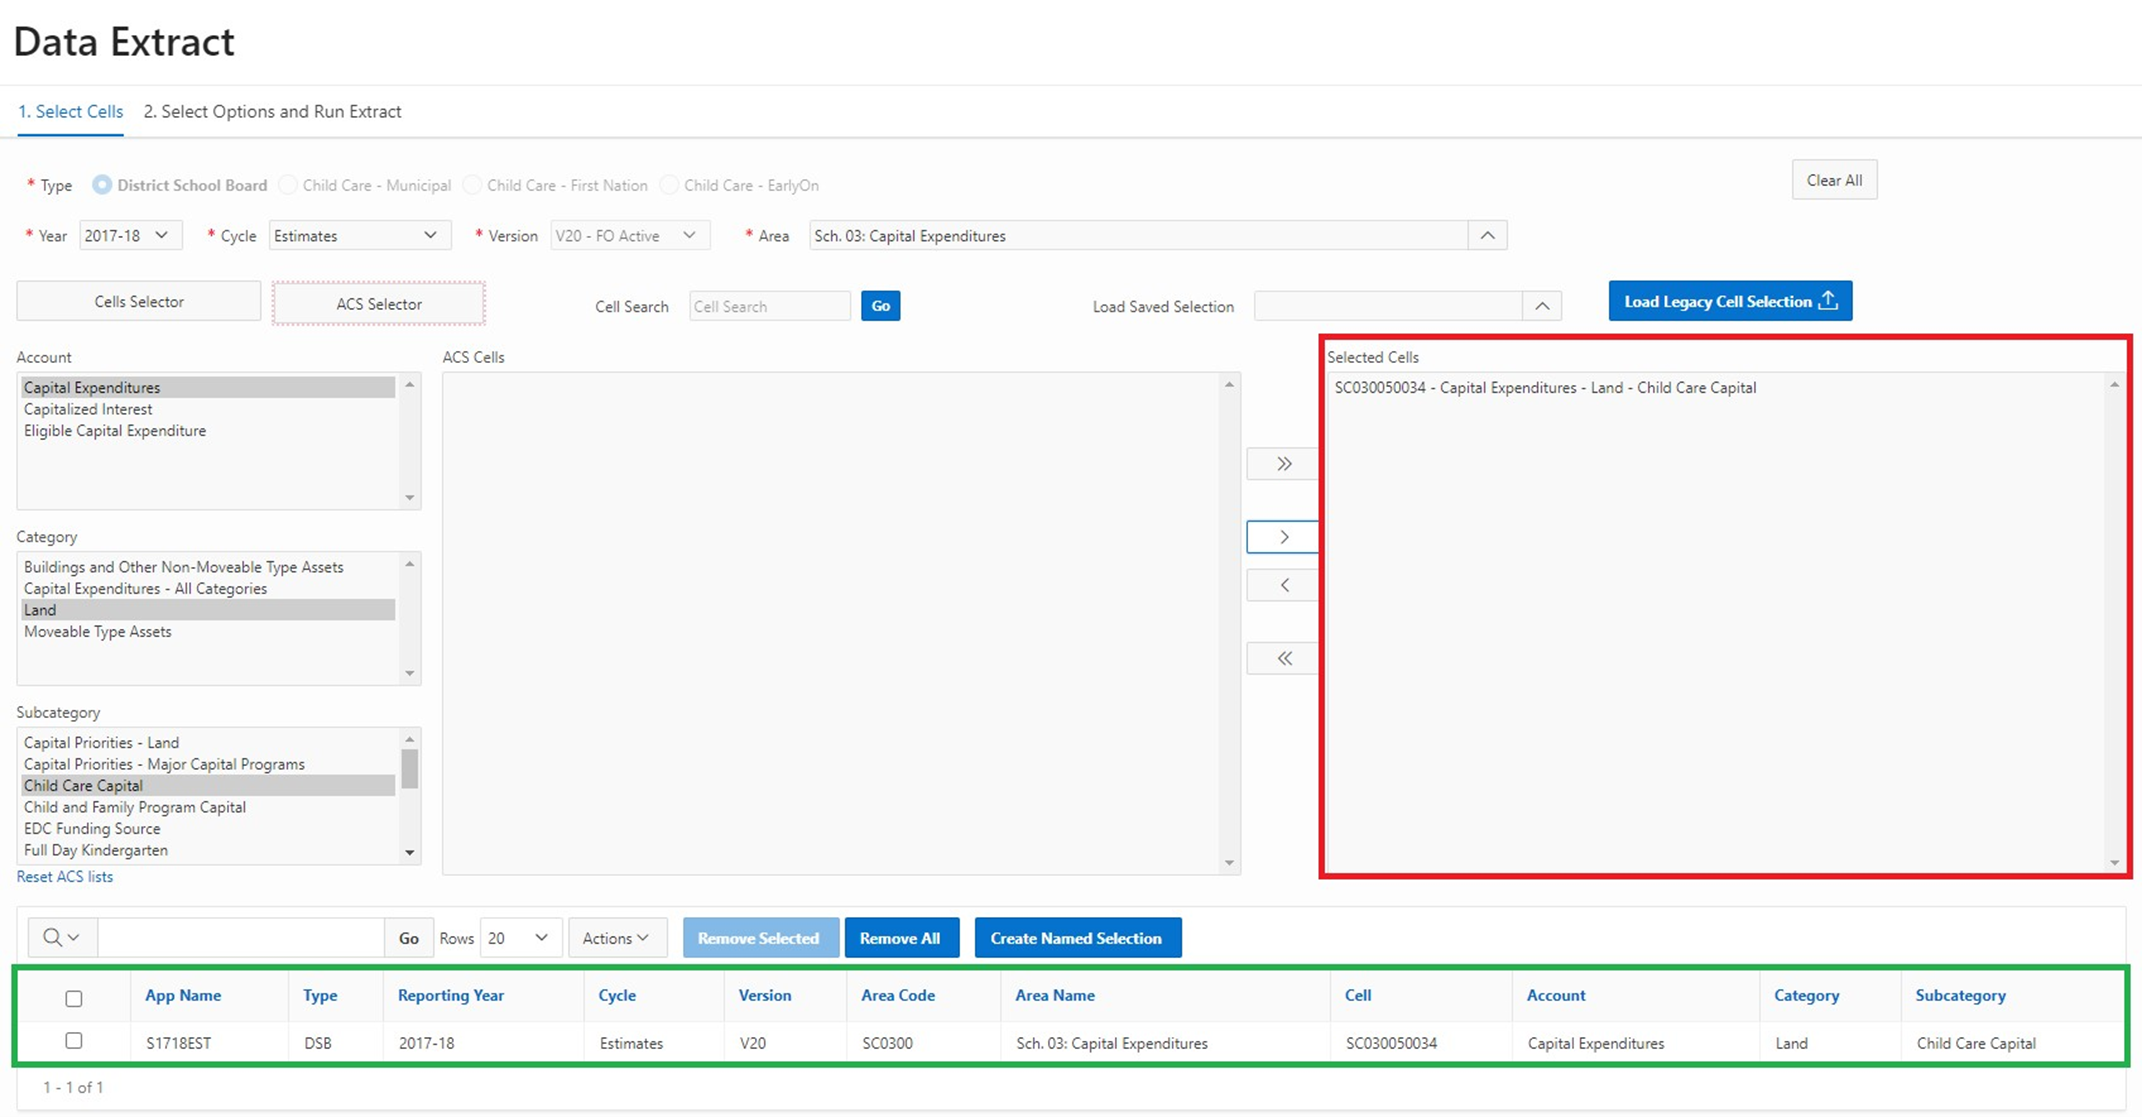
Users can use the menu bar to move cells to the right-hand Selected Cells box. The cell will also appear in the session selection area (highlighted green), below the selection boxes.
Users can continue to build up their selected cells list via the ACS Selector button or may toggle back to the Cells Selector tab if they wish and continue to add cells. The Reset ACS Lists button can be used to clear out the Account, Category and Subcategory boxes.
Adding Cells:
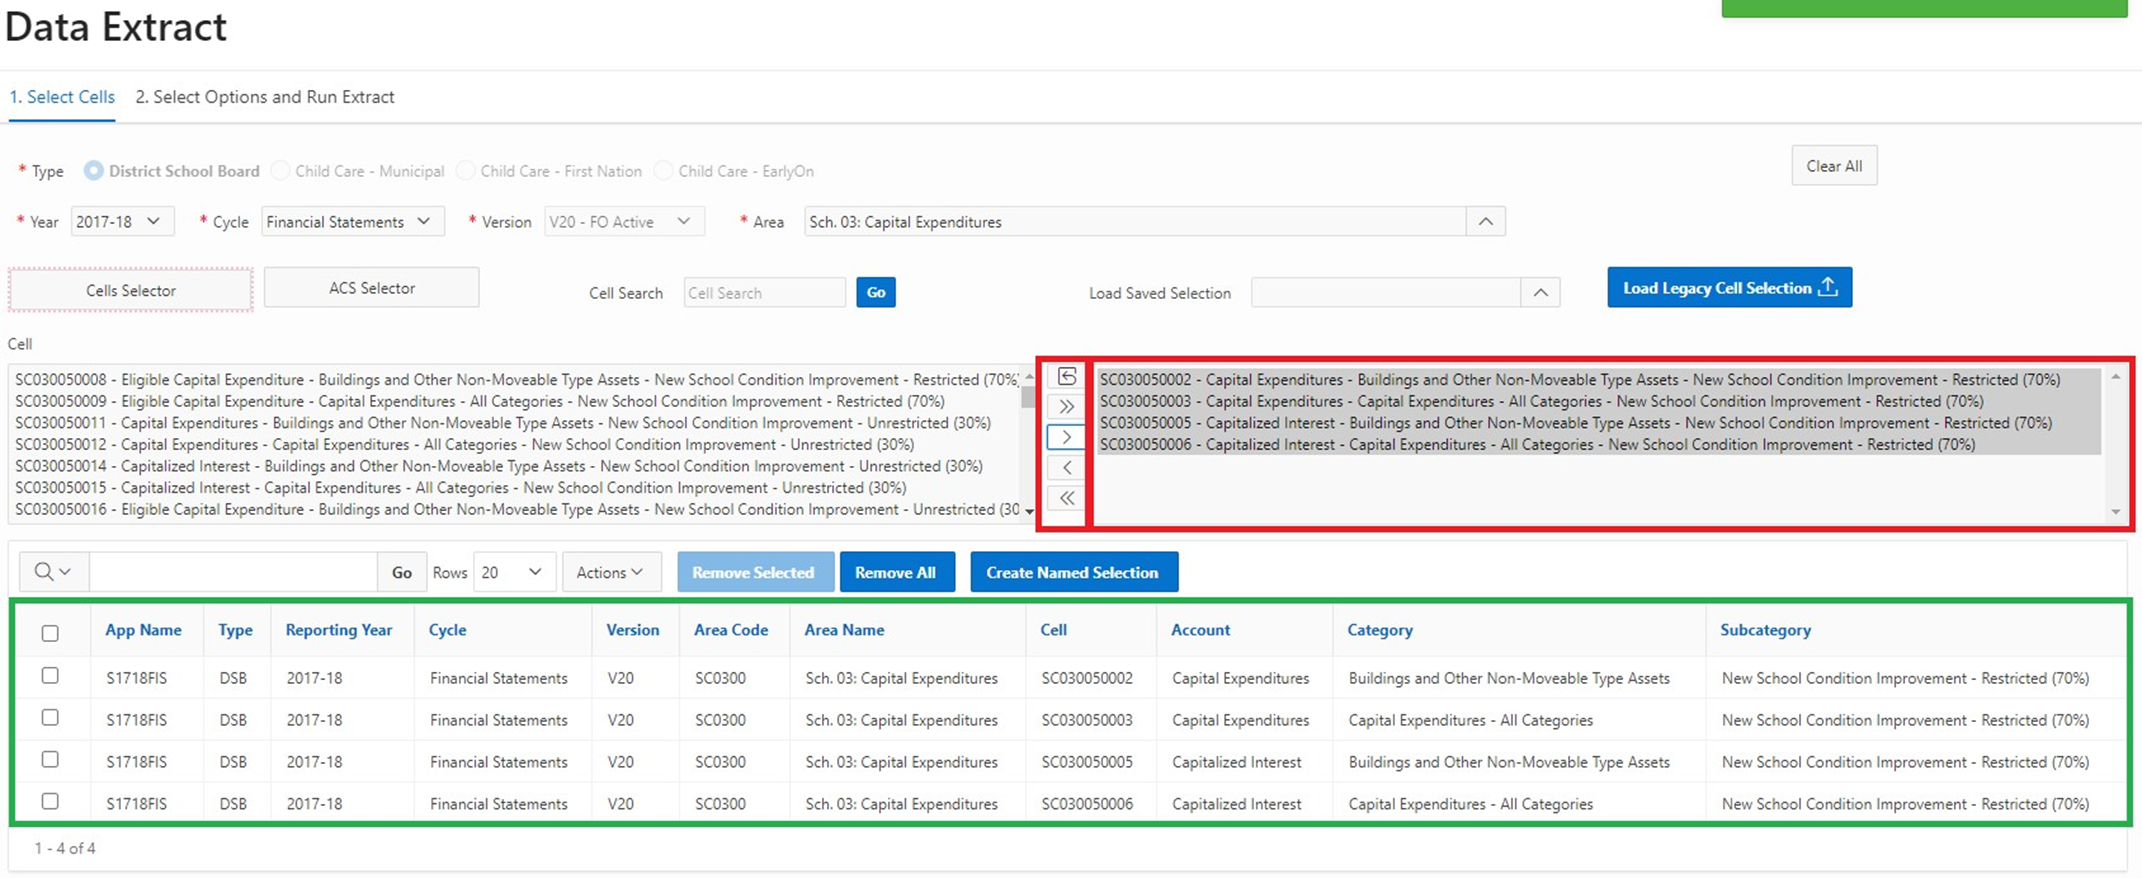
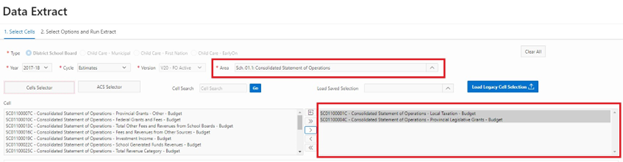
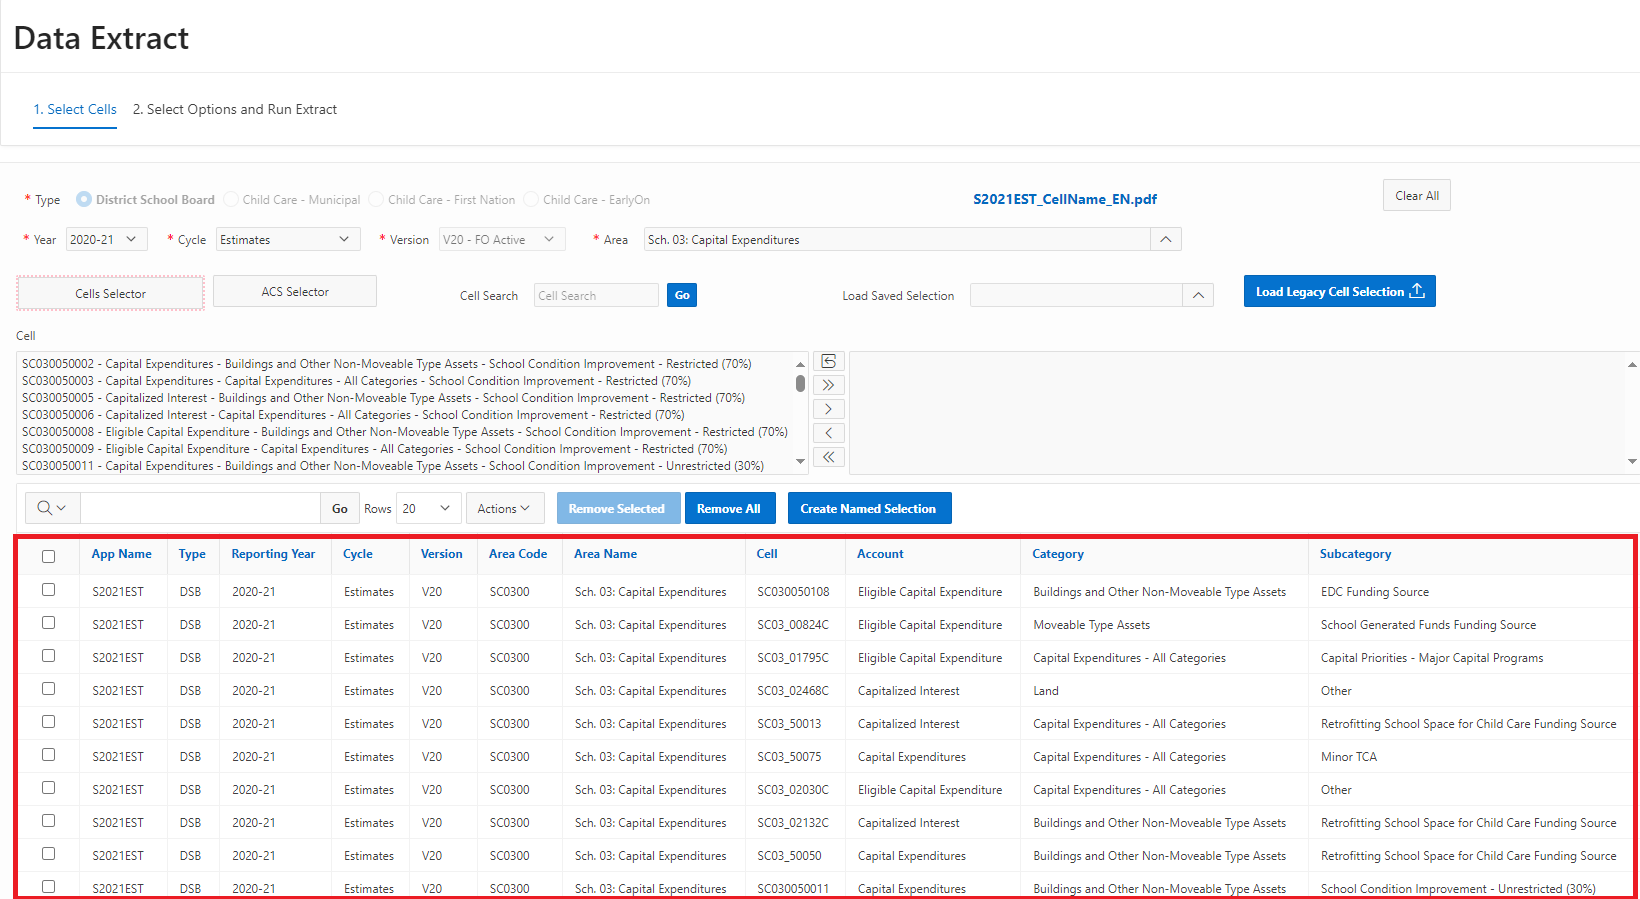
Users can continue to add cells for the same doc set (Year, Cycle, Version combination). The area can be changed as needed to create a multi-area selection. In the screenshots below, the Area selected is “Sch. 01.1: Consolidated Statement of Operations.” Selected cells appear in the right-hand box and are also added to the session selection area underneath.
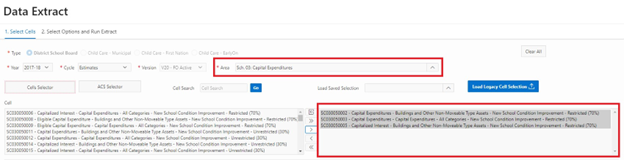
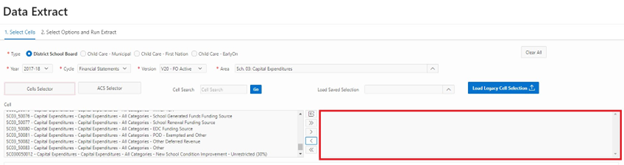
In the next image, the Area has been changed to “Sch. 03 Capital Expenditures.” Three more cells have been selected. These newly added cells will appear in the right-hand box, replacing the cells selected from the prior Area (Sch. .01: Consolidated Statements). This box only contains cells selected from the current Area.
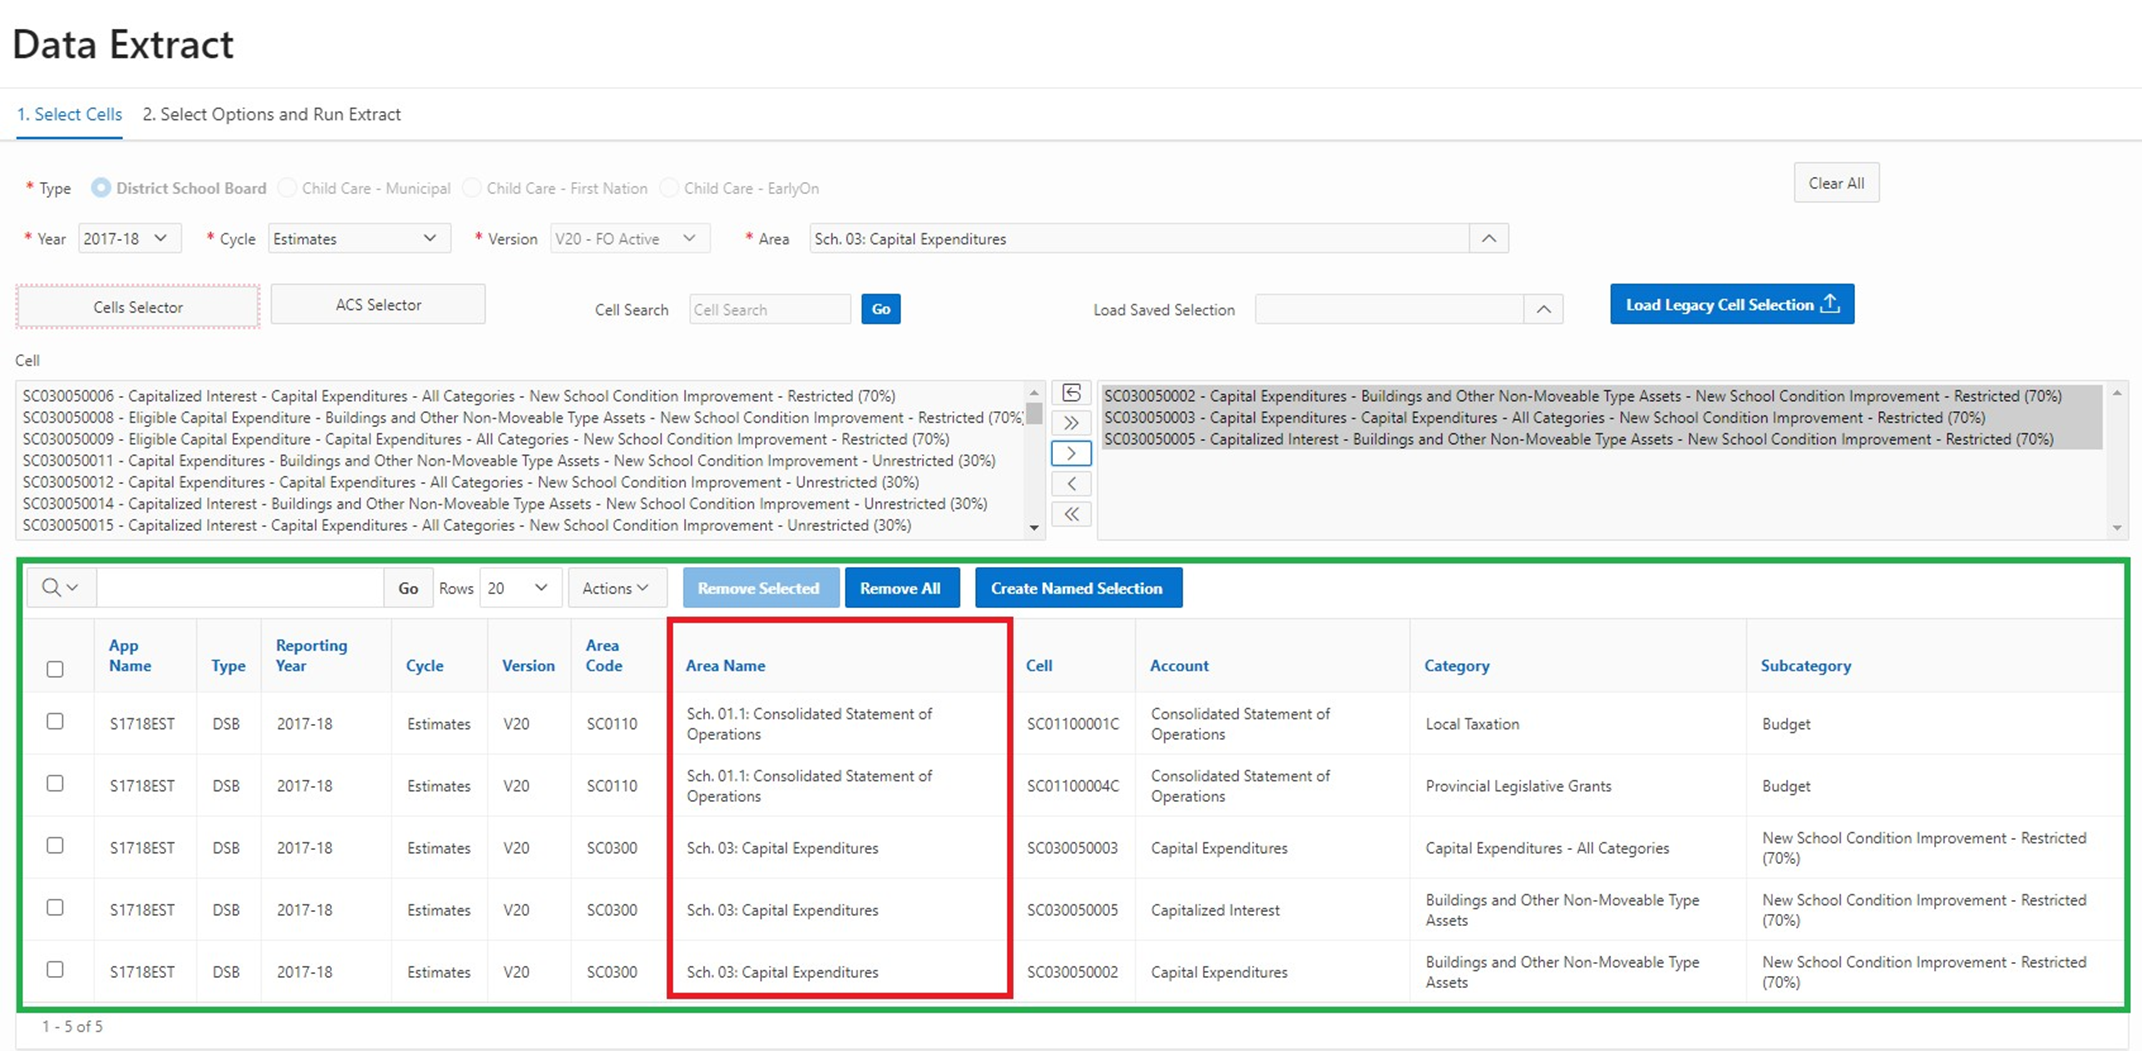
All cells that have been selected thus far (from two Areas) will accumulate in the session selection area underneath the boxes on the bottom of the page, as marked by the green box. Users can continue to add cells for different Years, Cycles, or Areas. Users can add or remove cells (see below) until they have all the data points they require for the extract.
After selecting the first Doc Set, users cannot change the Type and Version as they are locked. However, users can create a multi-doc set selection by picking a different Year, Cycle, and Area to add more cells.
Removing Cells:
Three options are available for removing cells from the selection box and the session selection area.
-
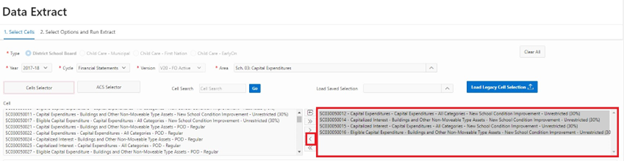
If the user has selected cells and would like to remove them, this can be done via the center menu icons. In the example below, all cells were highlighted and the arrow button was used to remove them.
All cells have been removed as illustrated below.
-
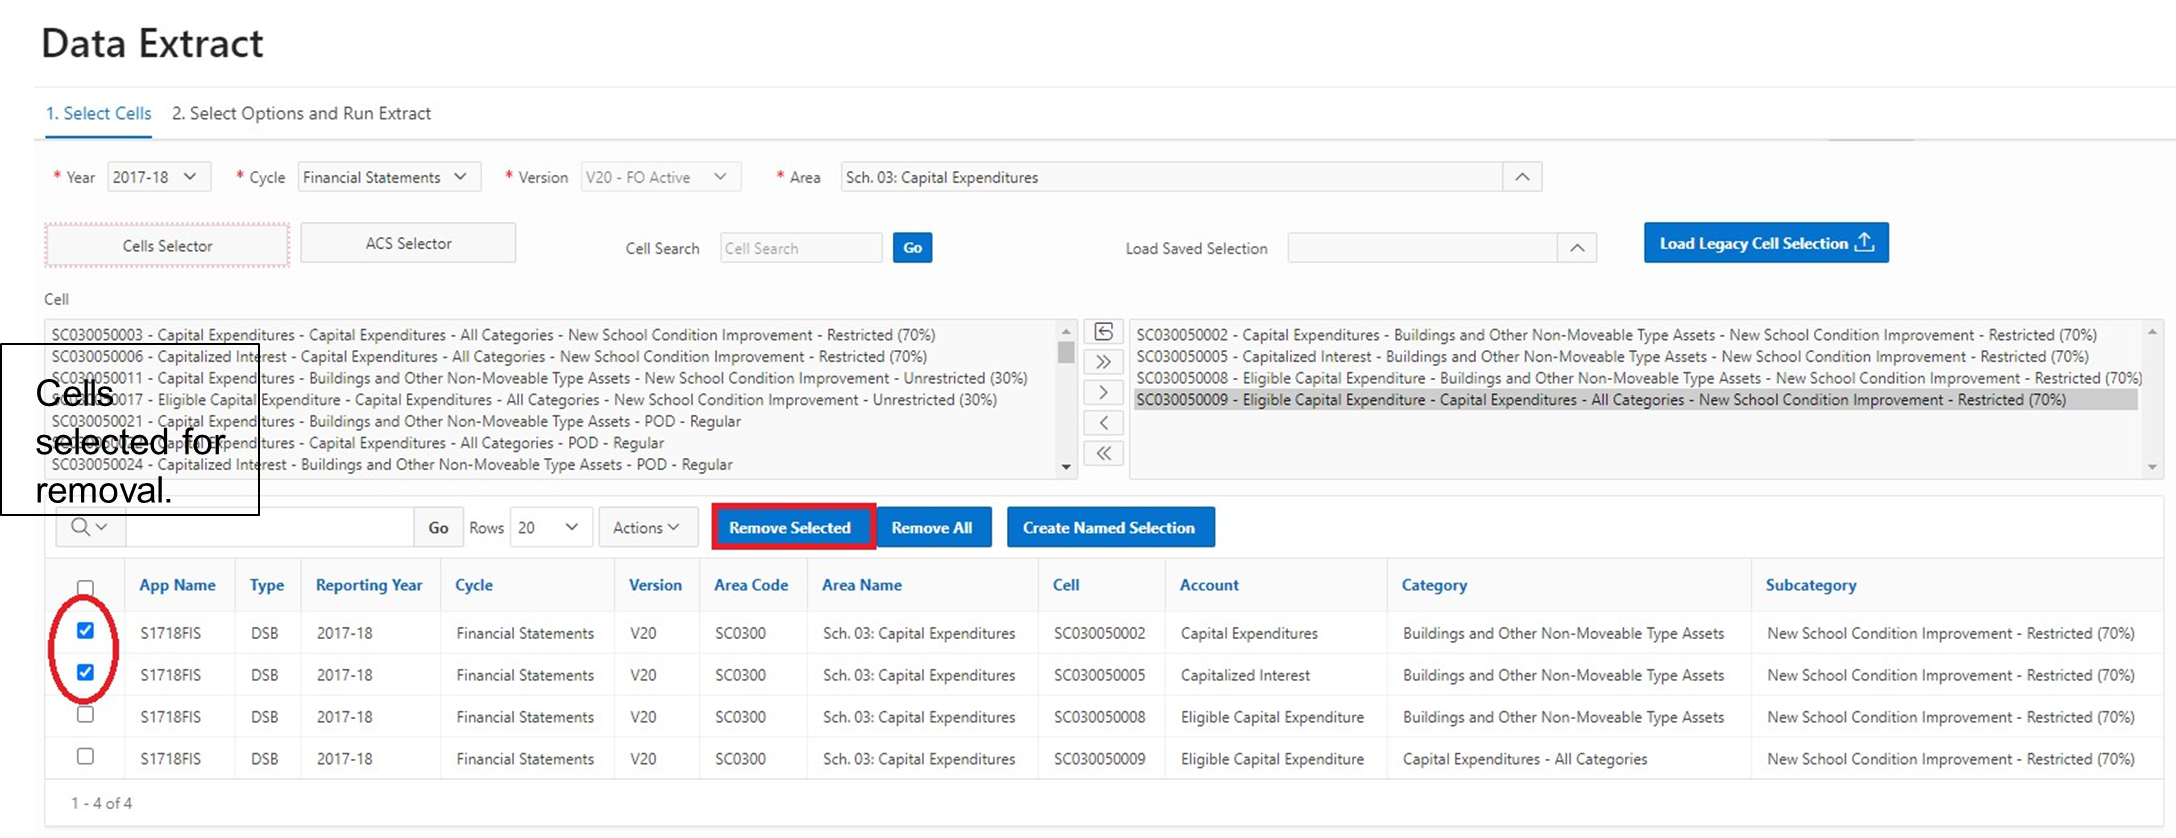
Users can remove individual cells by clicking on the boxes at the left hand of the screen in the session selection area. Clicking on the Remove Selected button will remove the specified cells. Users can add or remove cells until they have all the data points they require for the extract.
-
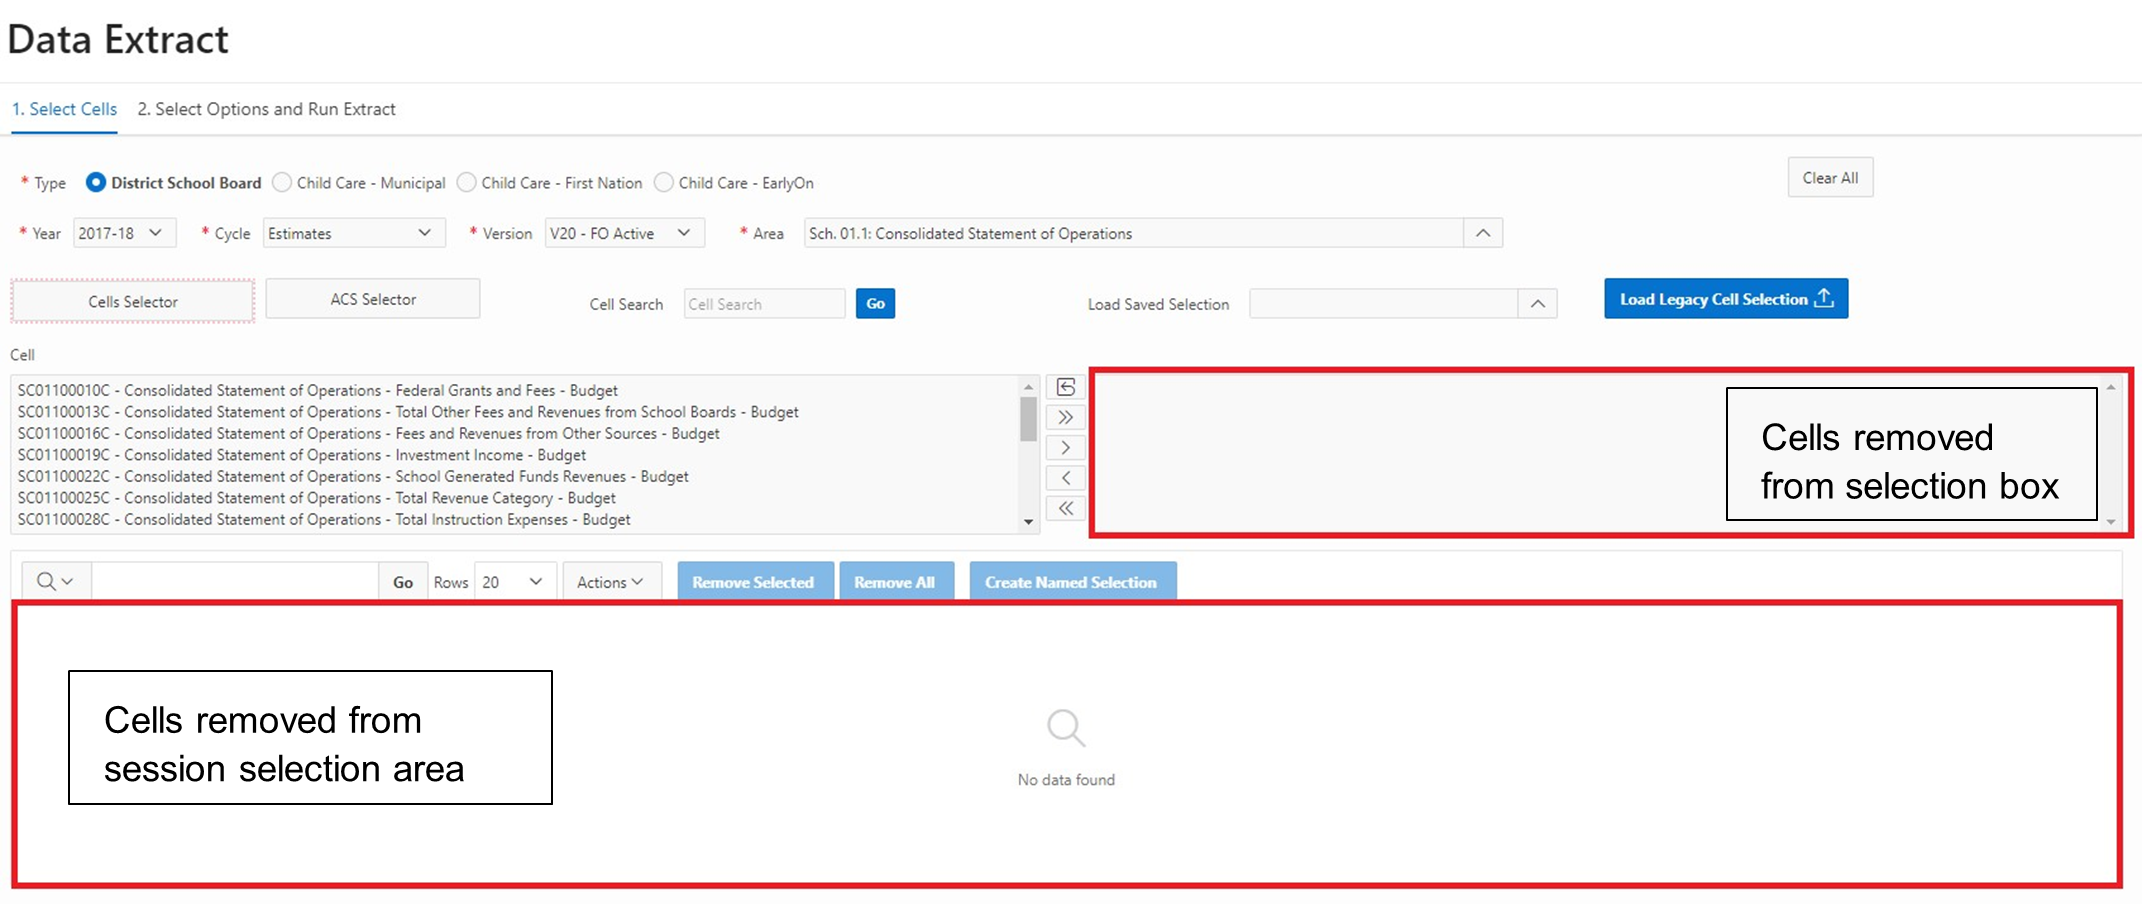
All cells can be removed by clicking on the Remove All button.
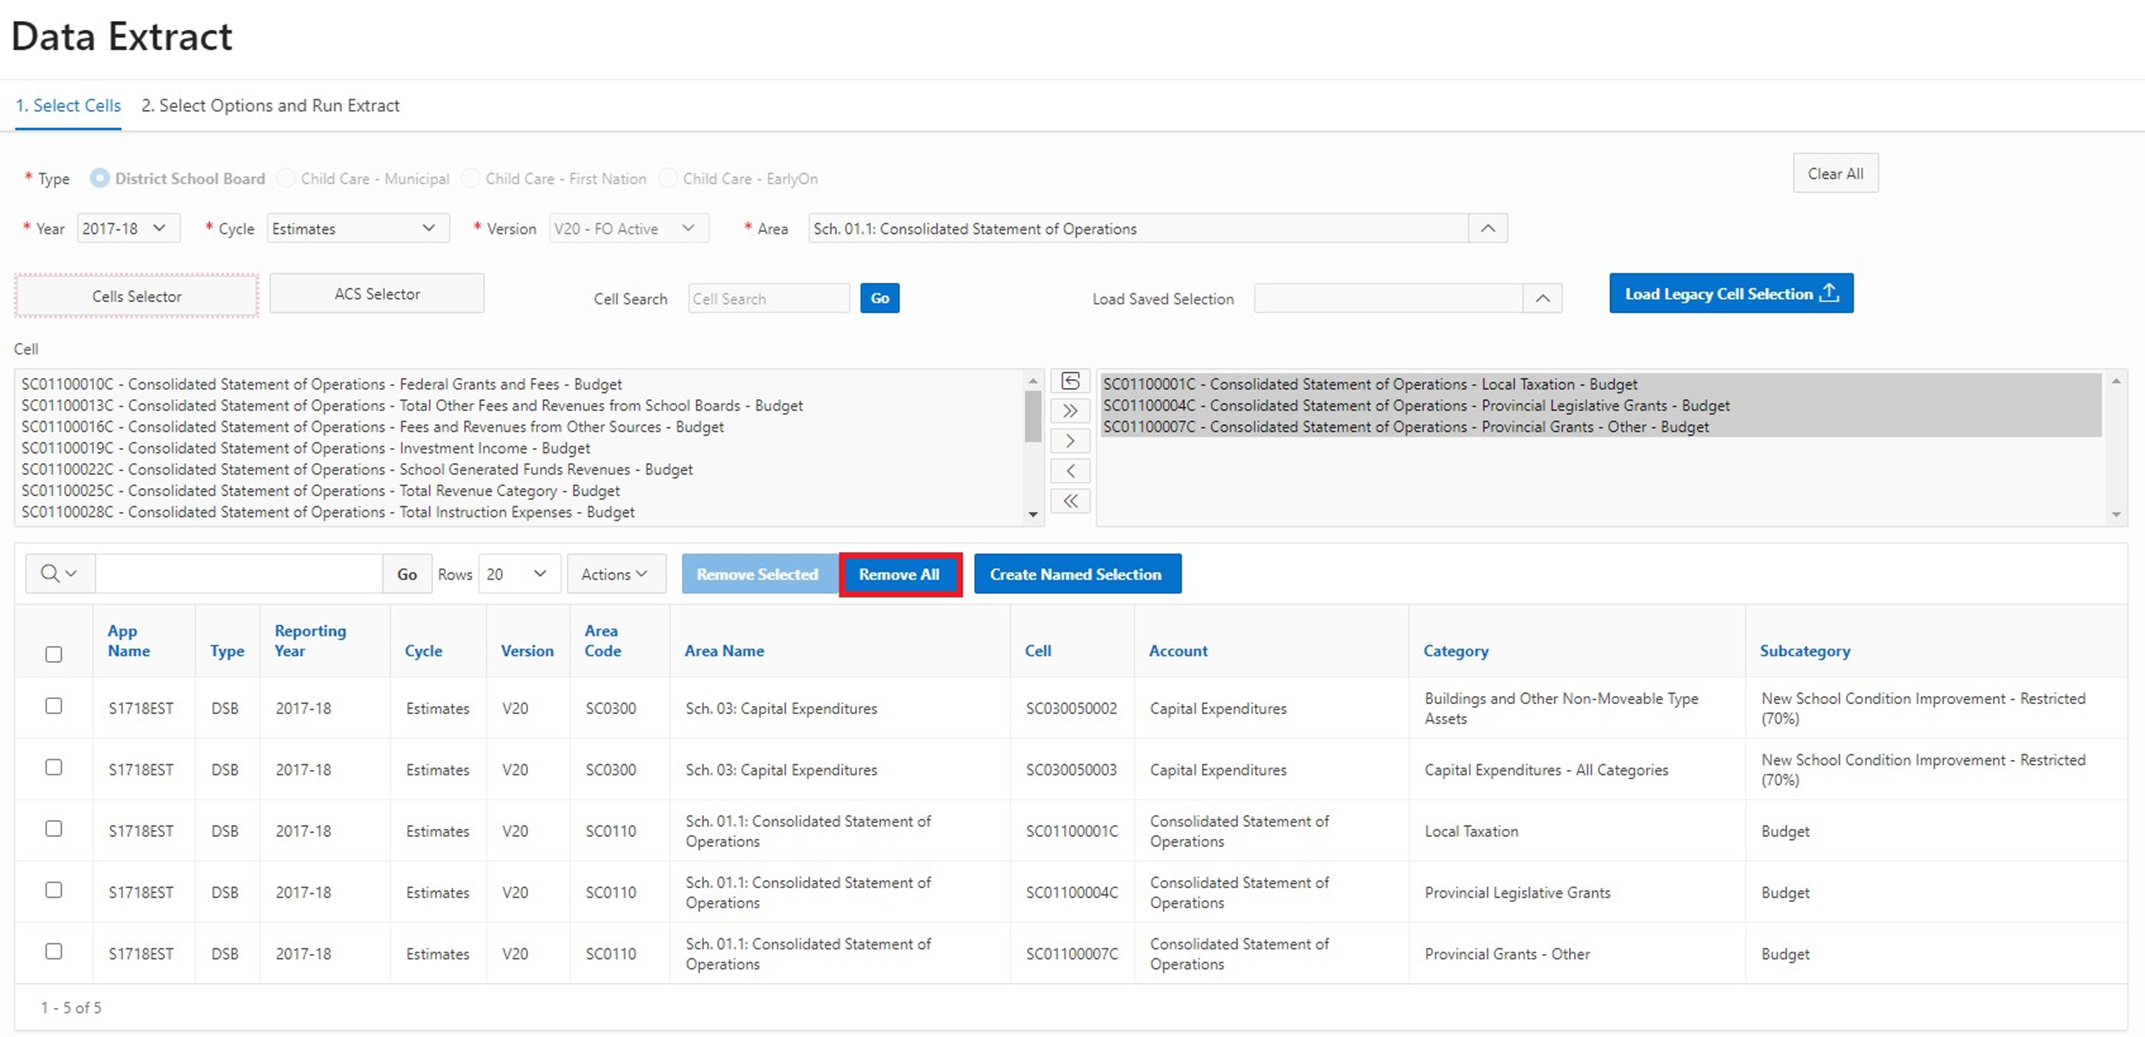
The Remove All button removes cells from both the right-hand selection box and from the session selection area as shown below.
2.2.7 Cell Name Reference Document
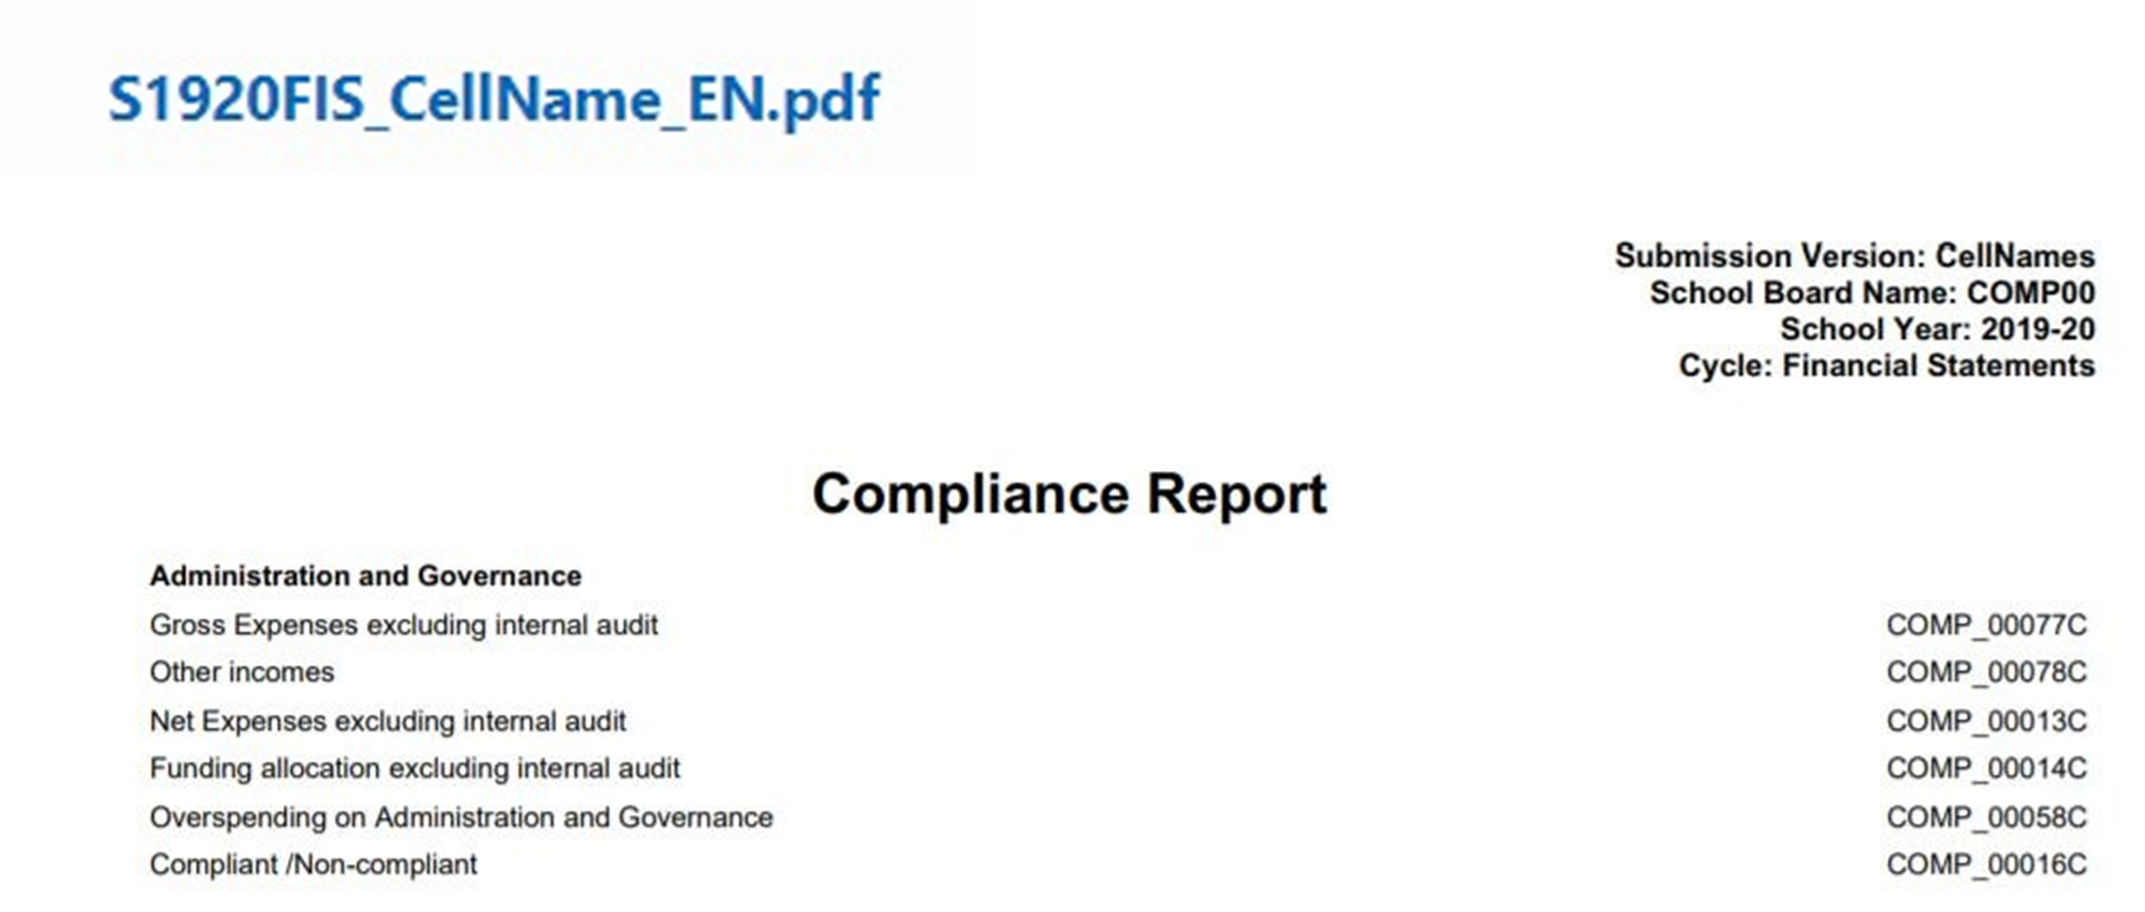
Only for the recent doc sets, a Cell Name Reference Document link is available on the page for users to open a PDF format document. By clicking on the link, it will open the document in a new tab. This document will display the Cell Names by Area. For example, this is the English version of the document for the S1920FIS doc set.
2.3 Select Options and Run Extract
Once the required cells are chosen, the user is ready to click on Select Options and Run Extract.
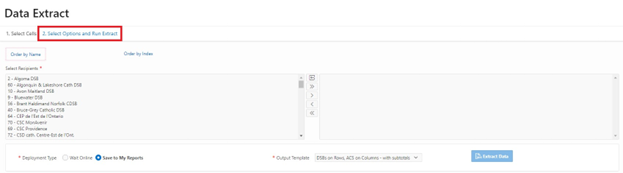
The Select Options and Run extract page allows users to:
- Choose recipients: Recipients are listed in alphabetical order or by index.
- Output Template: Default is “DSB Layout Template (Down Recipients Across ACS)”
- Deployment Type: Wait Online or Save to My Reports. Default is Save to My reports.
- Preview Data: Selected cells for recipients can be viewed at the bottom of the screen.
- Run Extract
Overview of steps:
- Step 1: Select Recipients
- Step 2: Select Deployment Type
- Step 3: Select Output Template
- Step 4: Select Preview Data
- Step 5: Select Extract Data
A detailed explanation of each step is provided next.
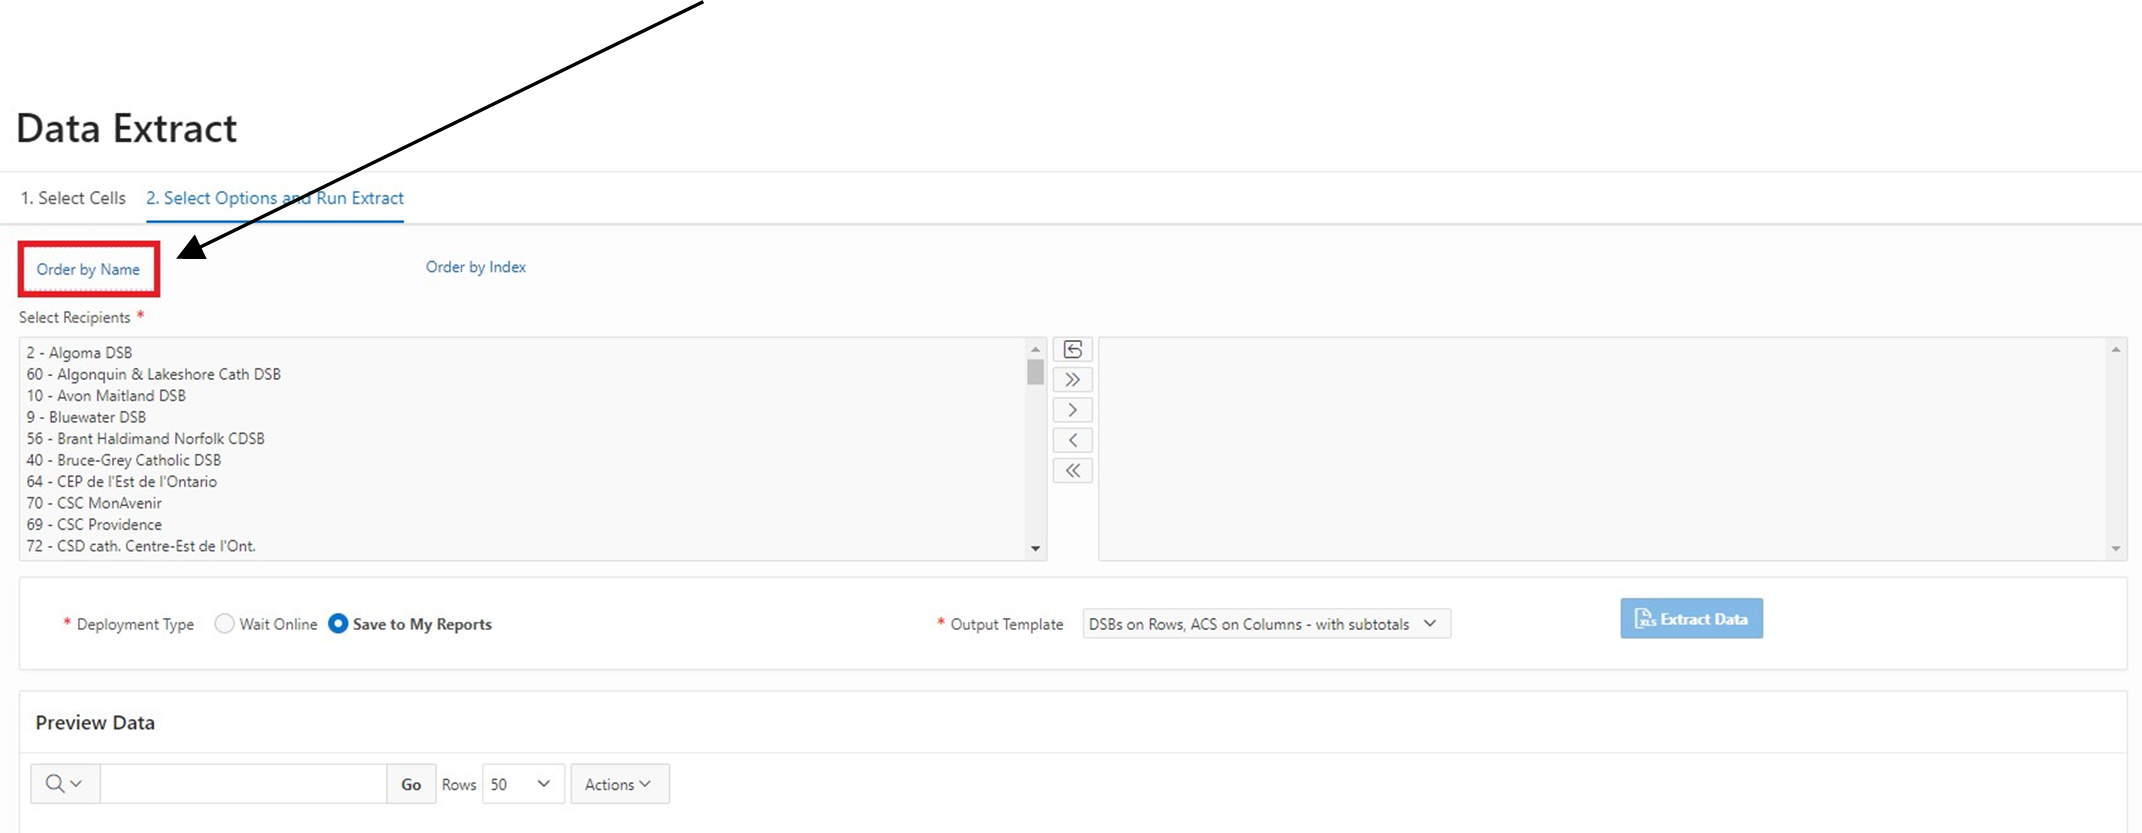
2.3.1 Selecting Recipients
Users select recipients by using the menu bar. Recipient names appear in alphabetical order.
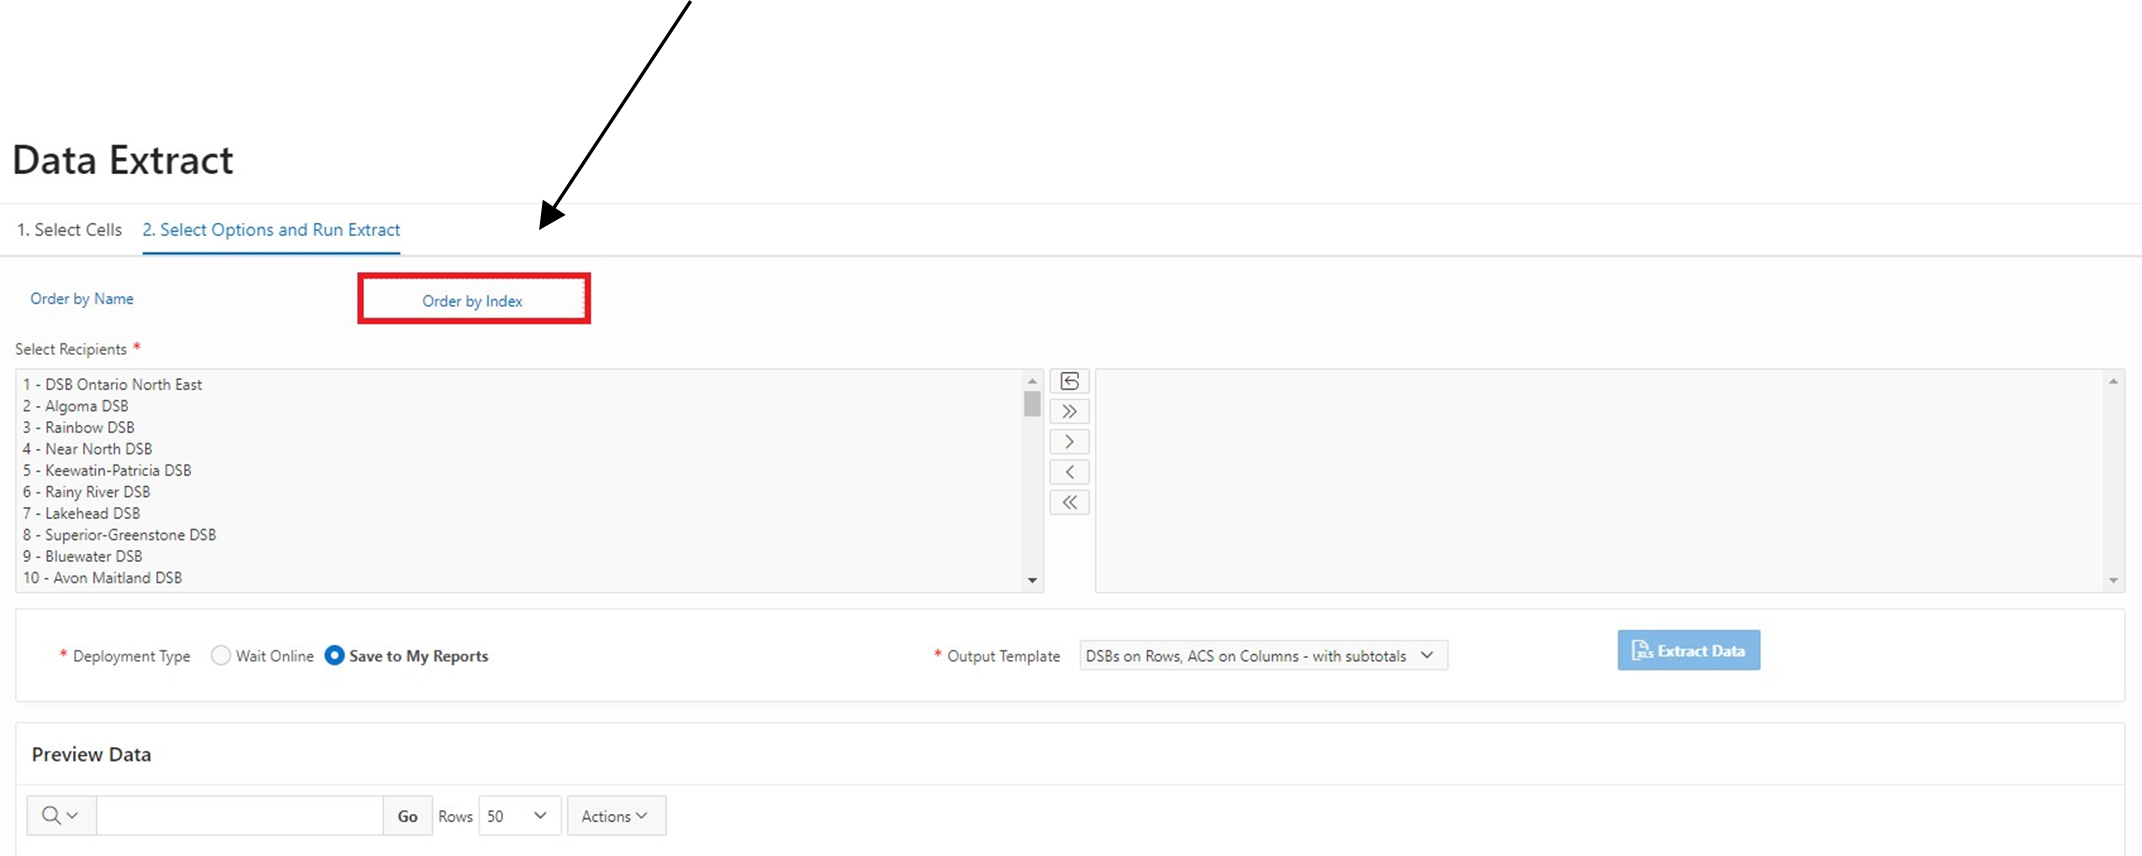
Recipients can also be ordered by Index number.
Choose recipients and use the center menu to move highlighted area to the selection box.
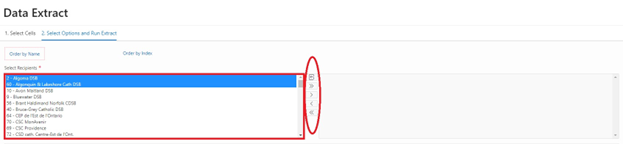
Selected recipients will appear in the right-hand box as shown below.

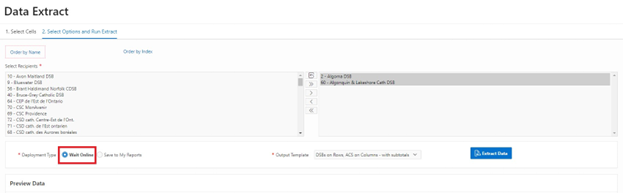
2.3.2 Selecting Deployment Type
Users can now choose Deployment Type. The user has two options:
-
Save to My Reports, which saves the Data Extract file to the My Reports page. This will run the extract in the background and allow users to start a new extract (should they choose to) or to exit from the DET page and revisit later once the extract is complete.

-
Users can also choose to Wait Online until the extract is complete. Note that by selecting this option, the user will have to remain on the page until the extract is complete. Large extracts may take several minutes to complete.
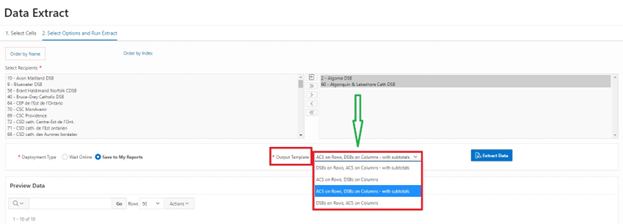
2.3.3 Selecting Output Template
By clicking on the arrow icon on the Output Template button, a drop-down menu lists all available templates. Users select the required Template for the extract. For each Type, at least two Template versions are available (one with Recipients listed on columns, and the other with Recipients listed on rows). The Templates for each Type are noted below.
| Type | Template |
|---|---|
| District School Board (DSB) |
ACS on Rows, DSBs on Columns - with subtotals DSBs on Rows, ACS on Columns - with subtotals ACS on Rows, DSBs on Columns DSBs on Rows, ACS on Columns |
|
Municipal Childcare (CCM) First Nations (CCF) Child Care - EarlyOn (OTP) |
ACS on Rows, Recipients on Columns DSBs on Rows, ACS on Columns |
The user selects “ACS on Rows, DSBs on Columns - with subtotals”:
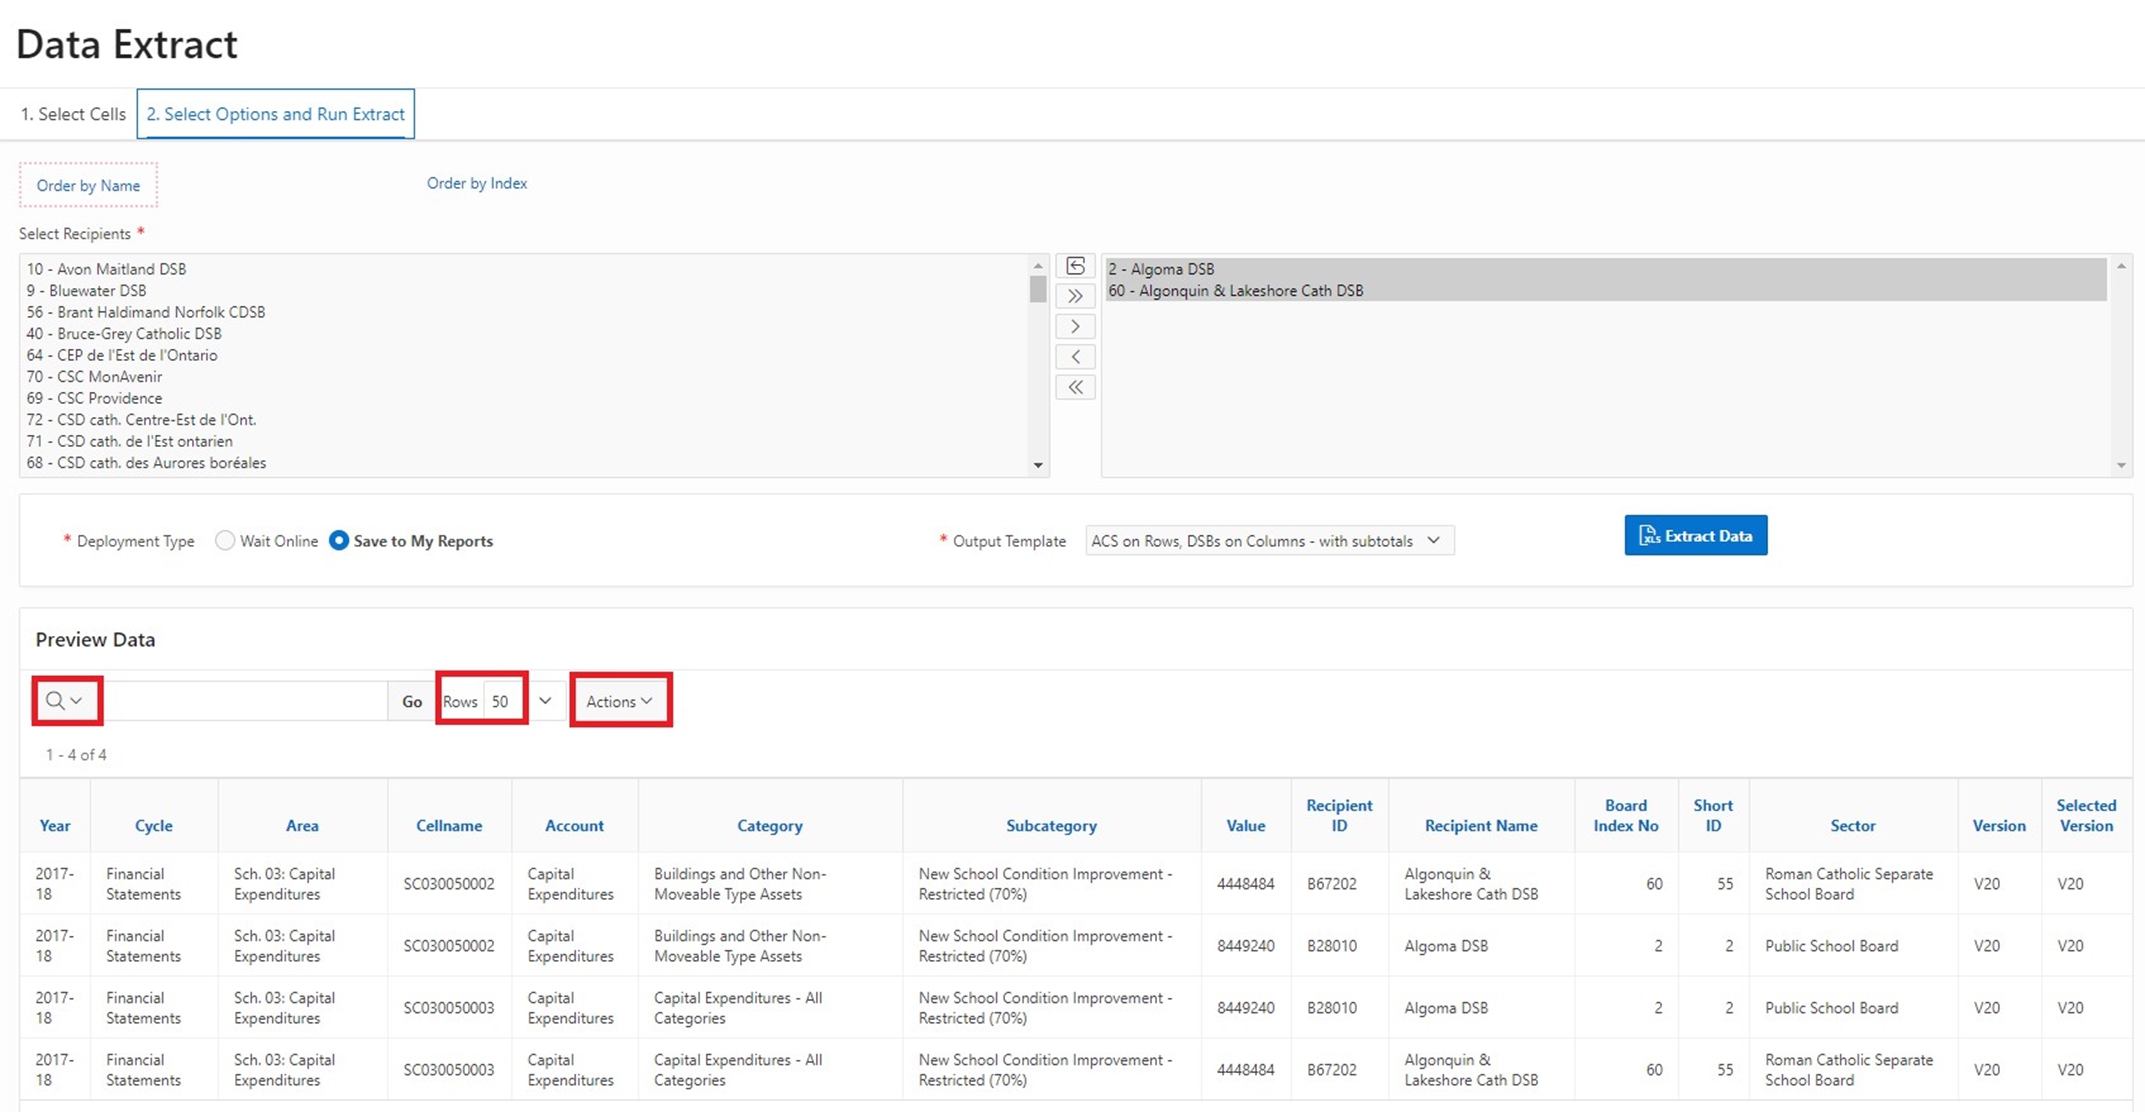
2.3.4 Preview Data
Data for selected recipients can be previewed at the bottom of the screen as illustrated below. Users can review data before running the extract. For example, the user can return to Select Cells subpage and add (or delete) cells to their selection.
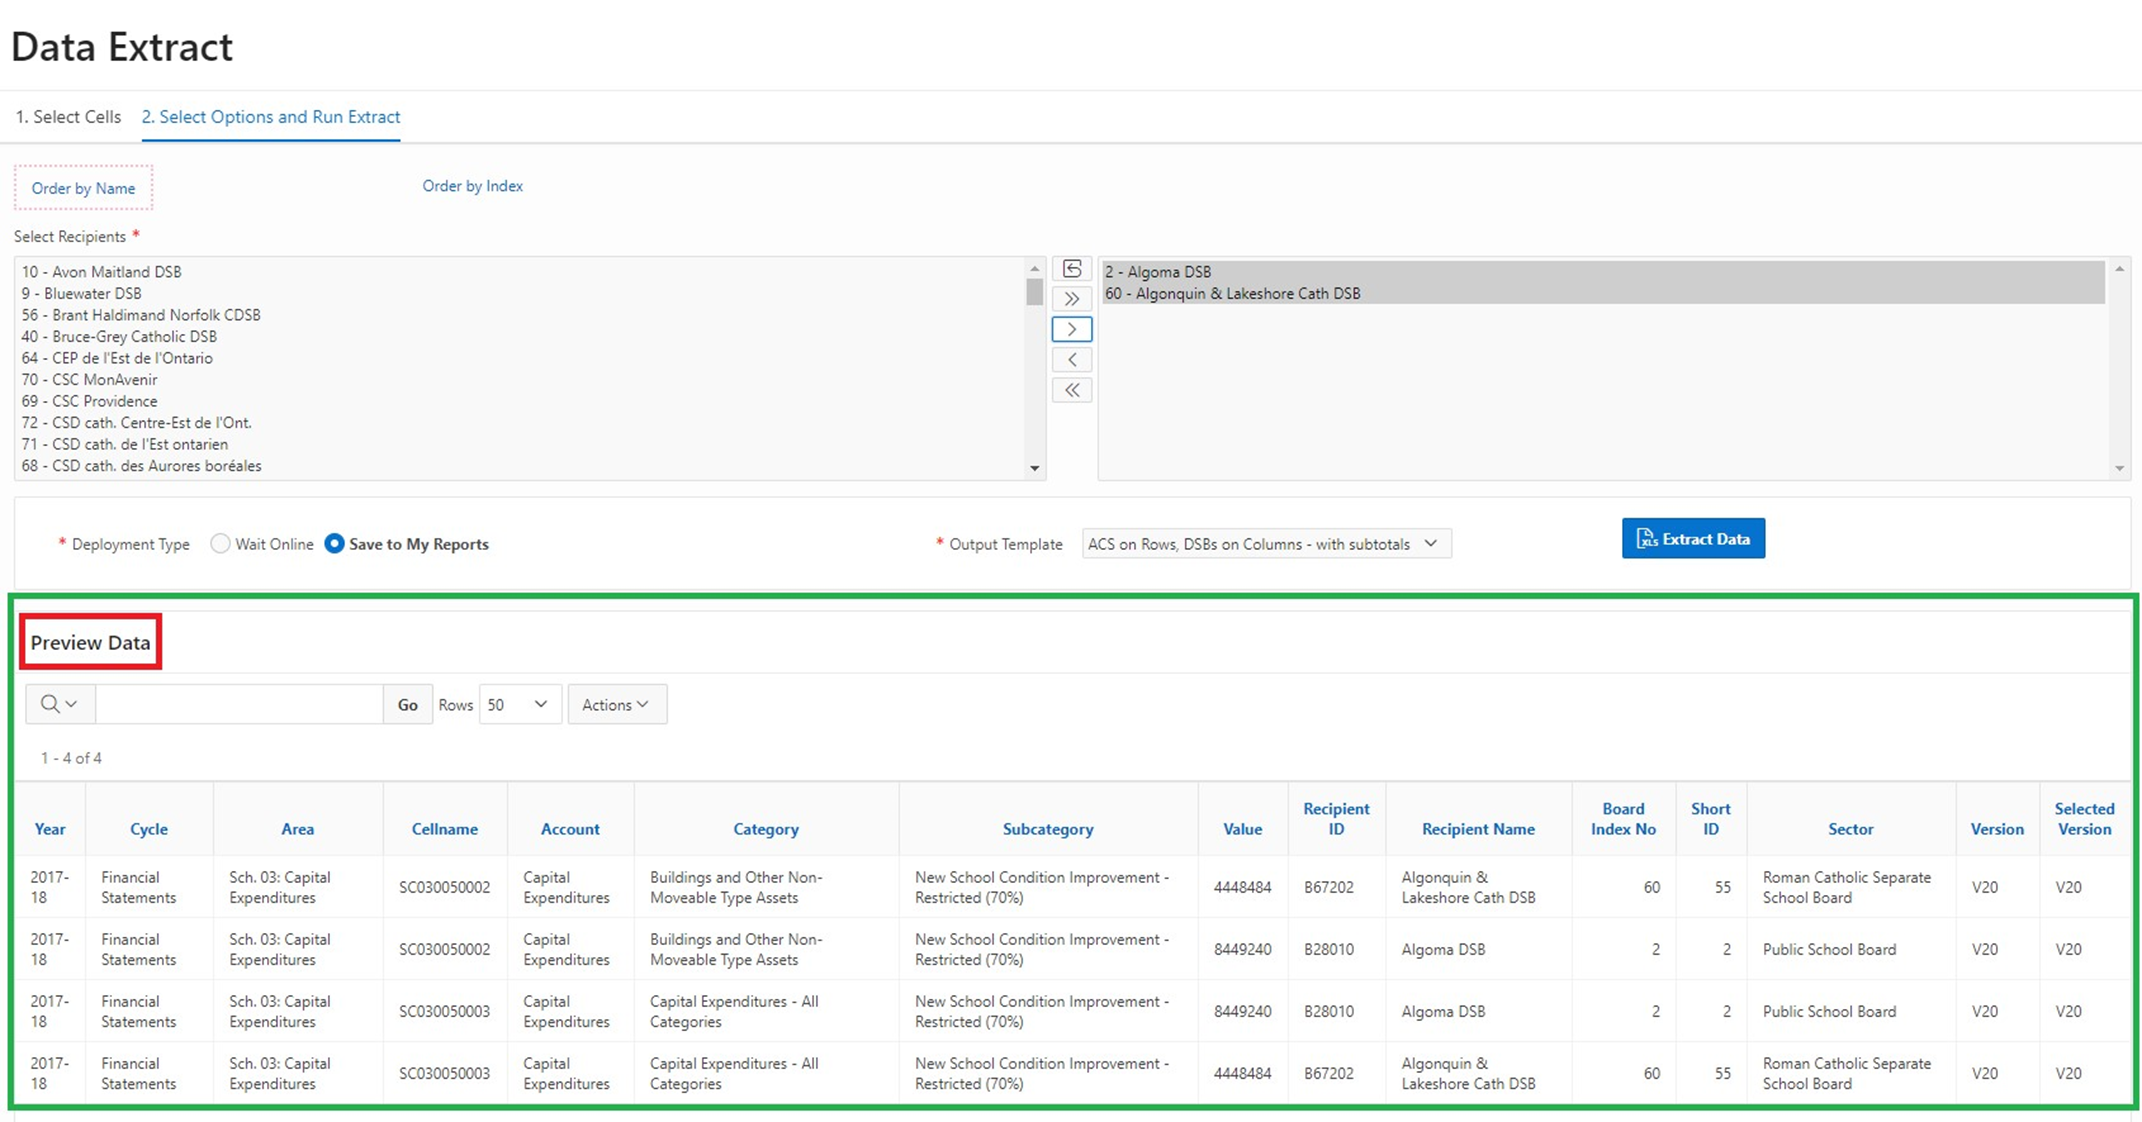
Preview Data allows user to search, change the number of visible rows, and utilize additional filtering features within the Actions menu.
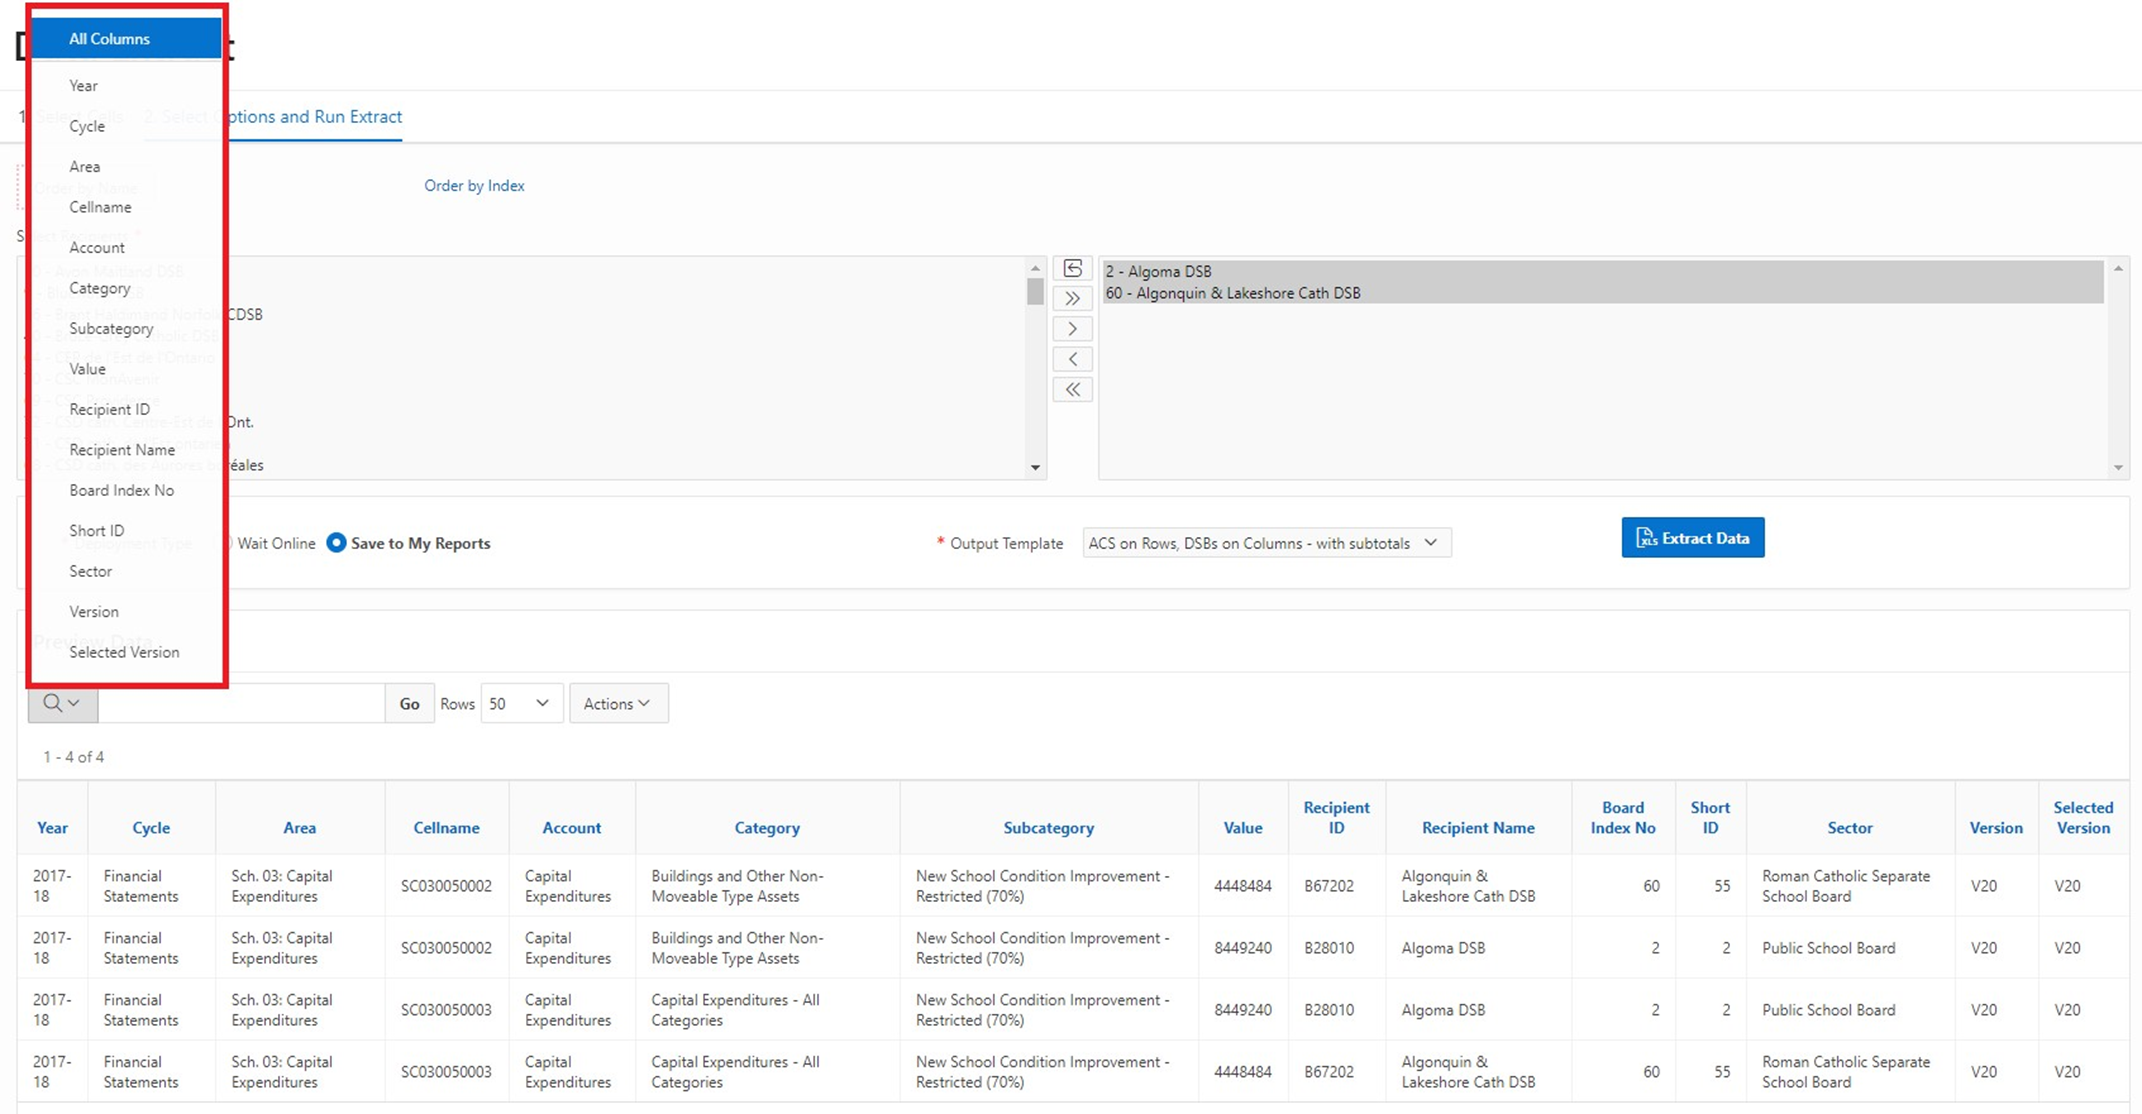
Users can click on the search icon to search by any of the specified columns: Year, Cycle, Area, Cell Name, Columns, Account, Value, Recipient ID, Category, Subcategory, Recipient Name, Board Index No., Short ID, Sector, Version, and Selected Version.
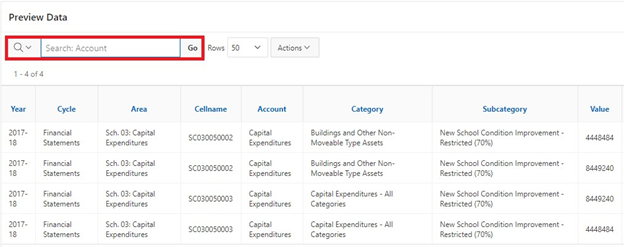
For example, in the screenshot below, the column Account was selected. The search bar can now be used to search for specific Accounts.
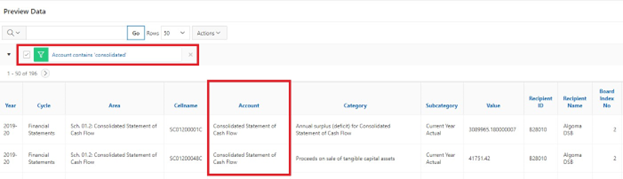
In the following example, the search bar is used to search for Accounts containing the word “Consolidated”. Now, only rows with Accounts that contain the word “Consolidated” are displayed. The green filter indicates the search that was conducted (it can be toggled on or off). The search bar has reset to no longer search for Accounts.
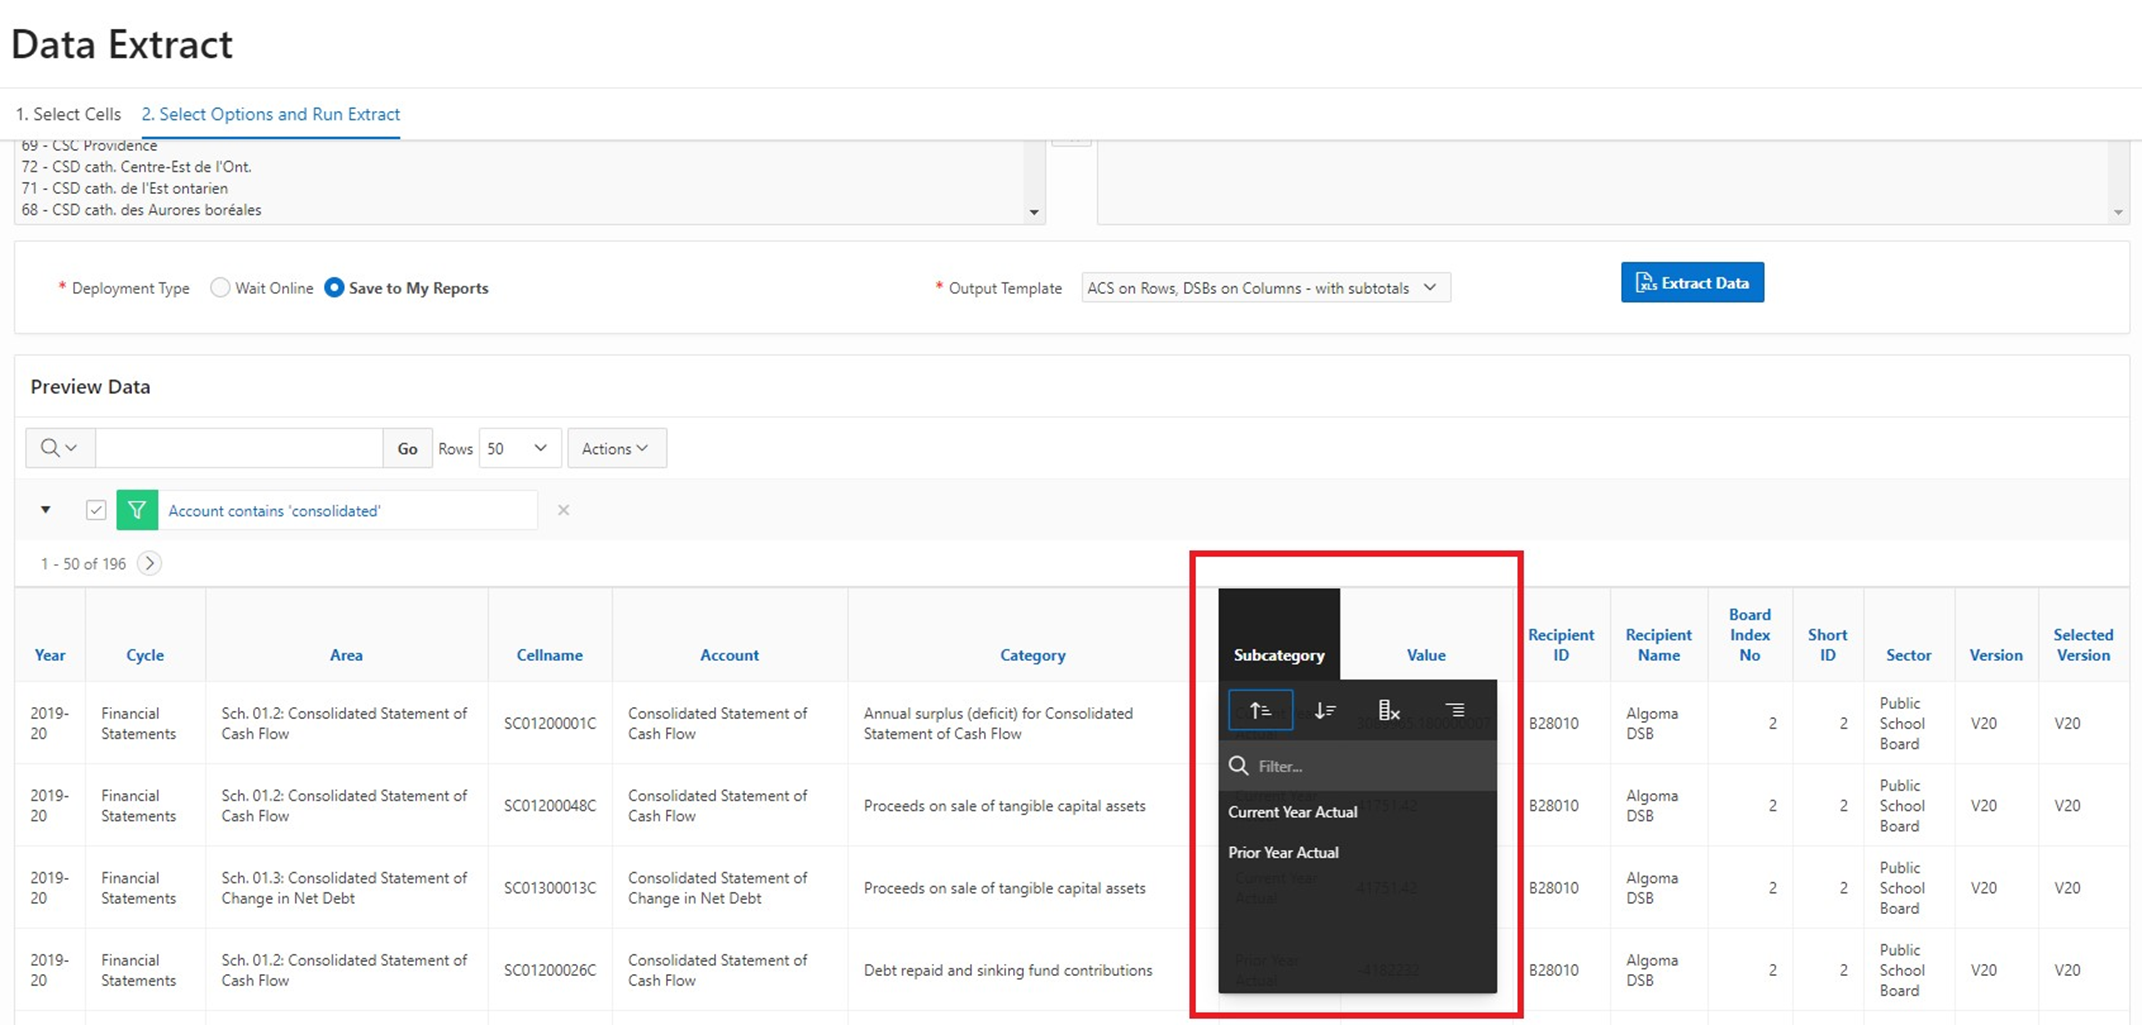
Users may also filter and search by column by clicking on the blue column name. In the example below, the Subcategory column name was clicked on and all unique values in the Subcategory column are listed. Users can select which Subcategory values they wish to view, as well as reorder them.
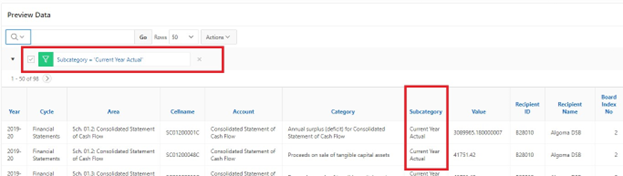
In the screenshot below, the Subcategory value “Current Year Actual” was selected and thus, only rows containing this value are displayed. The applied filter (noted by the green icon) can be toggled on and off as needed.
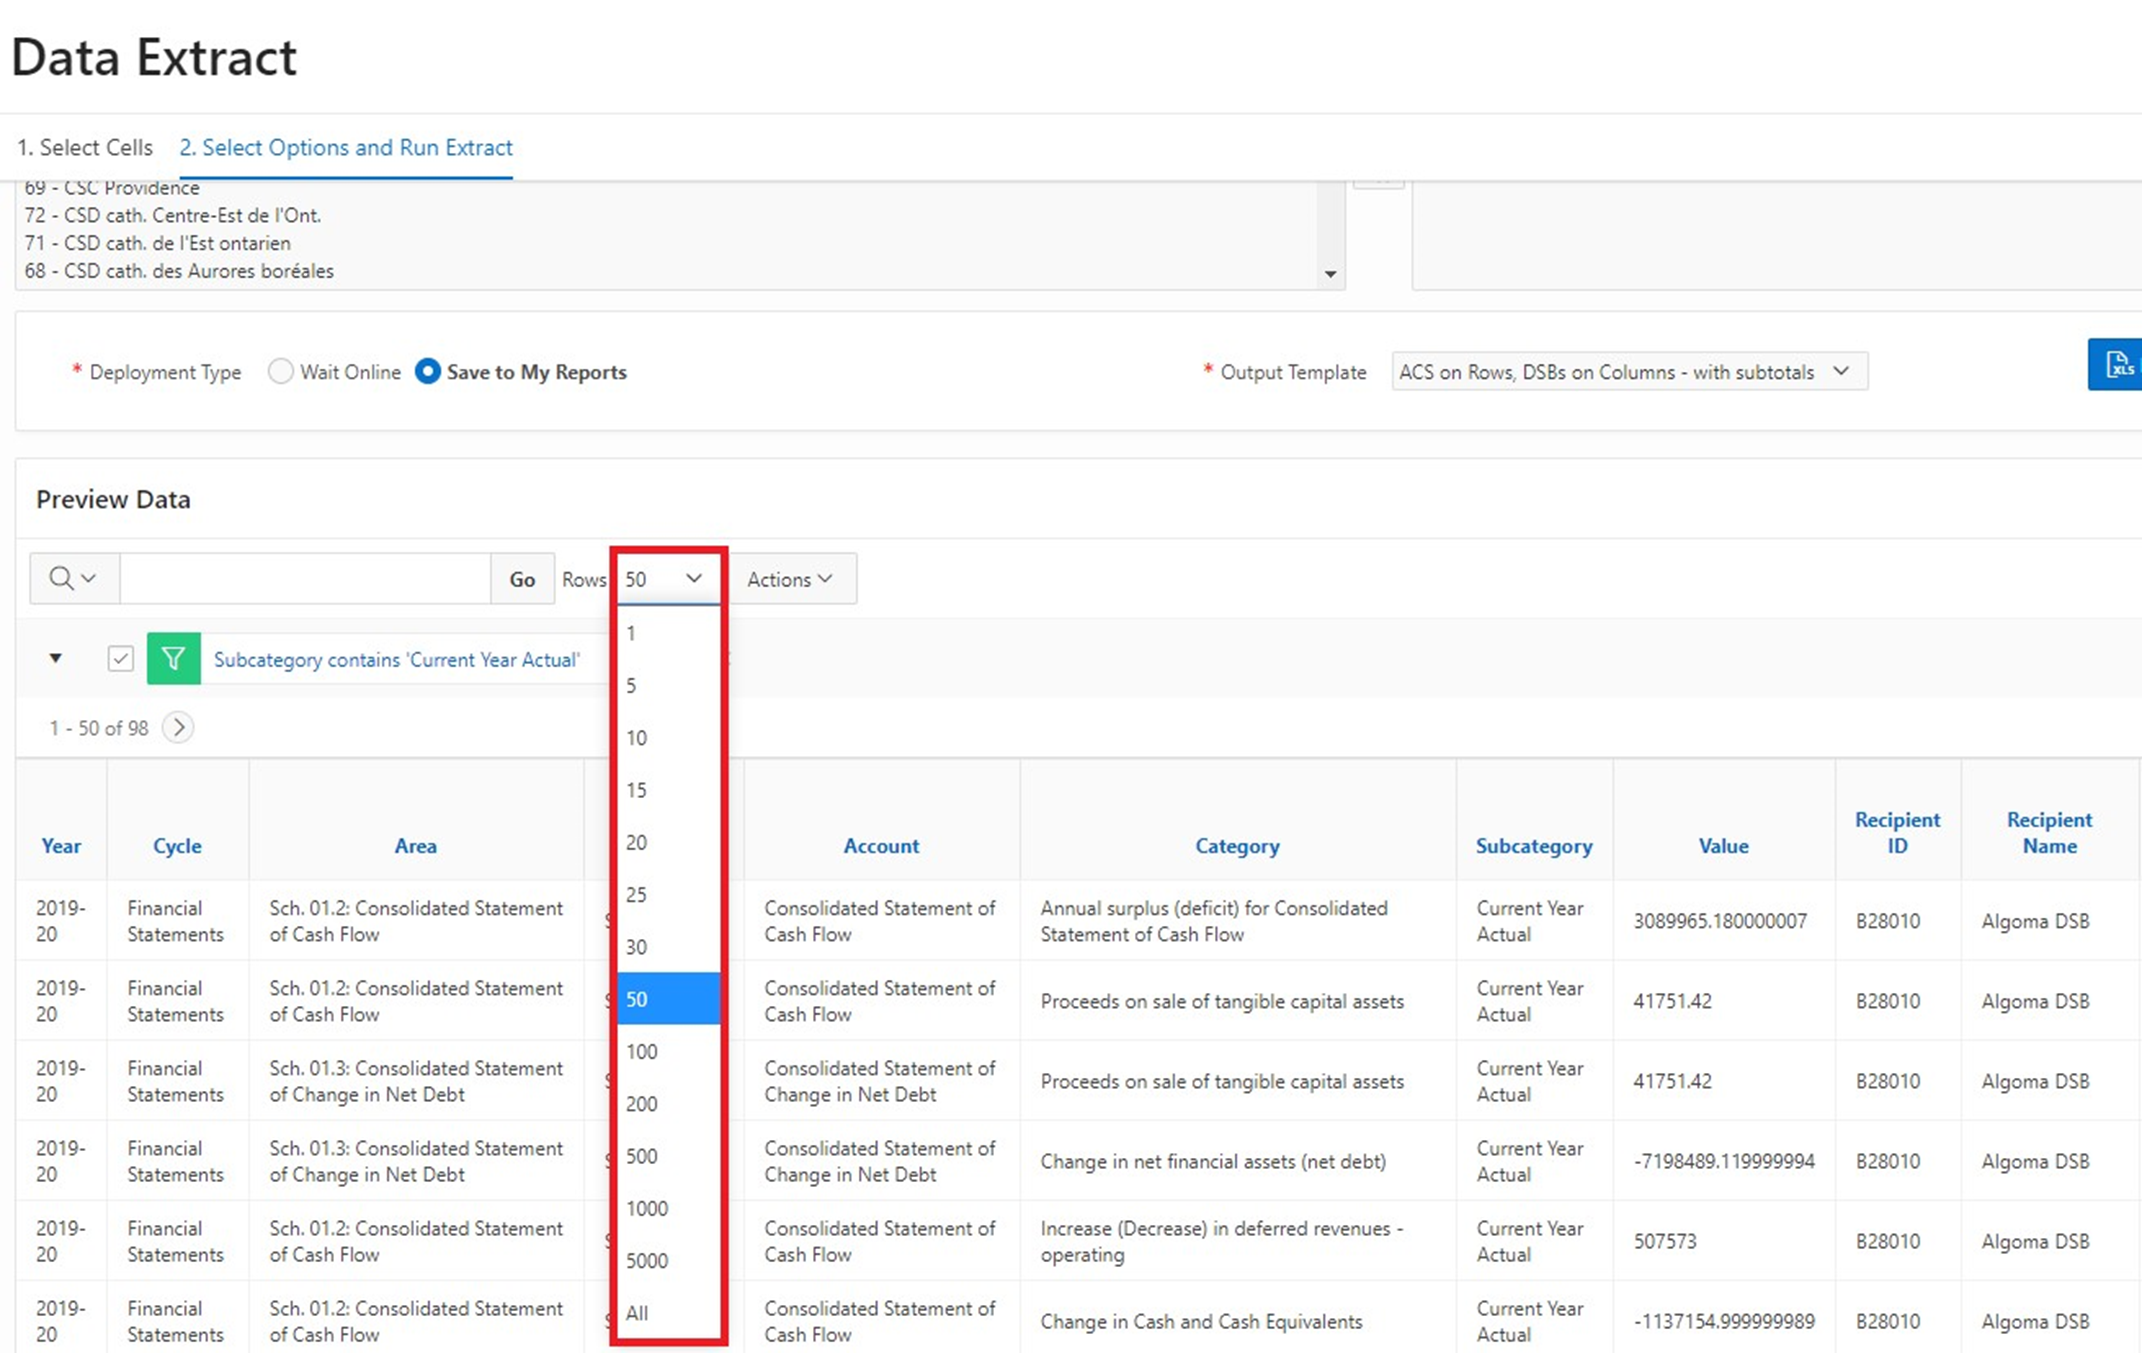
Users can change the number of rows displayed (the default value is 50).
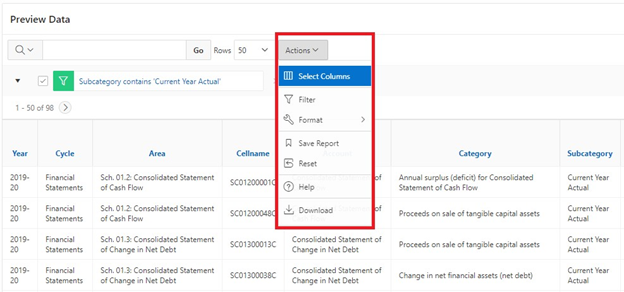
Users can select Actions which includes the ability to Select Columns, Filter, Format, Save Report, Reset, Help, or Download.
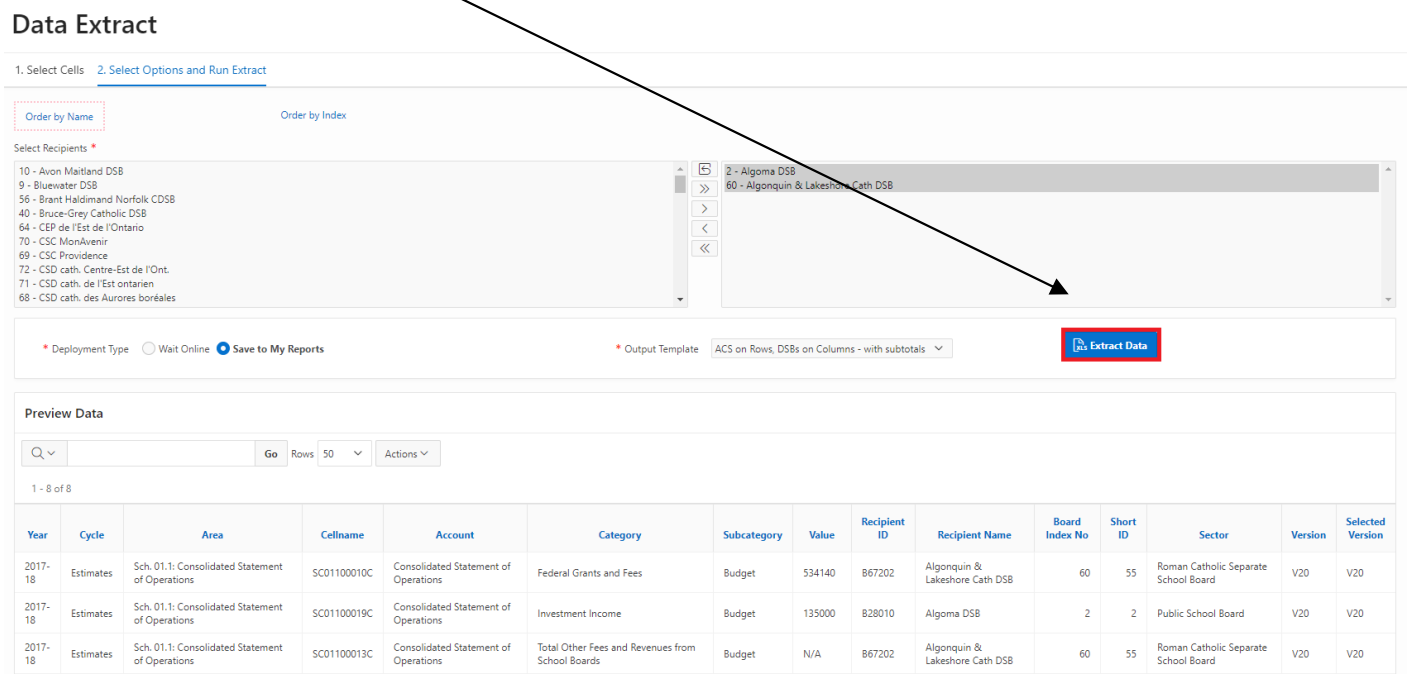
2.3.5 Extract Data
The user can now run the extract by clicking on the Extract Data button.
A pop-up menu will appear requiring the user to name the file (Description is optional and available for “Save to My Reports” only). A default name with timestamp is provided, depending on the template selected, and can be changed by the user.
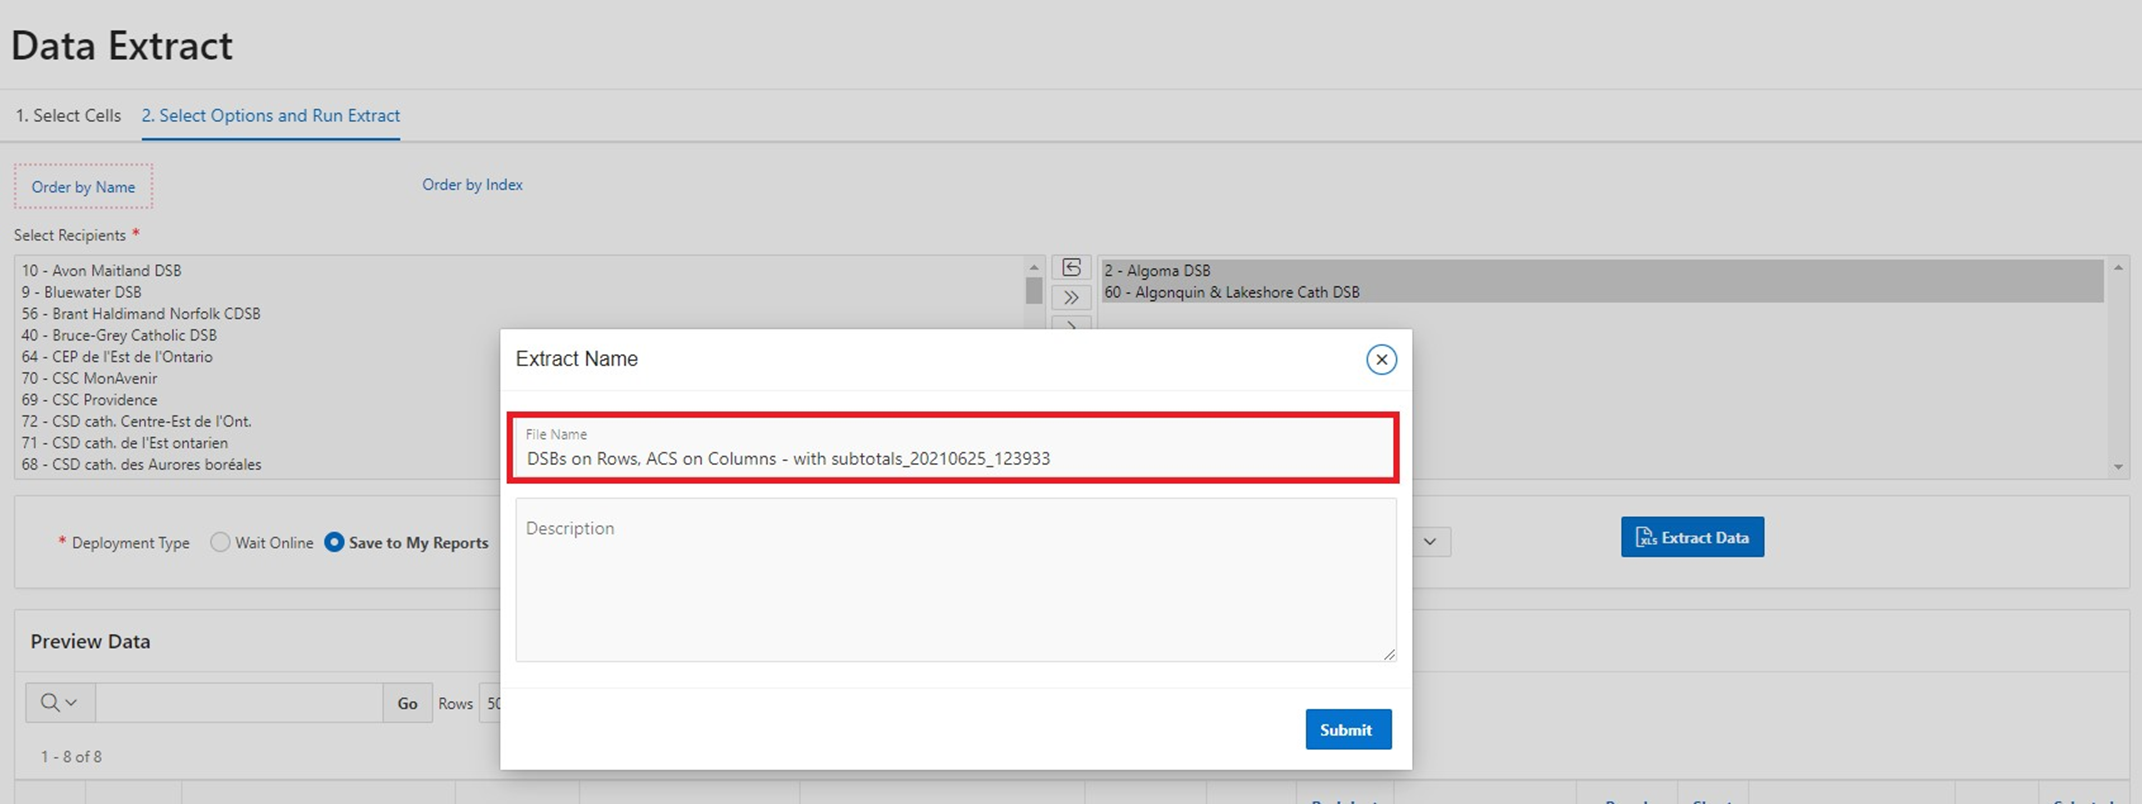
Once the user has clicked on the
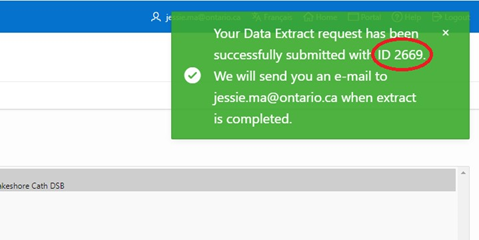
Users will receive an email once the extract report is available for download. The email will contain the unique ID number to identify the extract that is completed.
2.3.6 Download Extract
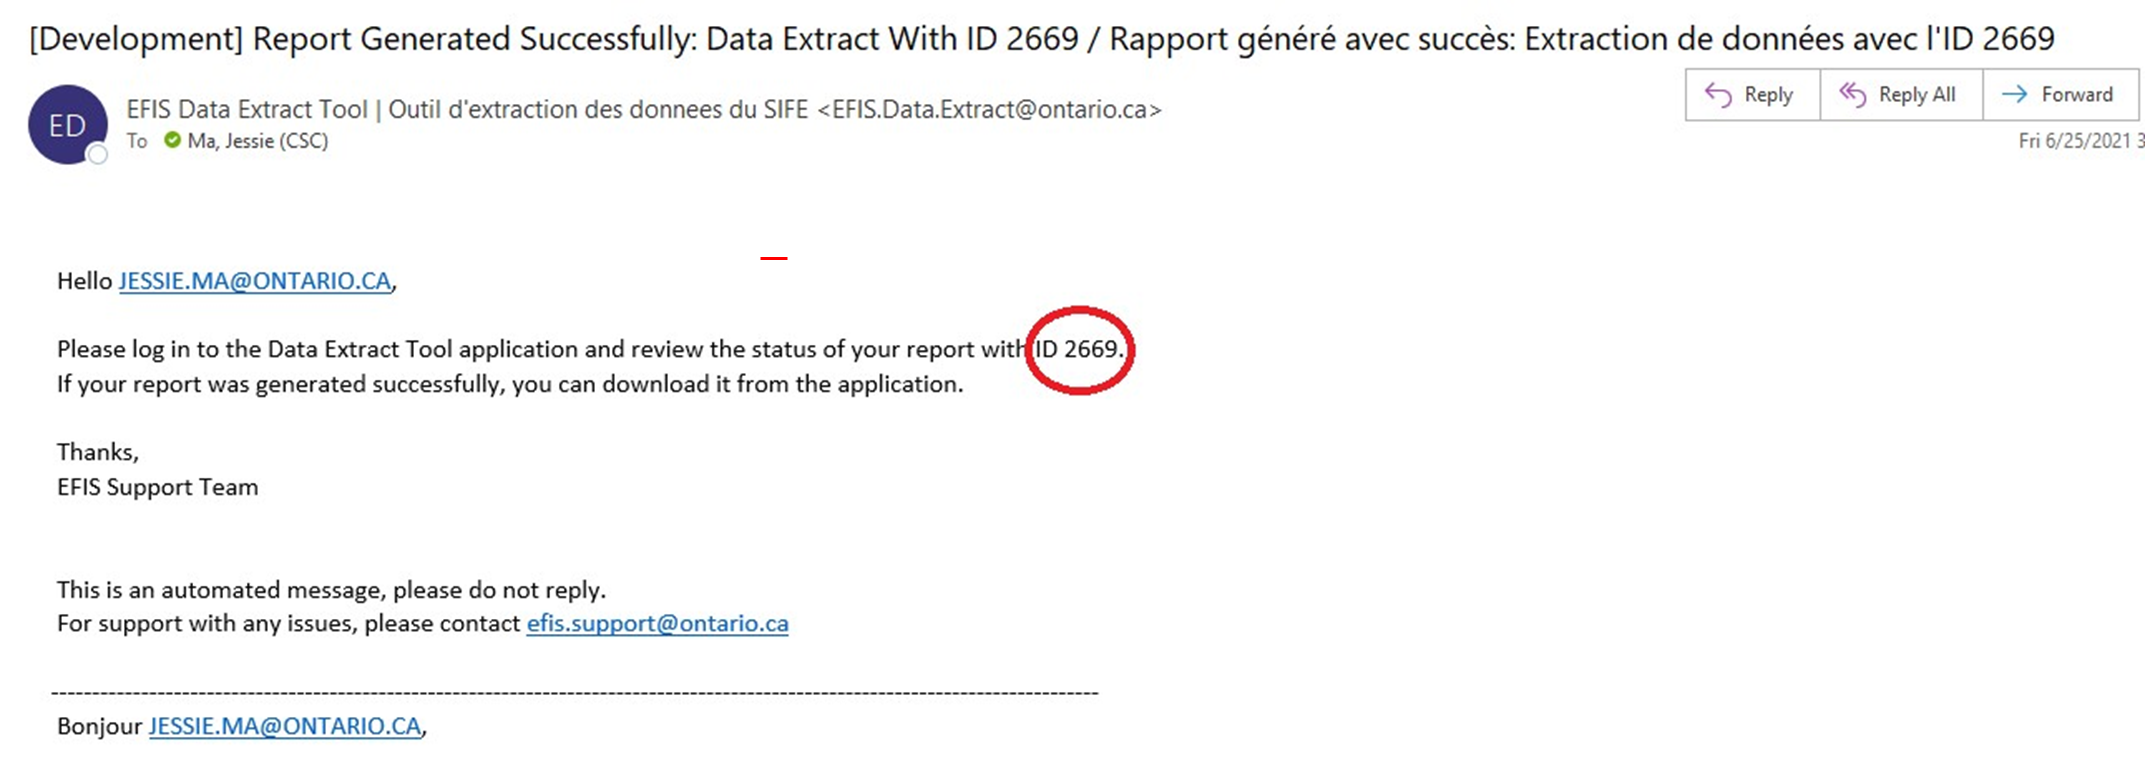
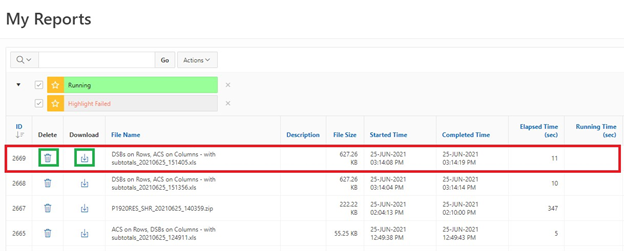
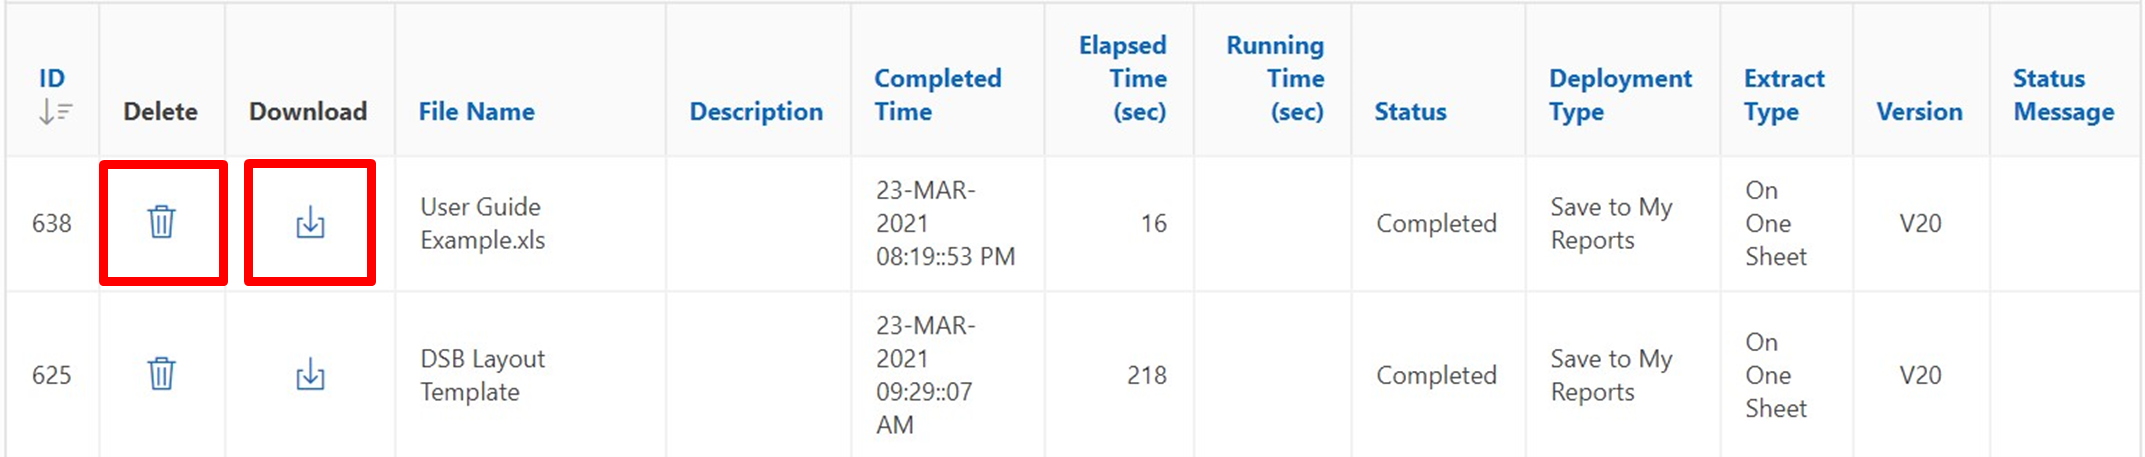
The My Reports page contains all extracts initiated by the user. Users will navigate to My Reports and locate the output Template.
Users will be able to locate the report by looking for the ID number. In the example above, it was ID 2669. The user can download the Extract by clicking on the Download icon. Users can also delete extracts they no longer want to keep.
The user will select and click on the file which will open in Excel. Note for Release 1, the following Excel format error will be displayed. Select Yes.

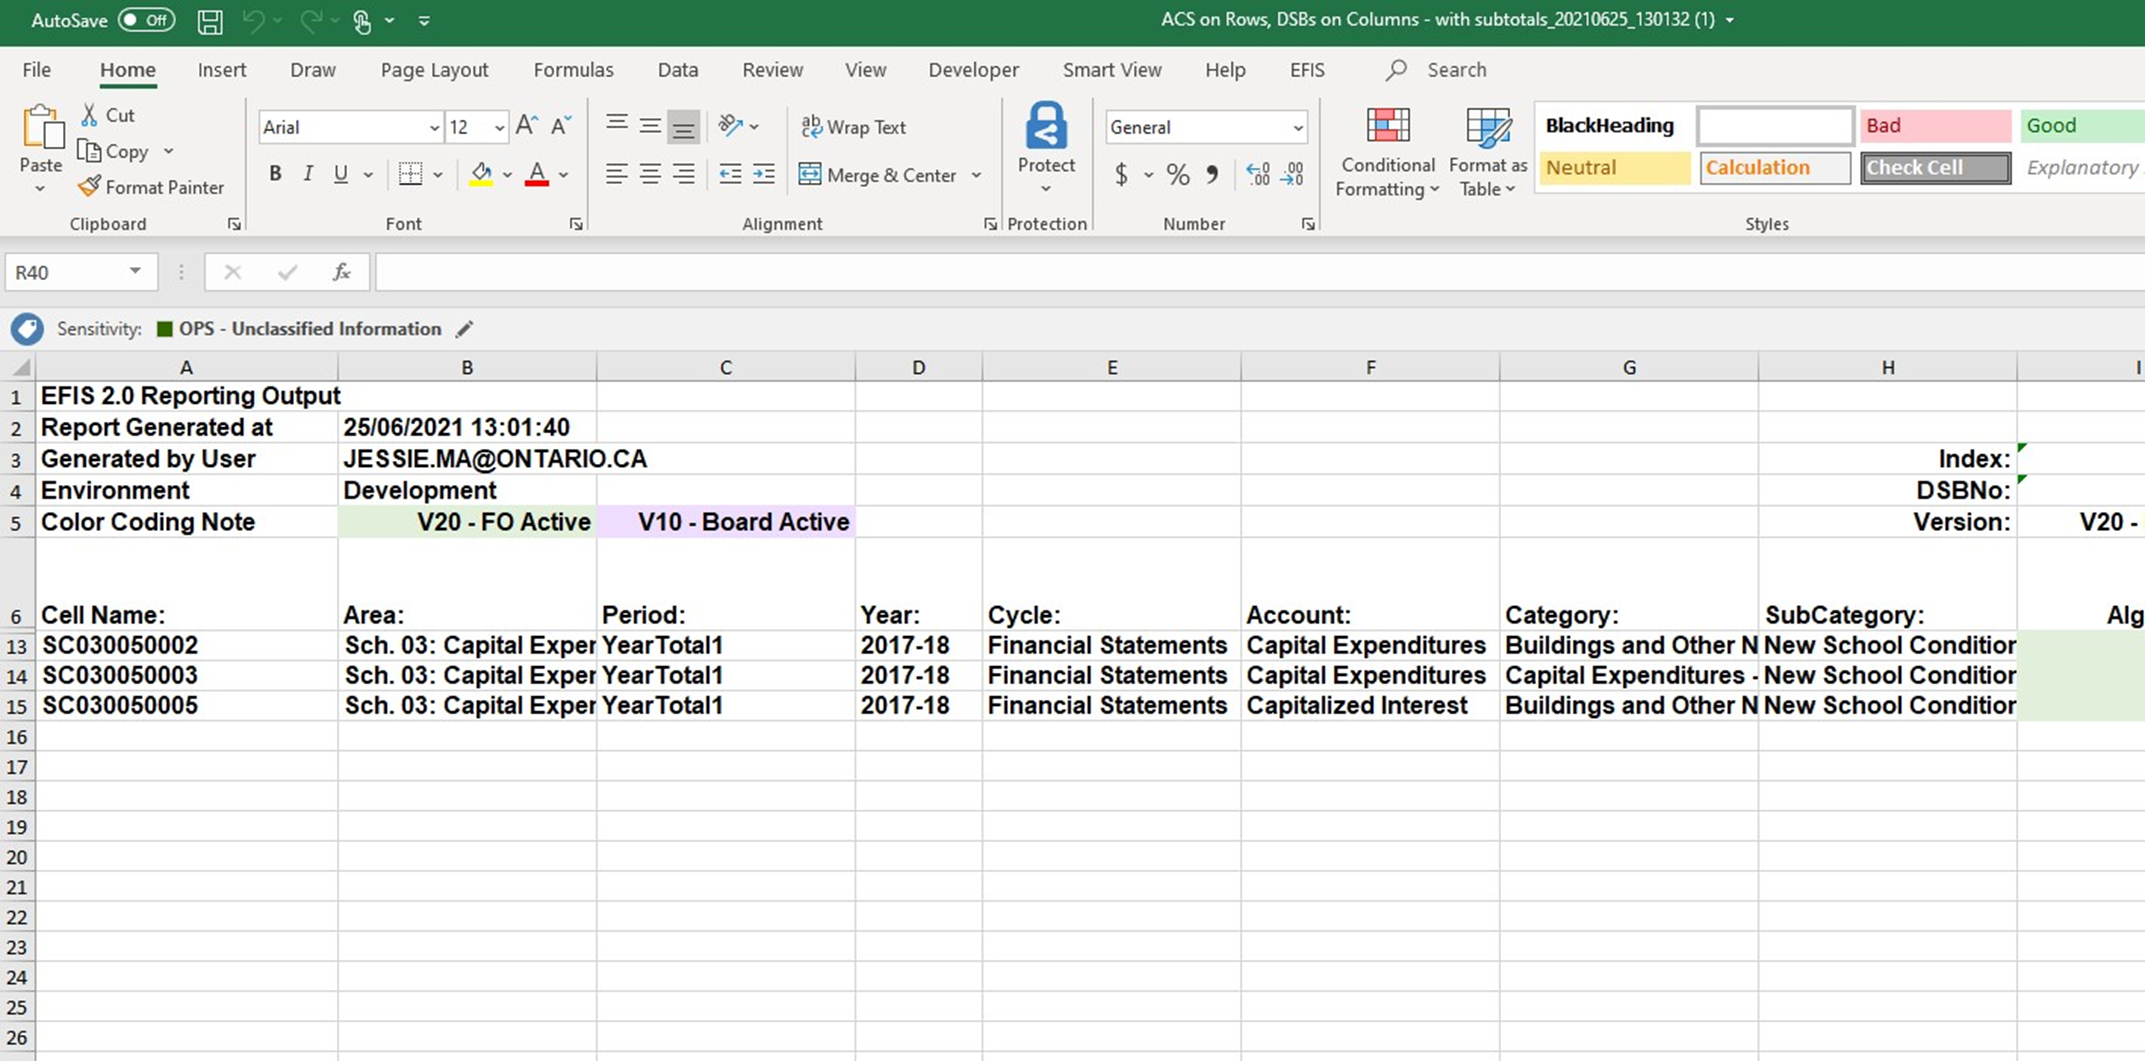
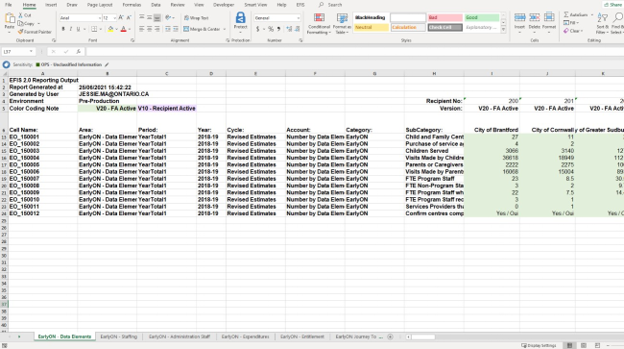
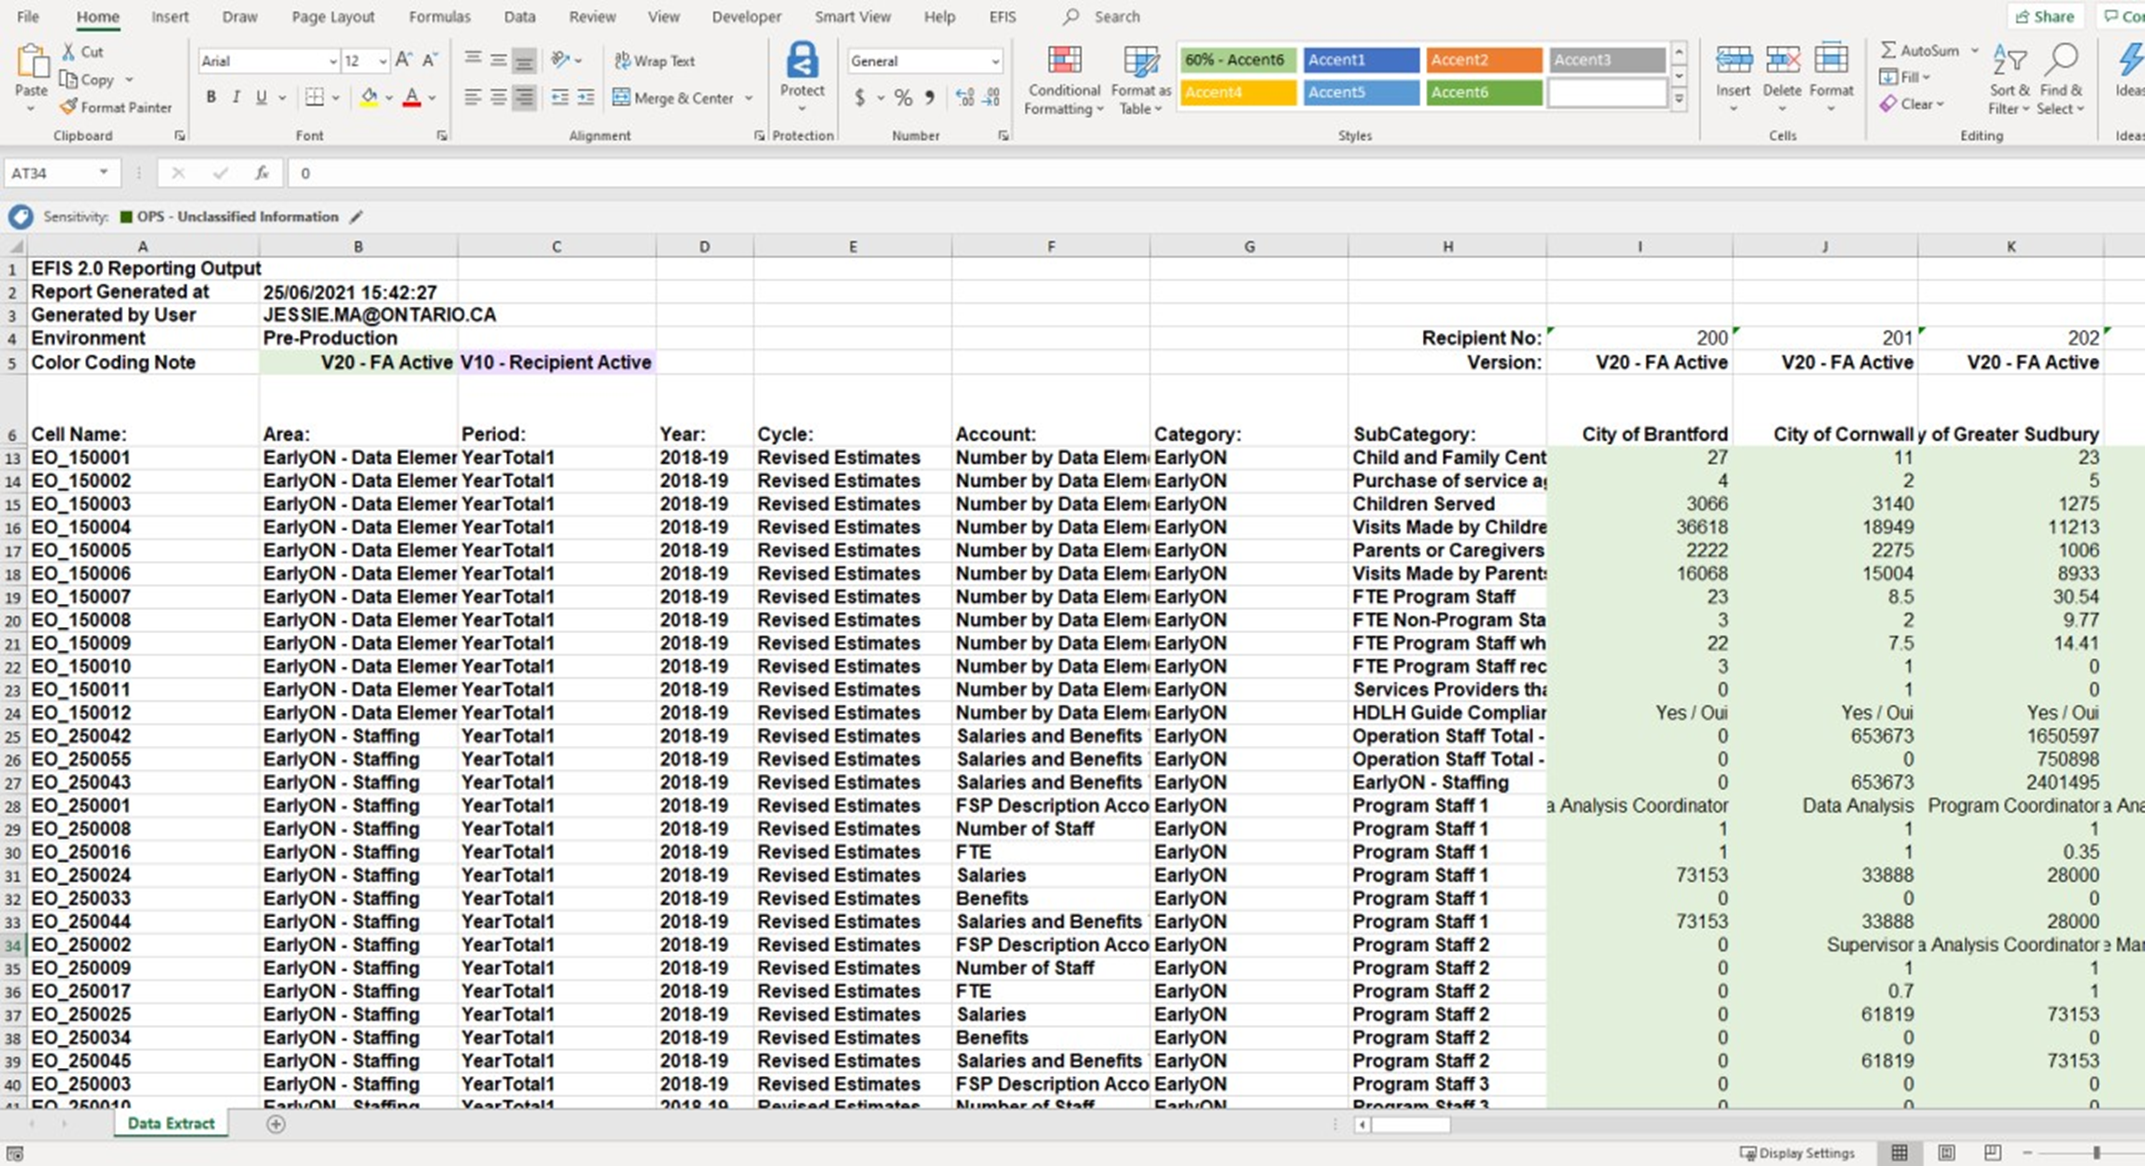
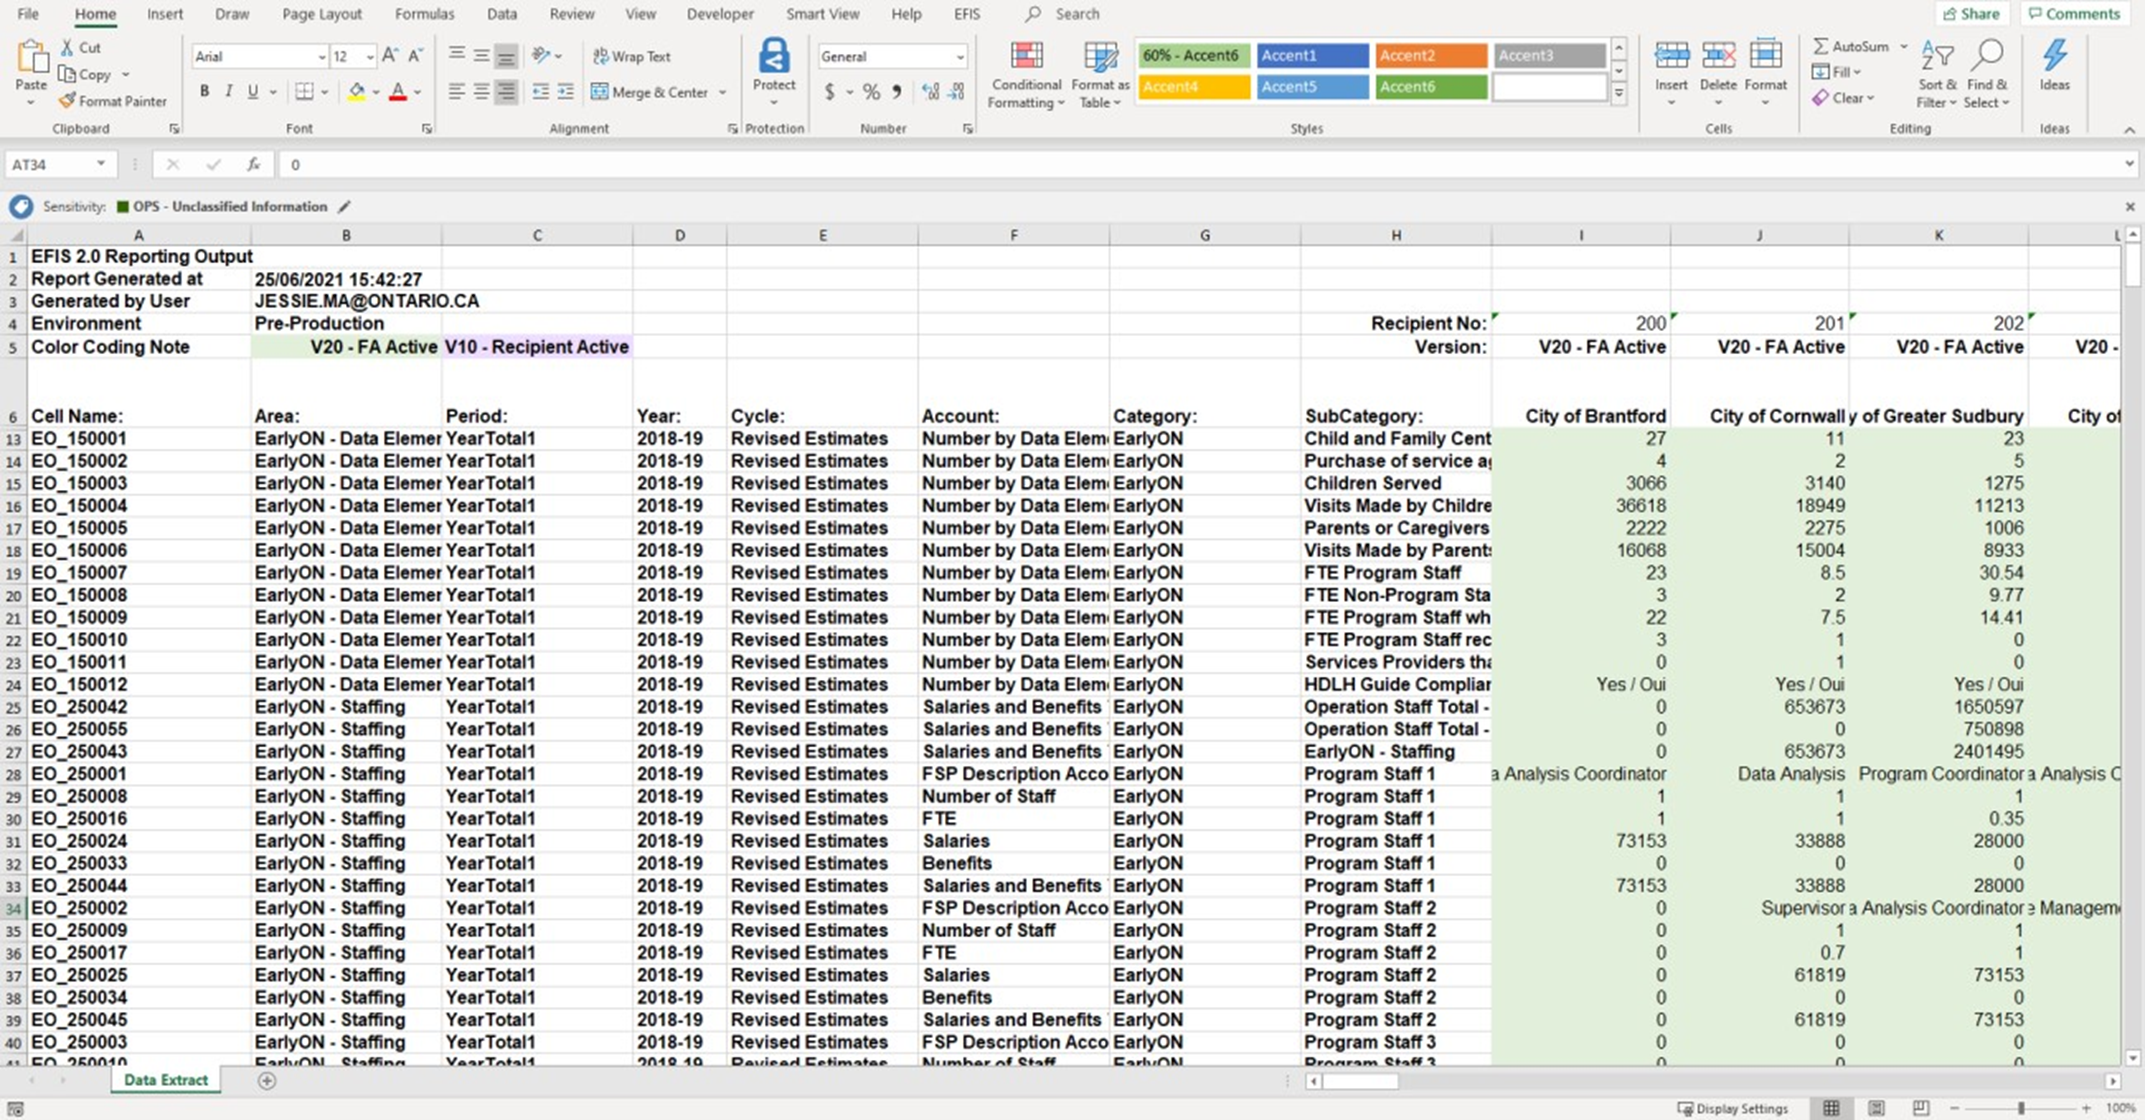
See below the extract output from a single doc set.
Note
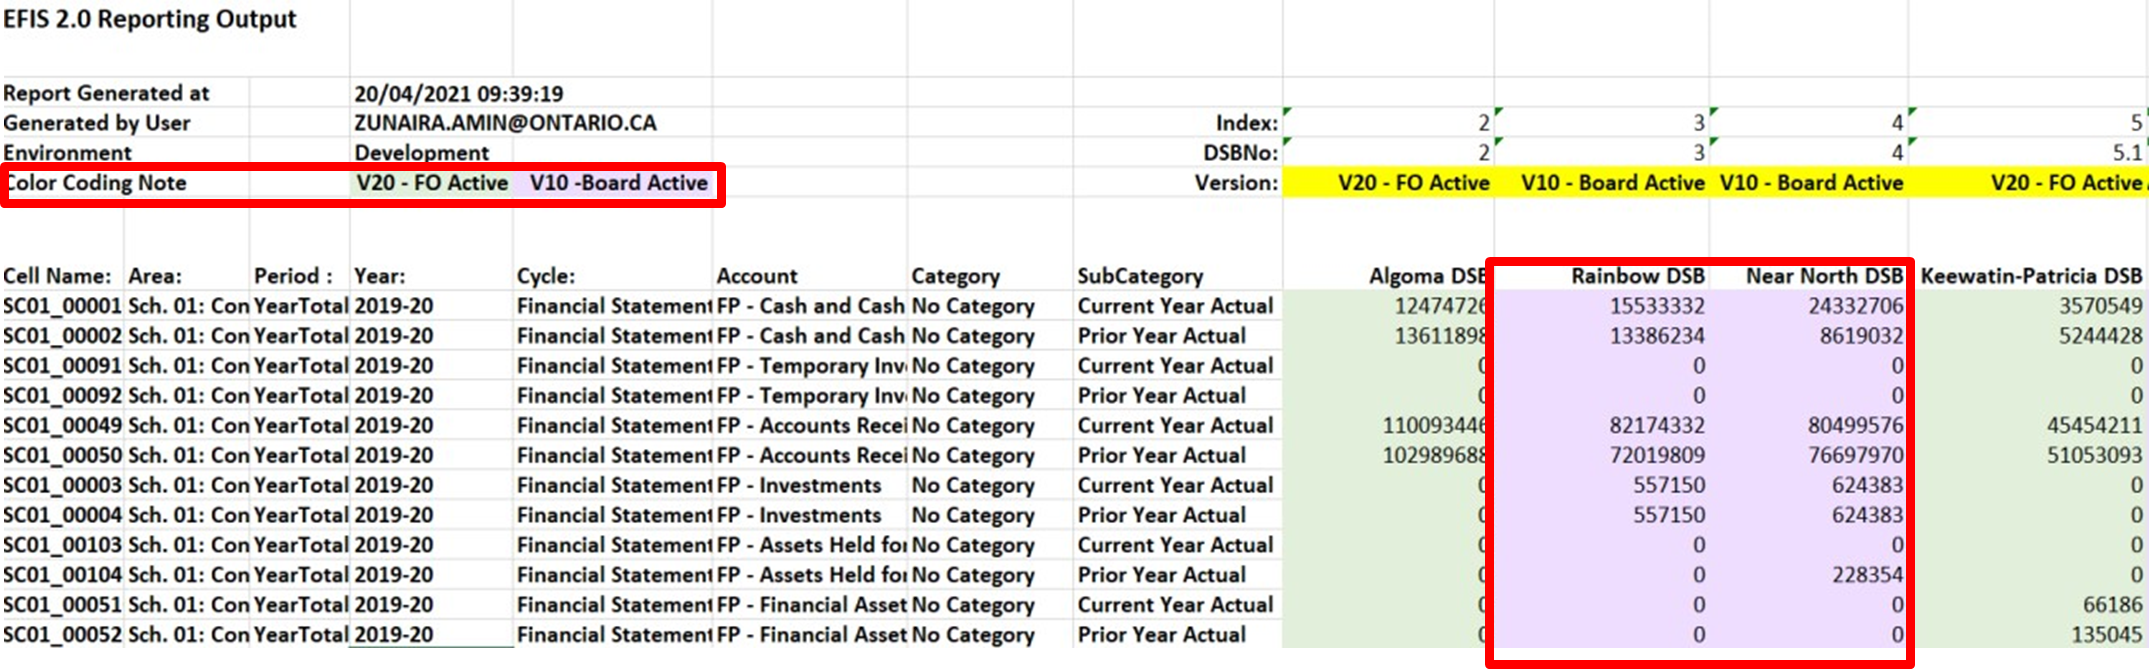
This extract contains V20 data and is colour-coded green accordingly (see 2.2.4 Select Version for more information on version colour-coding). The row indicating the version, highlighted yellow in the images below for the purposes of this guide, will also notify the user which version of the data is displayed.

In the following output (also from a single doc set), V10 data was substituted in the place of unavailable V20 data for two recipients (Rainbow DSB and Near North DSB) and thus, the substituted cells are colour-coded purple to signify that it is V10 data. The “Version” row, indicated in yellow, notes which version of the data is displayed.
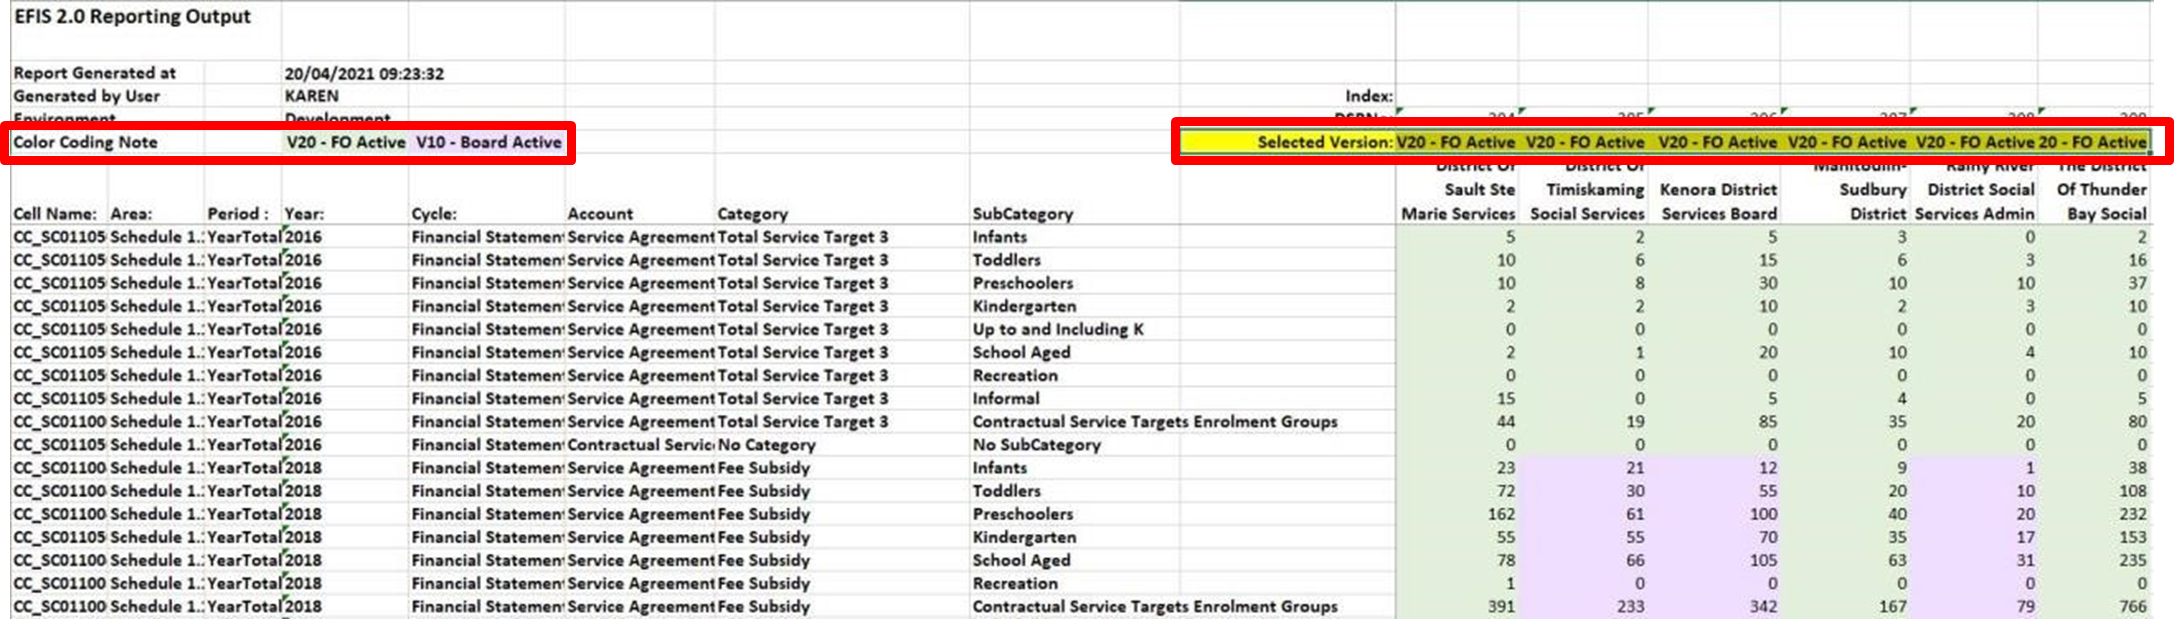
For extracts containing data from multiple doc sets, the row highlighted yellow will instead indicate the version selected by the user when preparing the extract, and will be renamed from “Version” to “Selected Version” to indicate the user's choice. In the image below, the user's selected version is V20-FO Active. However, only V10 data is available for certain cells. Given that the user selected V20-FO Active, the row highlighted yellow indicates the user's choice, while the colour-coded purple cells indicated where V10 data was substituted, due to a lack of available V20 data.
For extracts containing data from multiple doc sets, doc sets will be sorted by Year in ascending order, and then by Cycle Order (i.e. Estimates, Revised Estimates, Financial Statements, March Report).
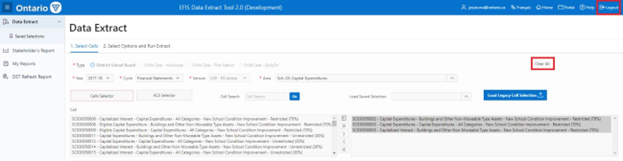
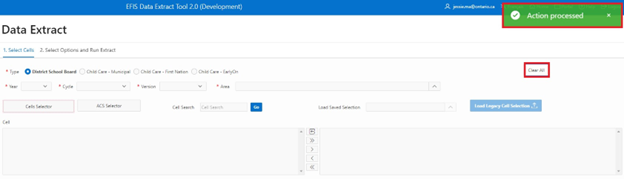
Once the extract is complete, the user can prepare a new extract by returning to the Select Cells page and using the Clear All button to clear all selections to begin a new extract. If further extracts are not required, the user can Logout.
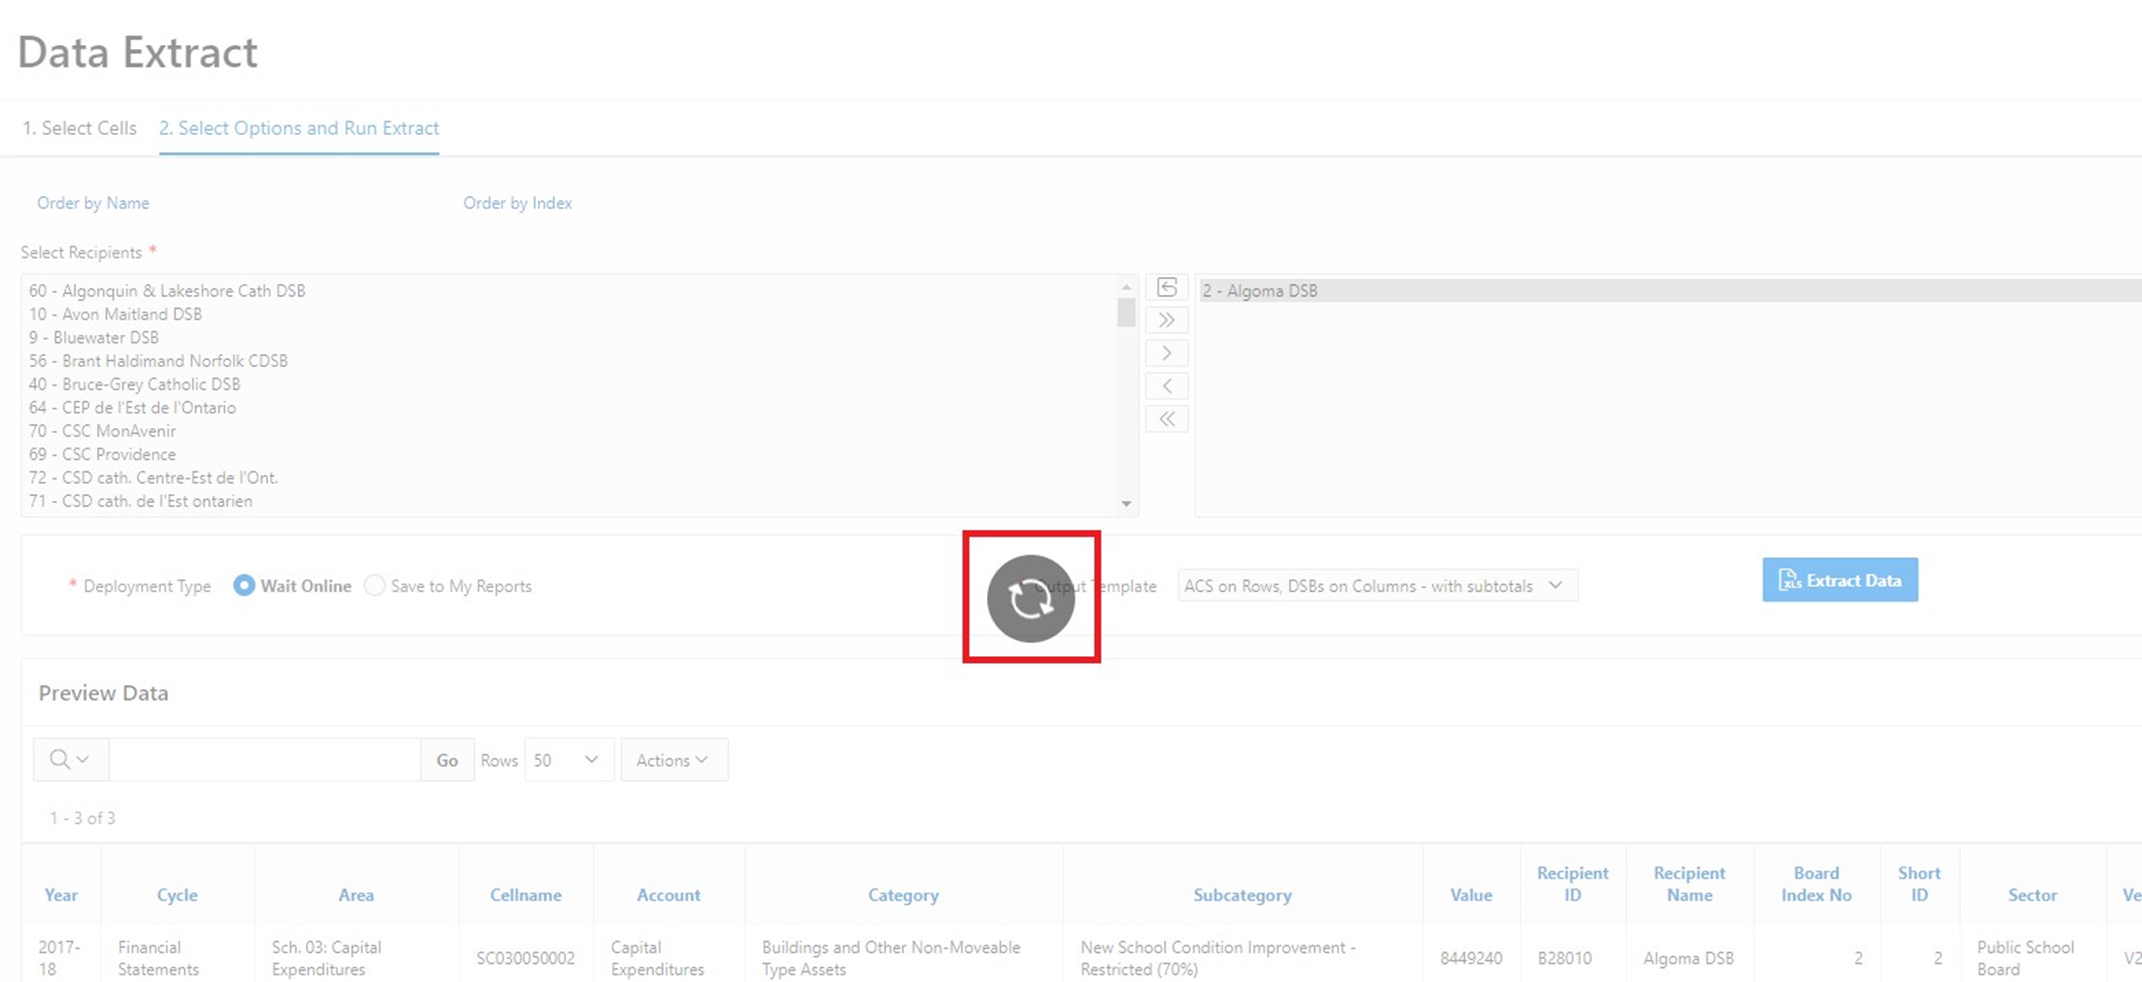
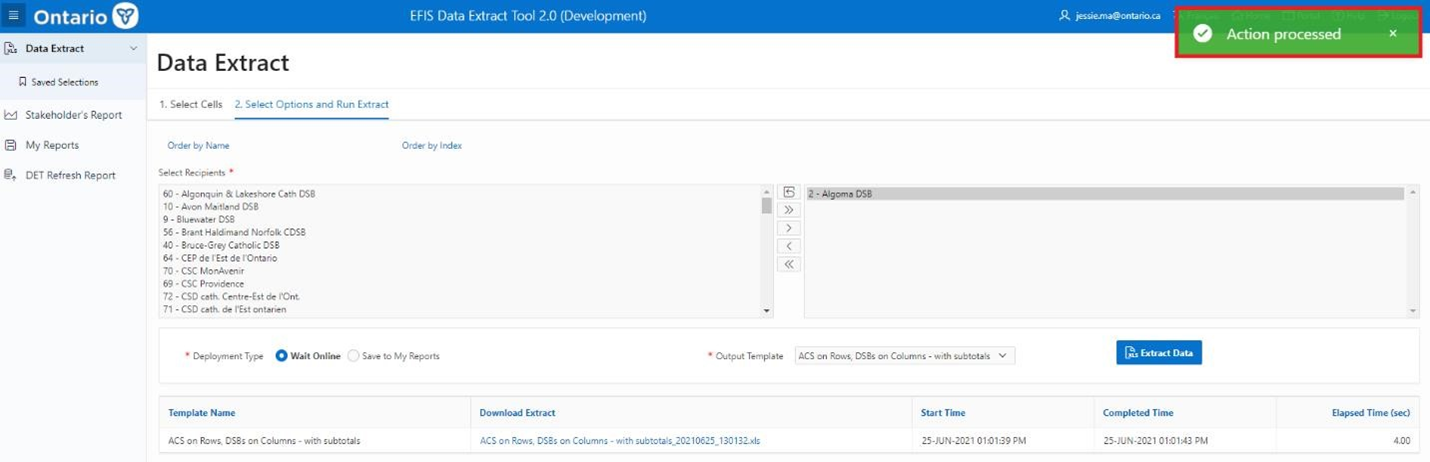
If a user has chosen to Wait Online for the Extract, a loading symbol will appear in the center of the page while the extract is being completed. Once finished, a green pop-up message will appear to notify the user that the action has been processed and the extract is ready for download.
The extract will be returned to the Select Options and Run Extract page. The user will be able to download the Extract Template by selecting the link under the column heading Download Extract.
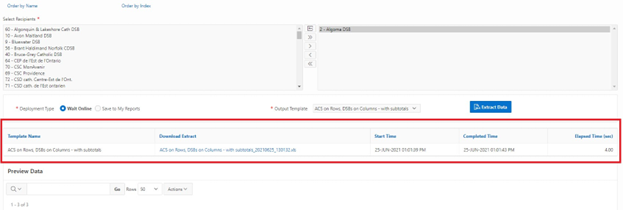
The user will select and click on the file which will open in Excel.
Note
For Release 1, the following Excel format error will be displayed. Select Yes.

Users can start a new extract, by returning to the Select Cells page, clearing data and beginning a new extract. If further extracts are not required, the user can Logout.
2.3.7 Clear All
Users can create a new extract, by returning to the Select Cells page and clicking on the Clear All button. Once a user selects Clear All, a green pop-up message will appear. At this point, the user can initiate another extract or Logout.
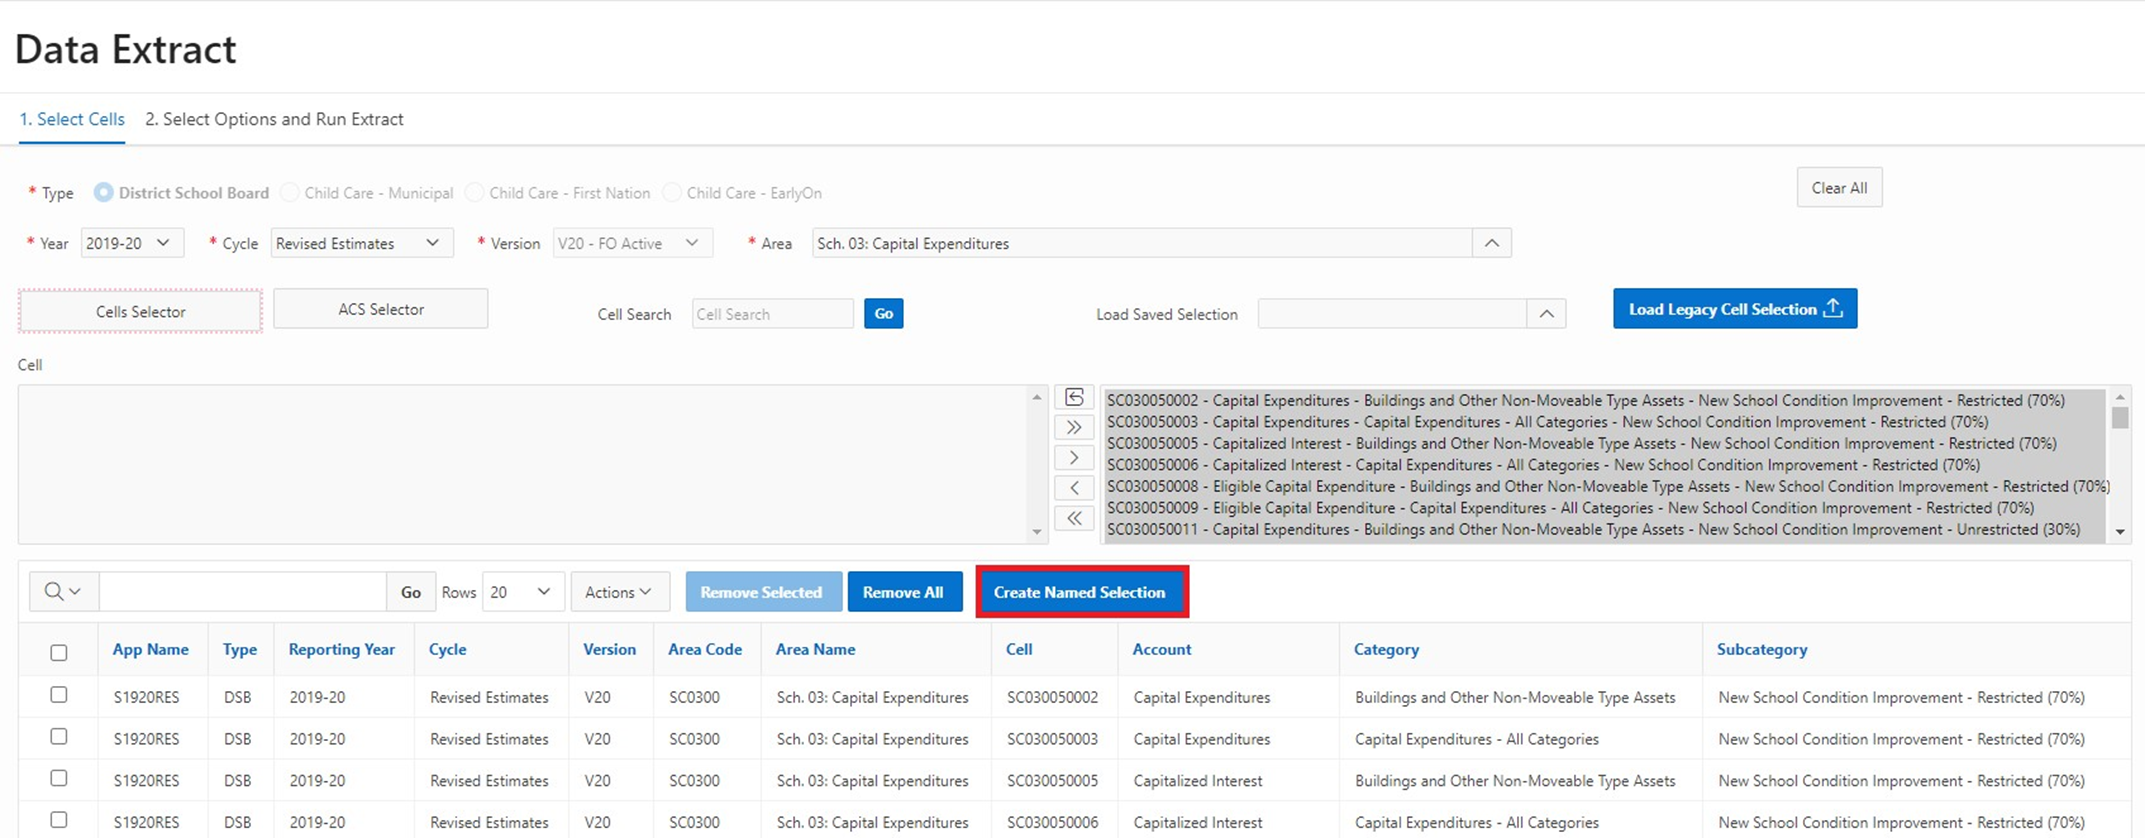
3 Creating & Loading Saved Selections
Once users have prepared a list of cells for extraction, they have the option to save the selection for future use. Click on the Create Named Selection button to do so.
Note
A doc set (Year, Cycle, and Version combination) must be selected prior to creating and loading saved selections.
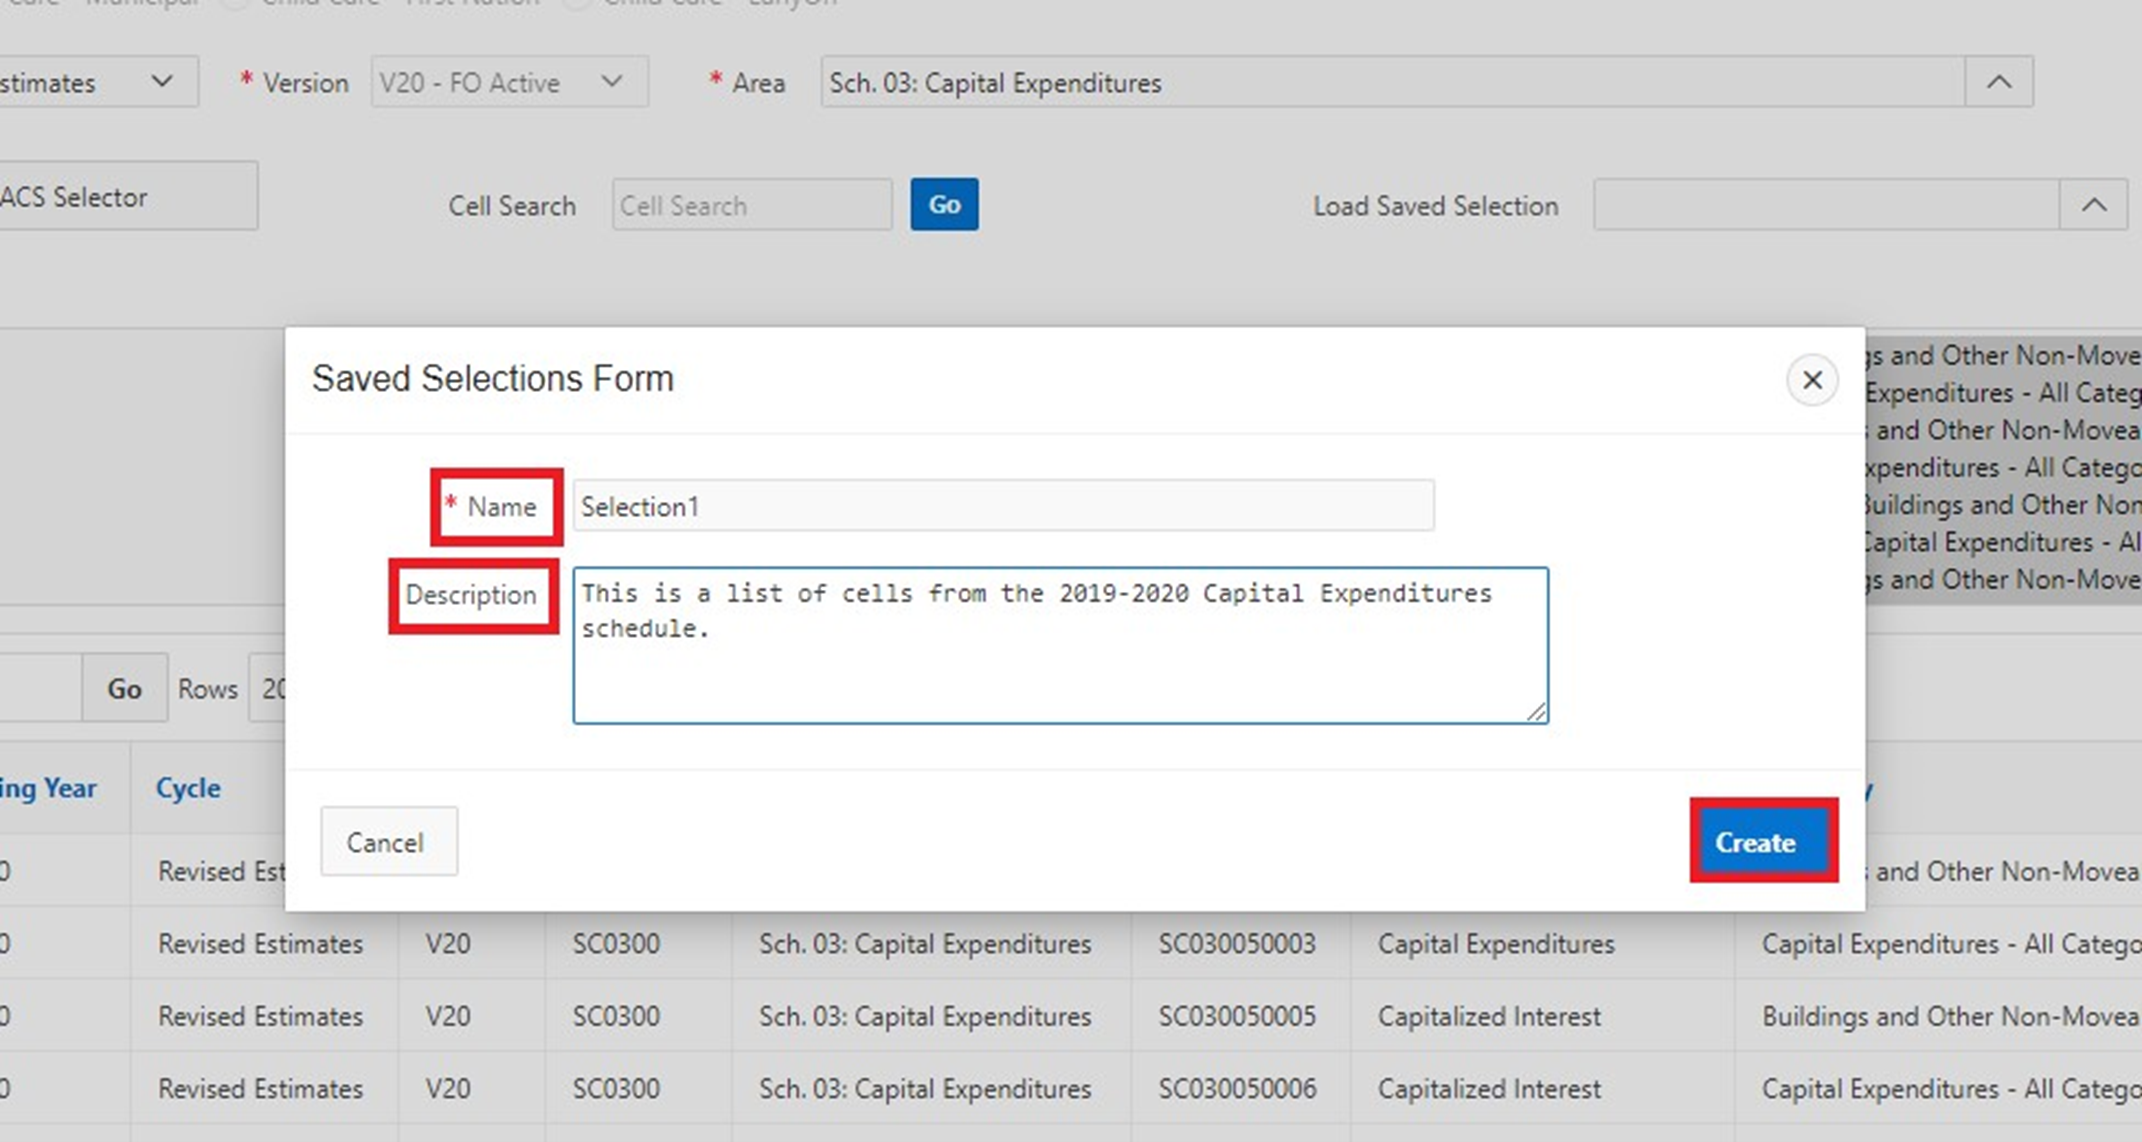
Users can assign a unique name to their selection (required) and add a description (optional). In the example below, the name “Selection1” has been given to this list of cells. A brief description has also been included. Click on Create to save your selection.
A green notification message appears in the top right corner of the page to confirm that your selection has been created.
To open a saved selection, click on the Load Saved Selection dropdown arrow.
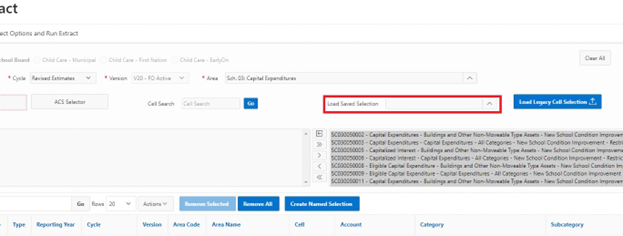
A list of saved selections will appear. Note that the recently created Selection1 has been added to the list.
A search bar is also available to find selections with specific titles.
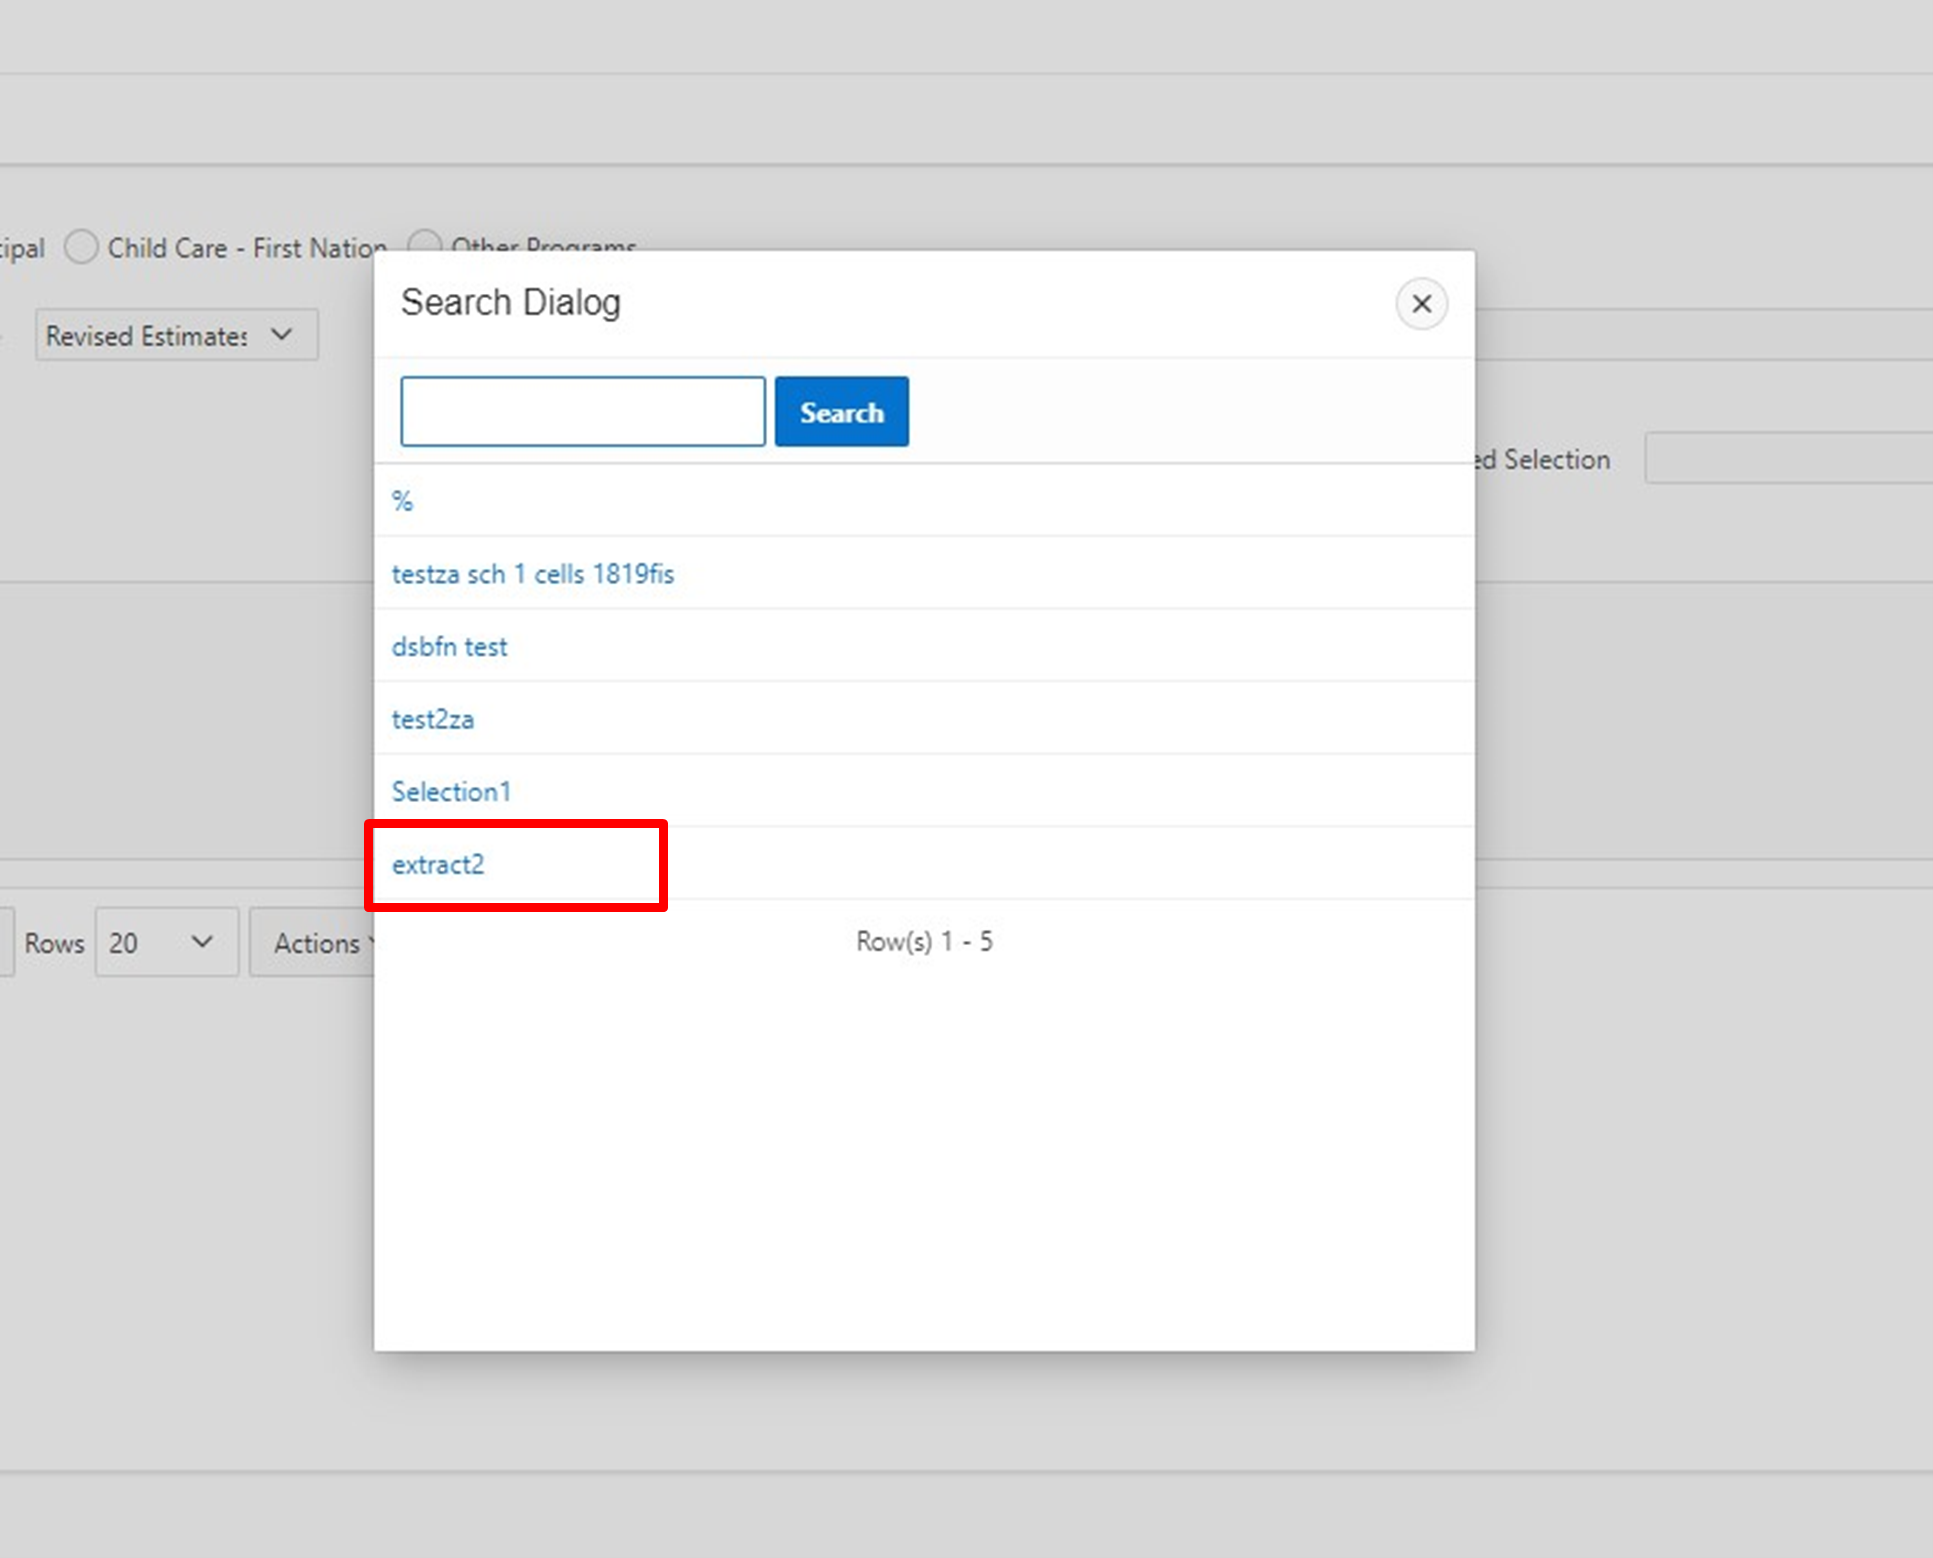
Click on the selection you wish to work with. For example, click on “extract2.” The chosen selection and its cells will populate the Preview section of the DET page. If the cell is available for that Year and Cycle, it will be added to the list.
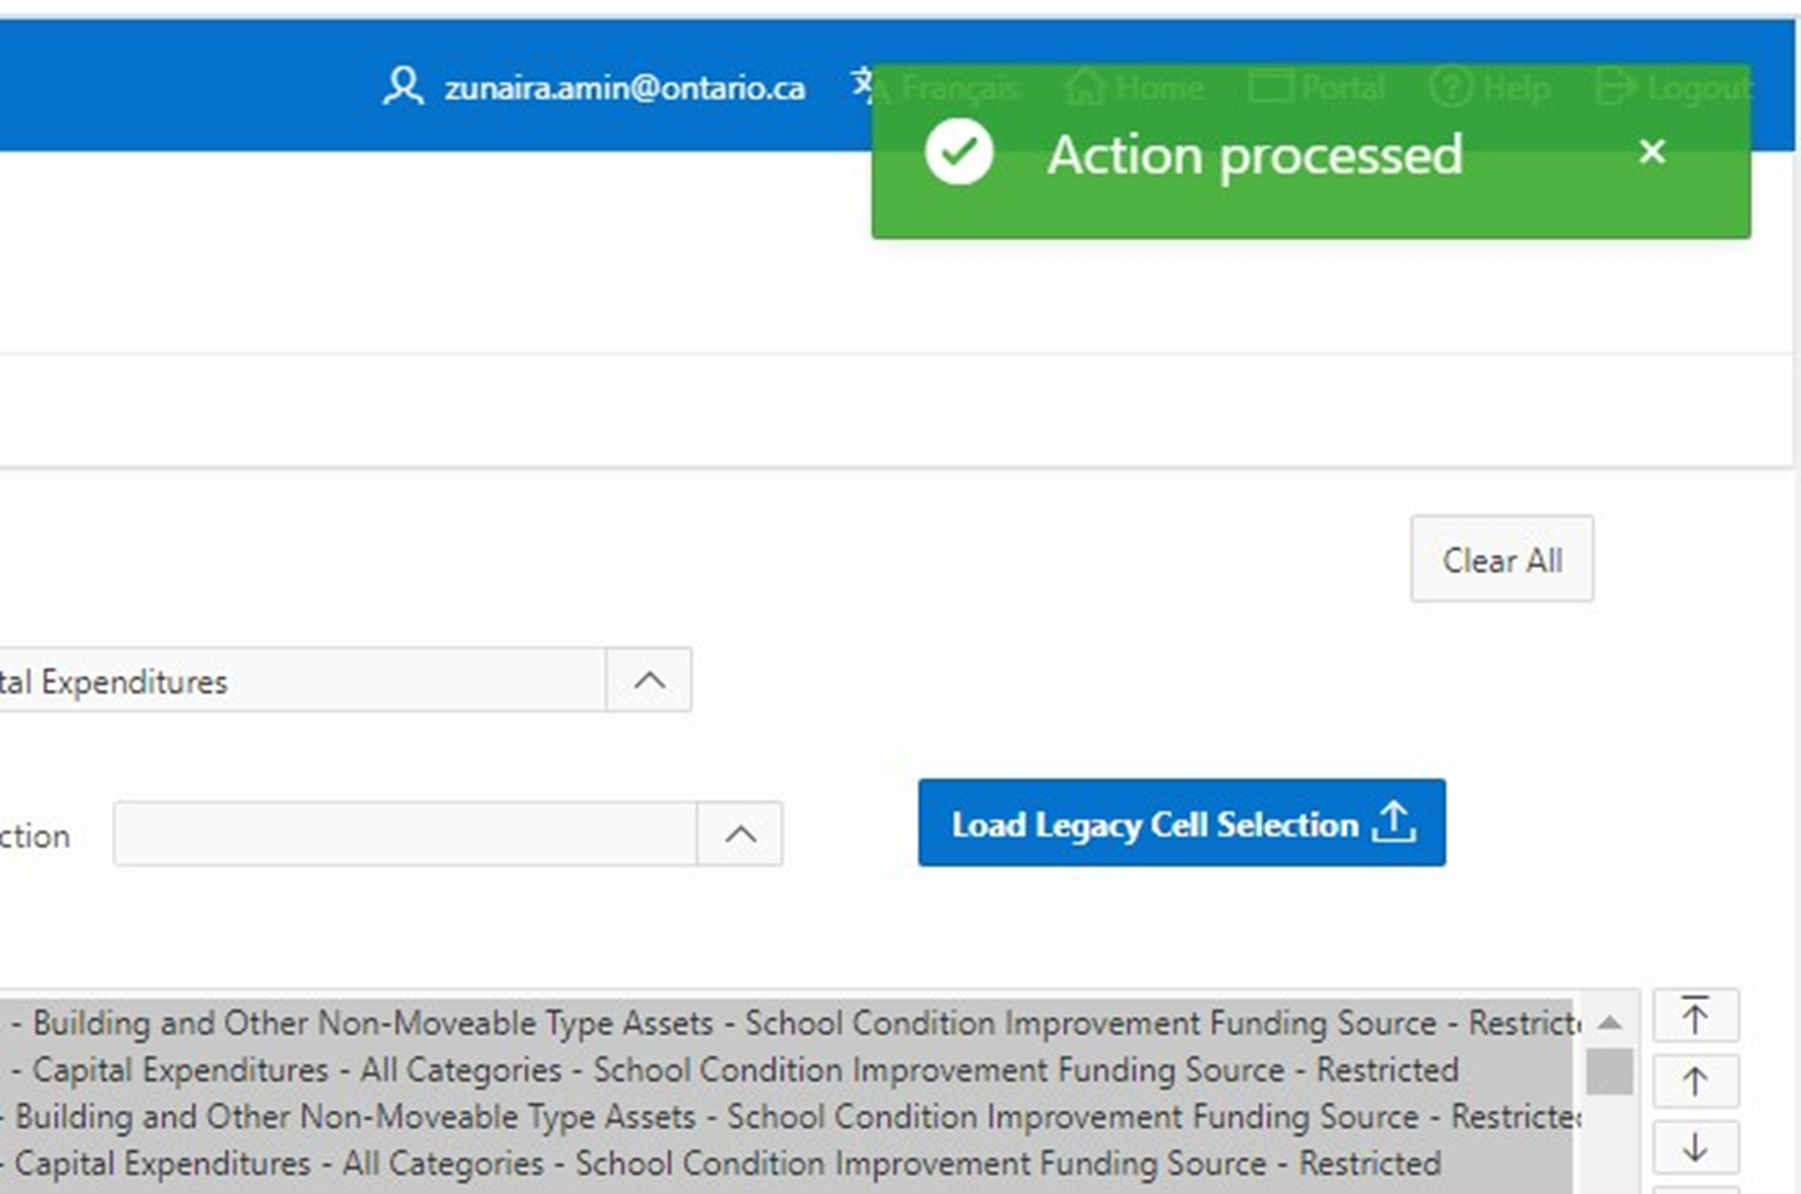
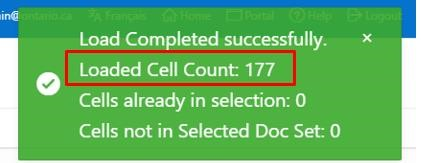
A green notification message appears in the top right corner of the page to confirm the selection has been loaded. The Loaded Cell Count notes the number of cells added to the Preview section. In the example below, the saved selection contained 177 cells, and so 177 cells were loaded into the list.
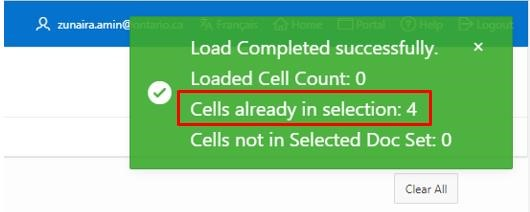
If the cells in the saved selection were already present in the Preview list, the green notification message will note the number of Cells already in selection. In the example below, the saved selection contained four cells. However, these four cells were already selected by the user. These four cells are reloaded into the list, but the user is also notified via a green pop-up that their saved cells were already in the selection.
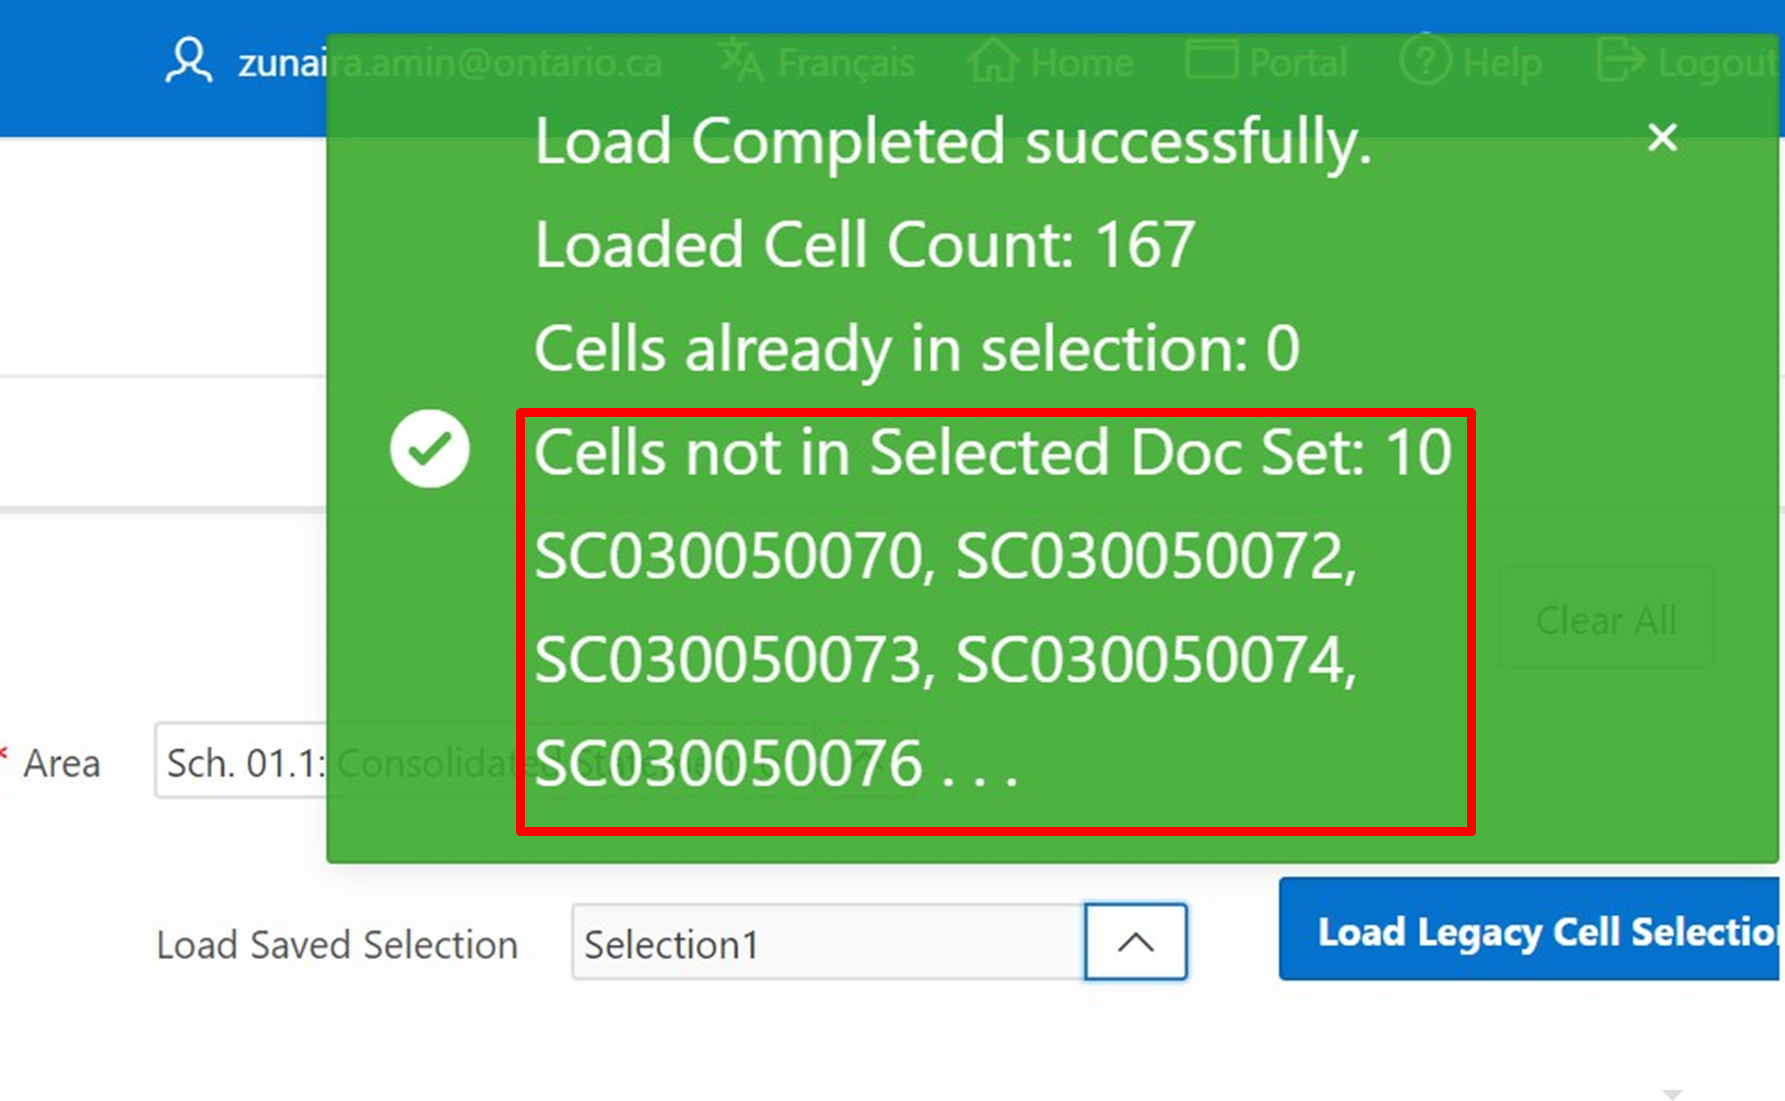
If the cells are not available in the selected Year/Cycle combination, the green notification message will note the number of Cells not in Selected Doc Set. Only five of the unavailable cells will be listed in the notification message.
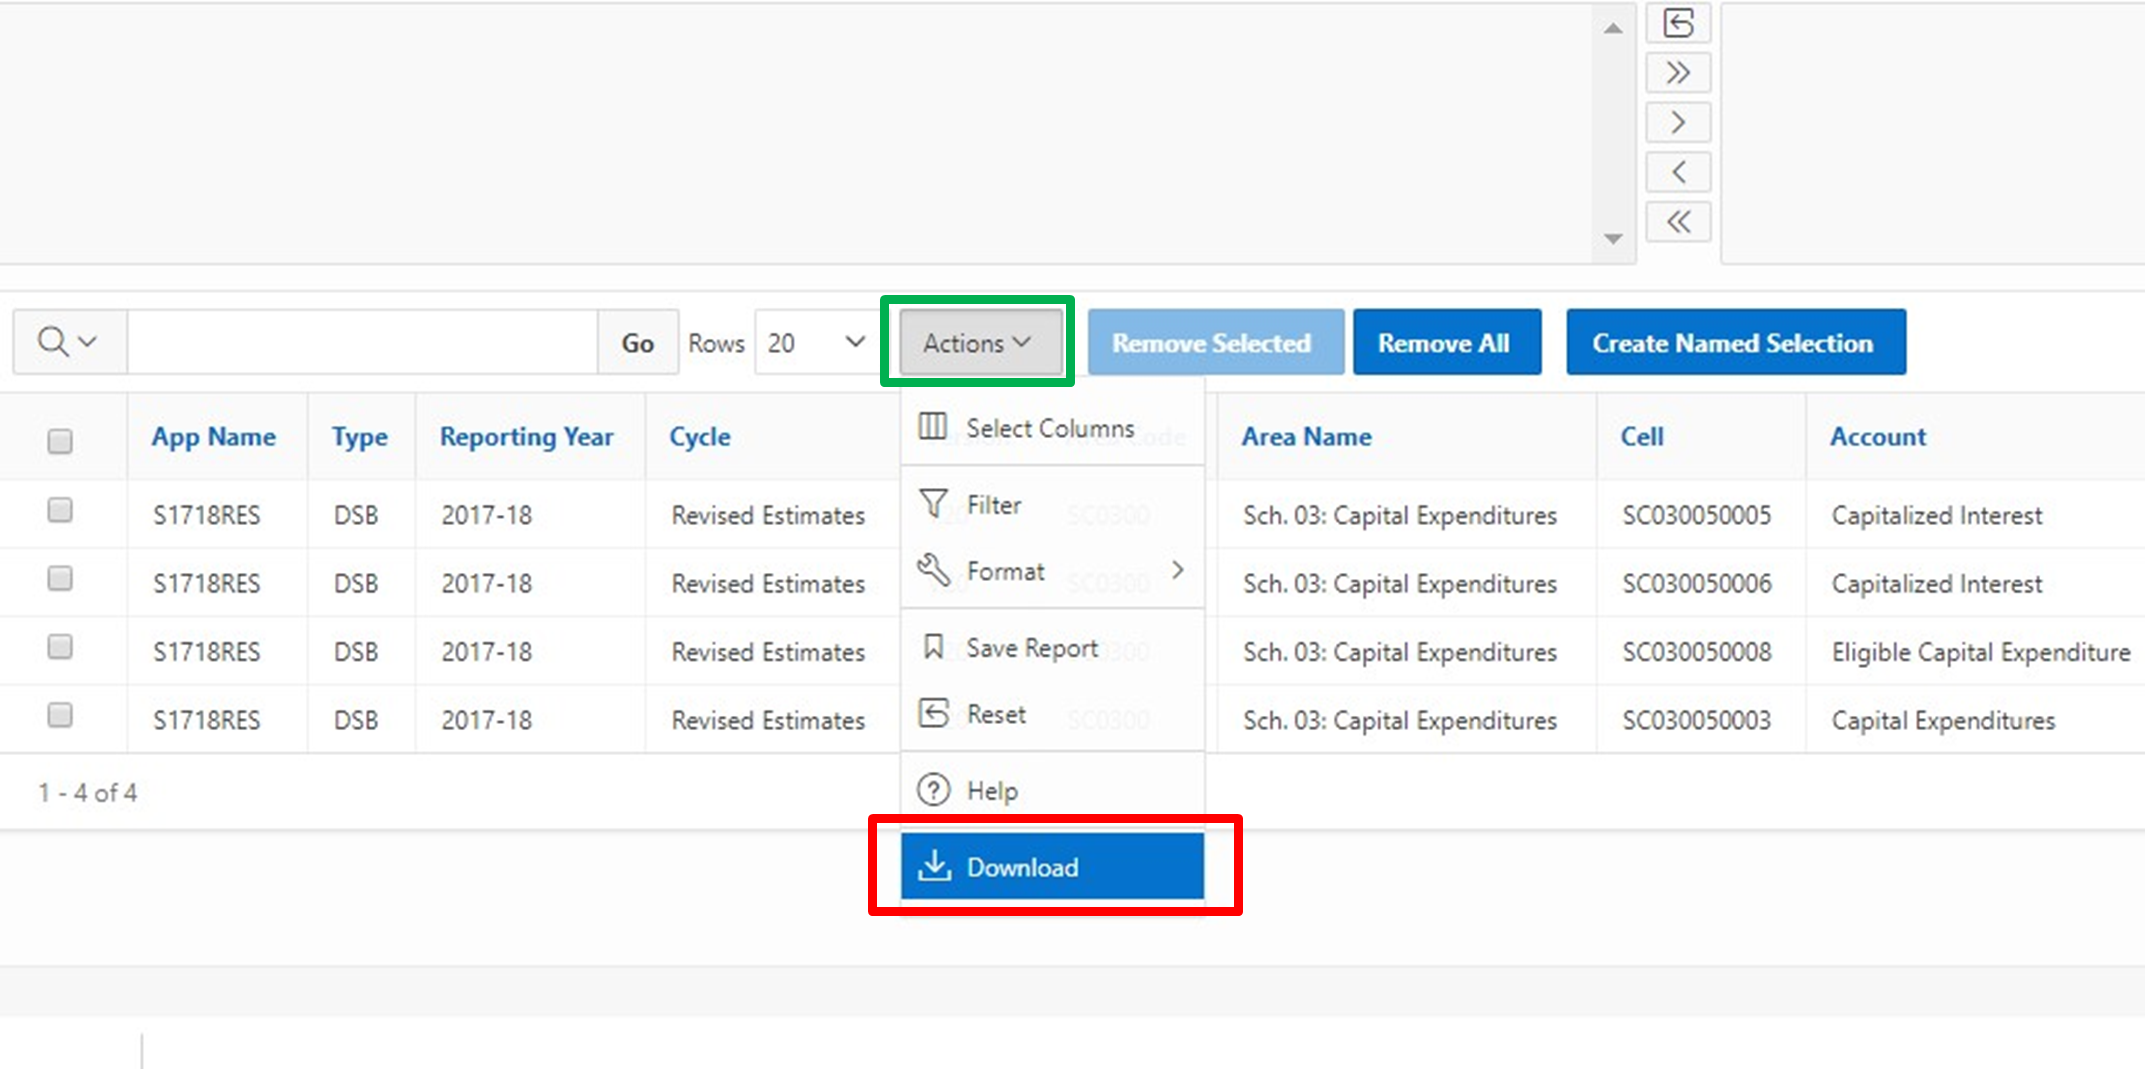
Users can also download their list of cells via the Download button found in the Action menu.
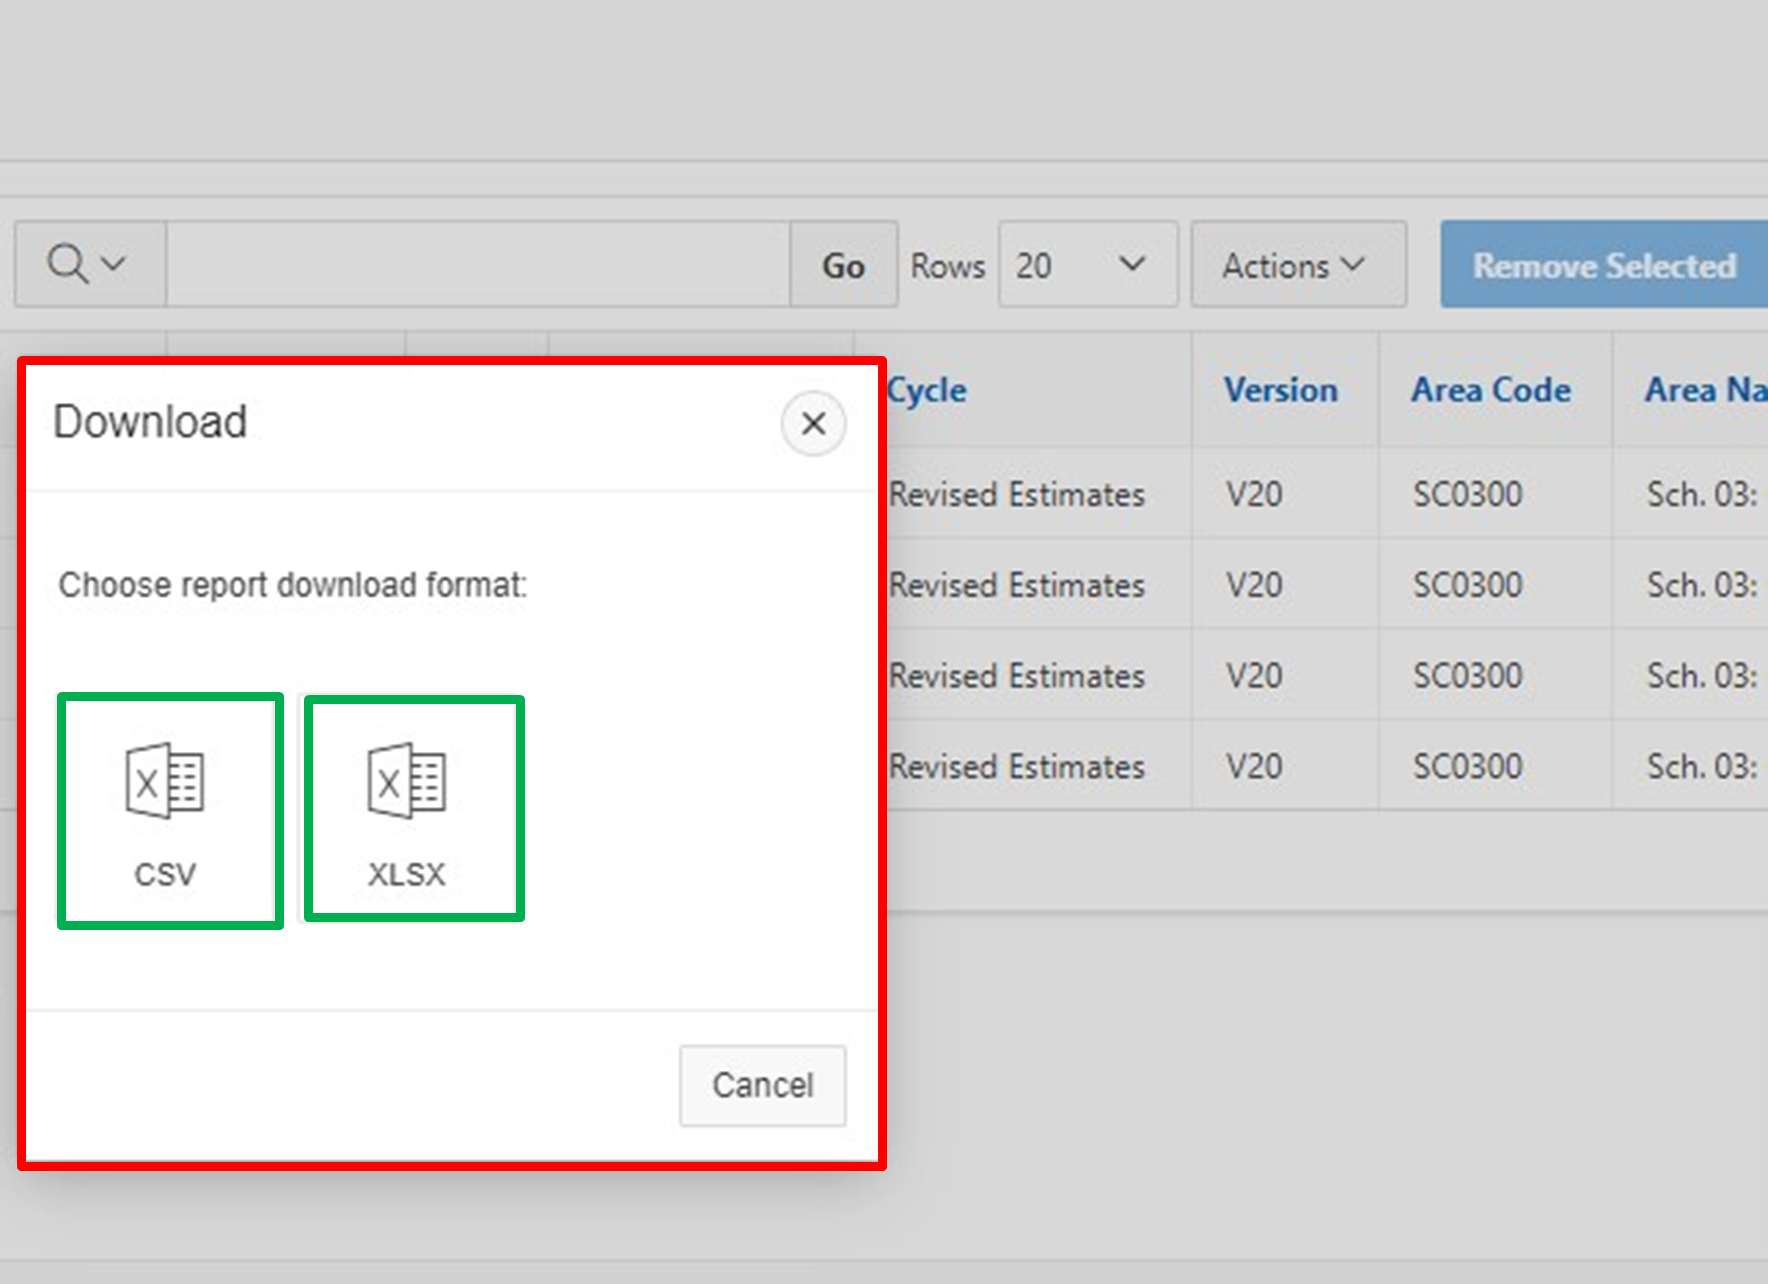
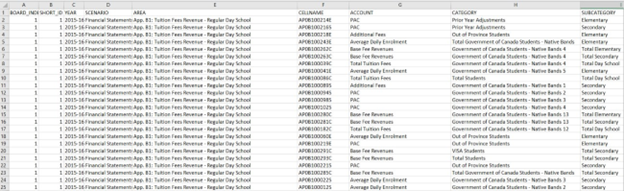
Users can download the list of cells in CSV and XLSX Excel formats.
Sample: CSV Format:

Sample: XLSX Format:

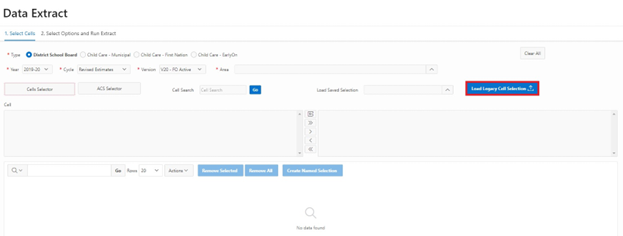
4 Loading Legacy CSV
Lists of cells from the DET 1.0 in CSV format can be uploaded to the DET. Click on the Load Legacy Cell Selection button.
Note
A doc set (Year, Cycle, and Version combination) must be selected prior to creating and loading saved selections.
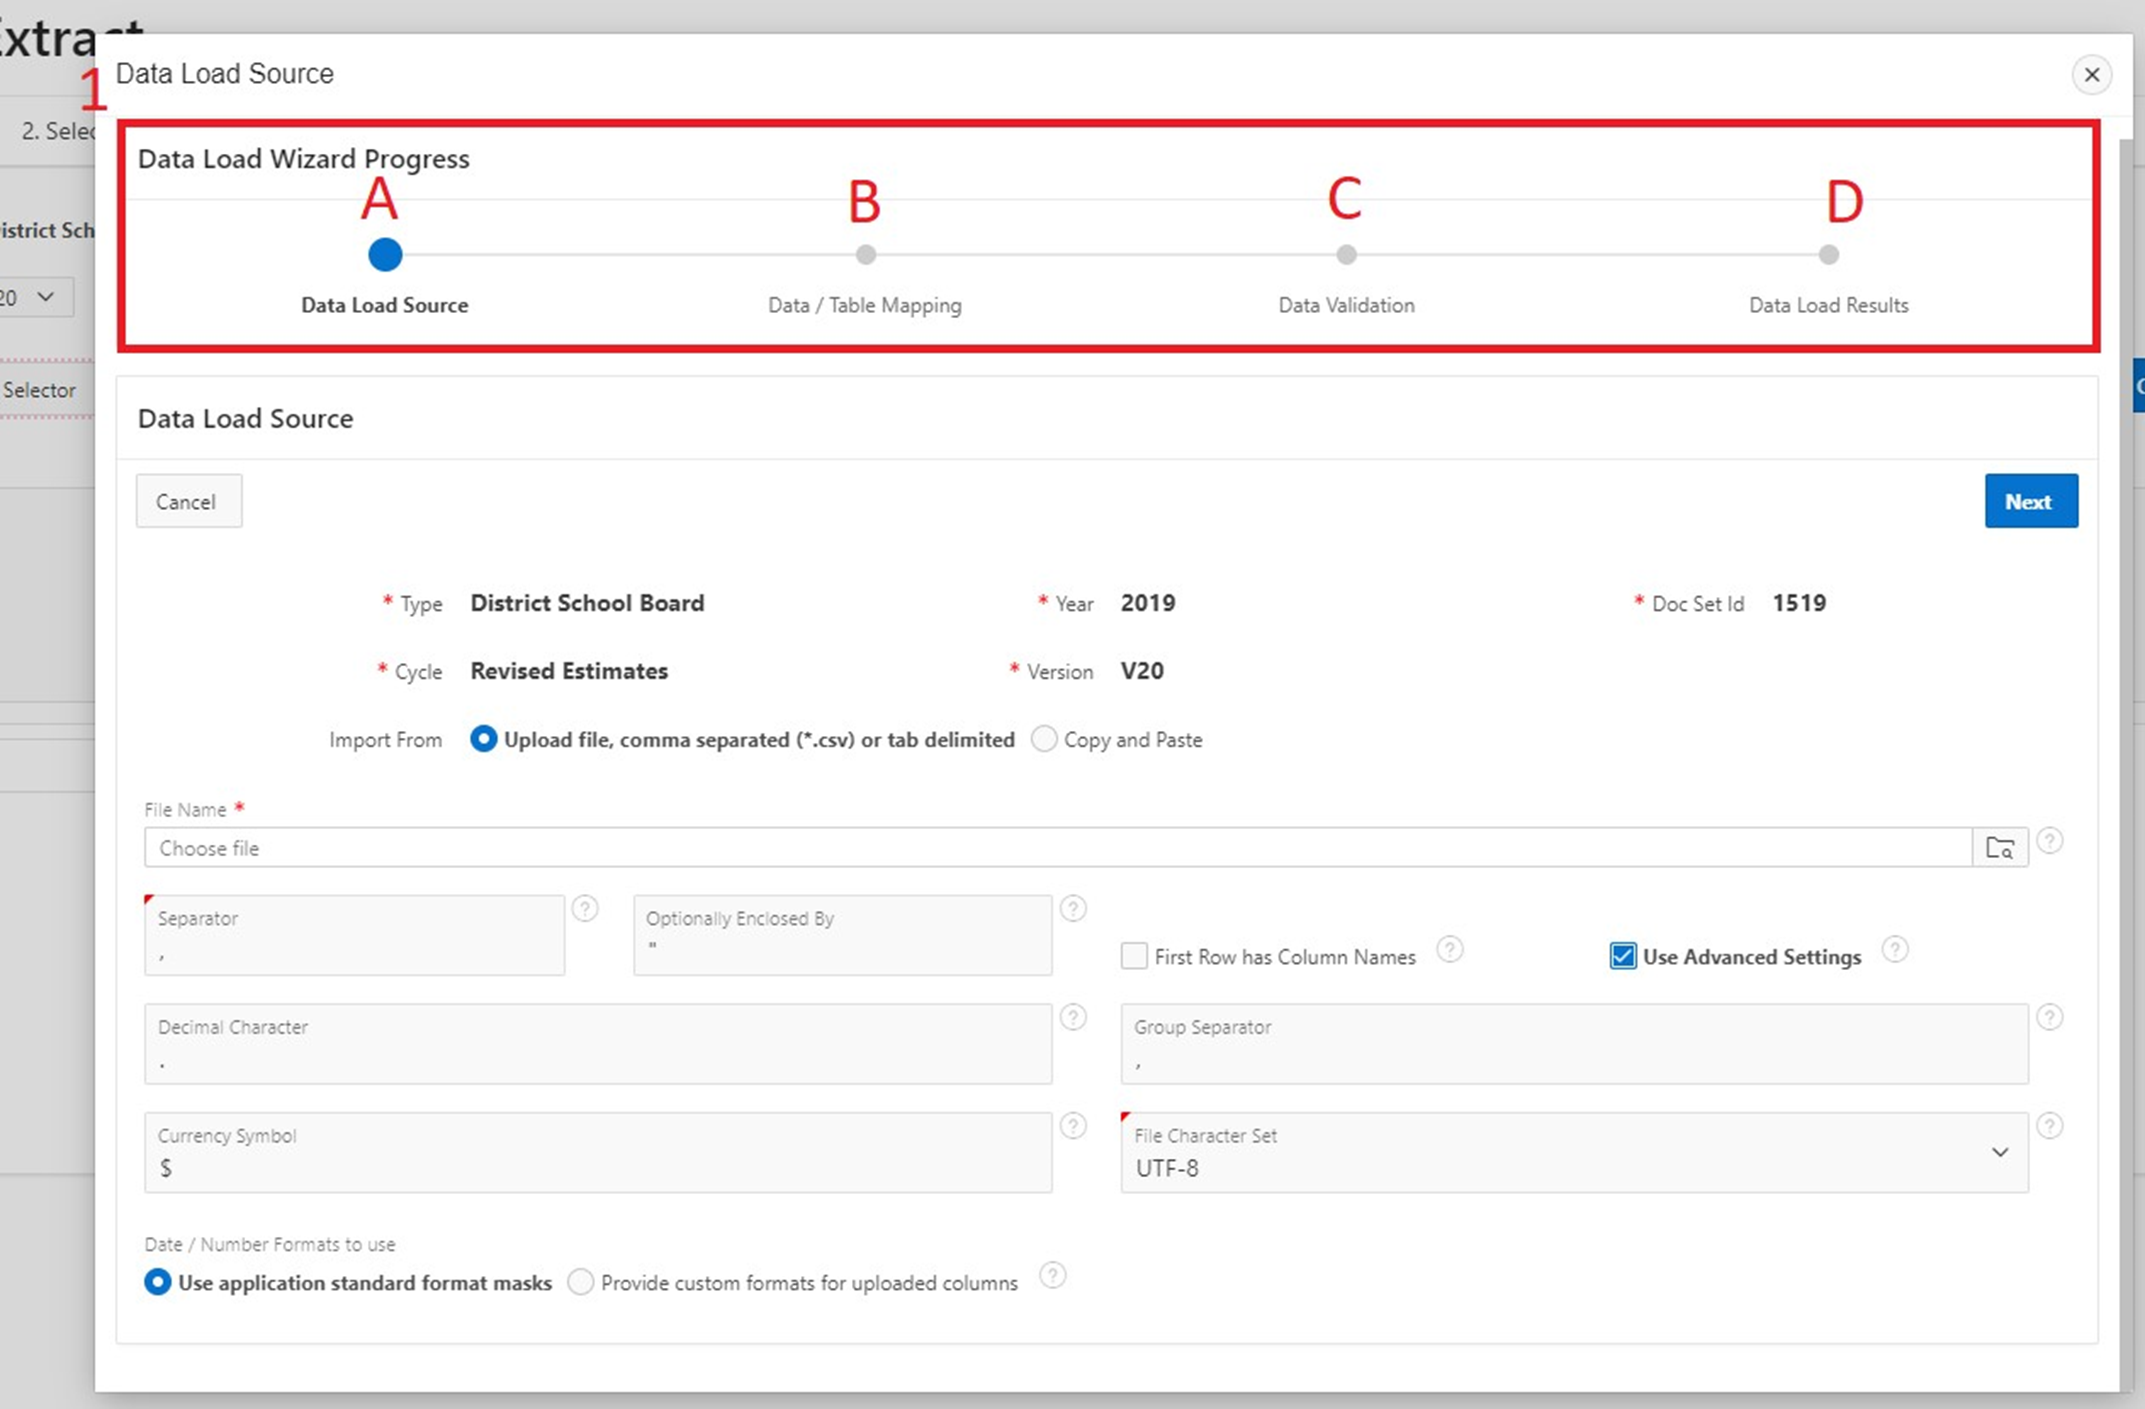
The Data Load Wizard will appear. The following sections encompass the Data Load Wizard:
-
Data Load Wizard Progress bar with 4 stages:
- Data Load Source
- Data/Table Mapping
- Data Validation
- Data Load Results
-
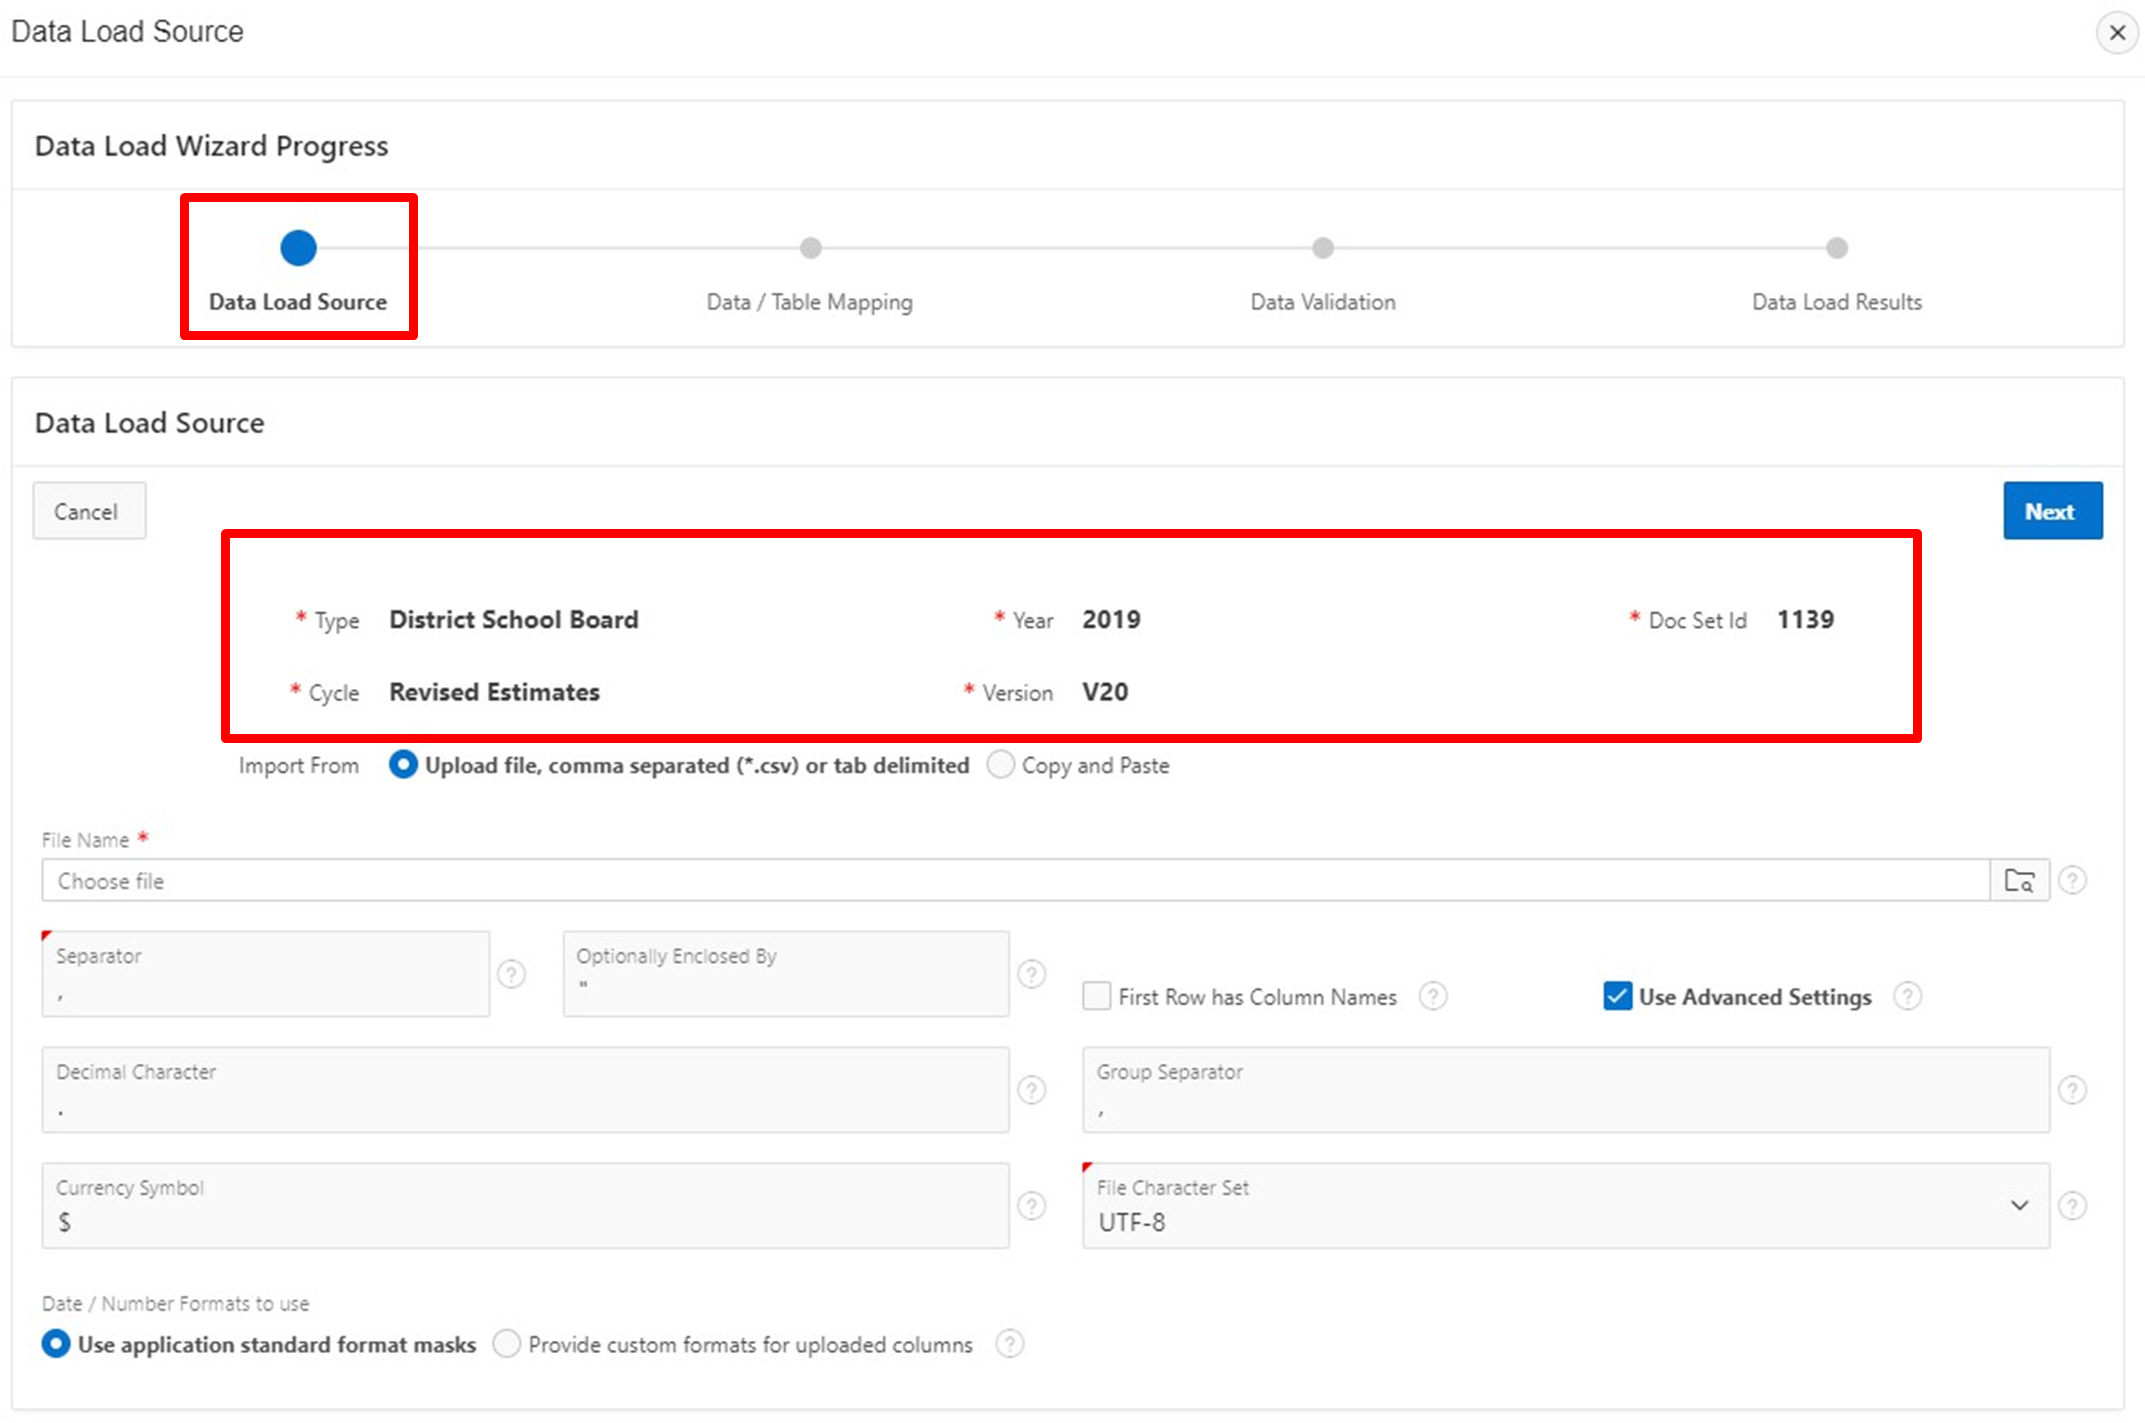
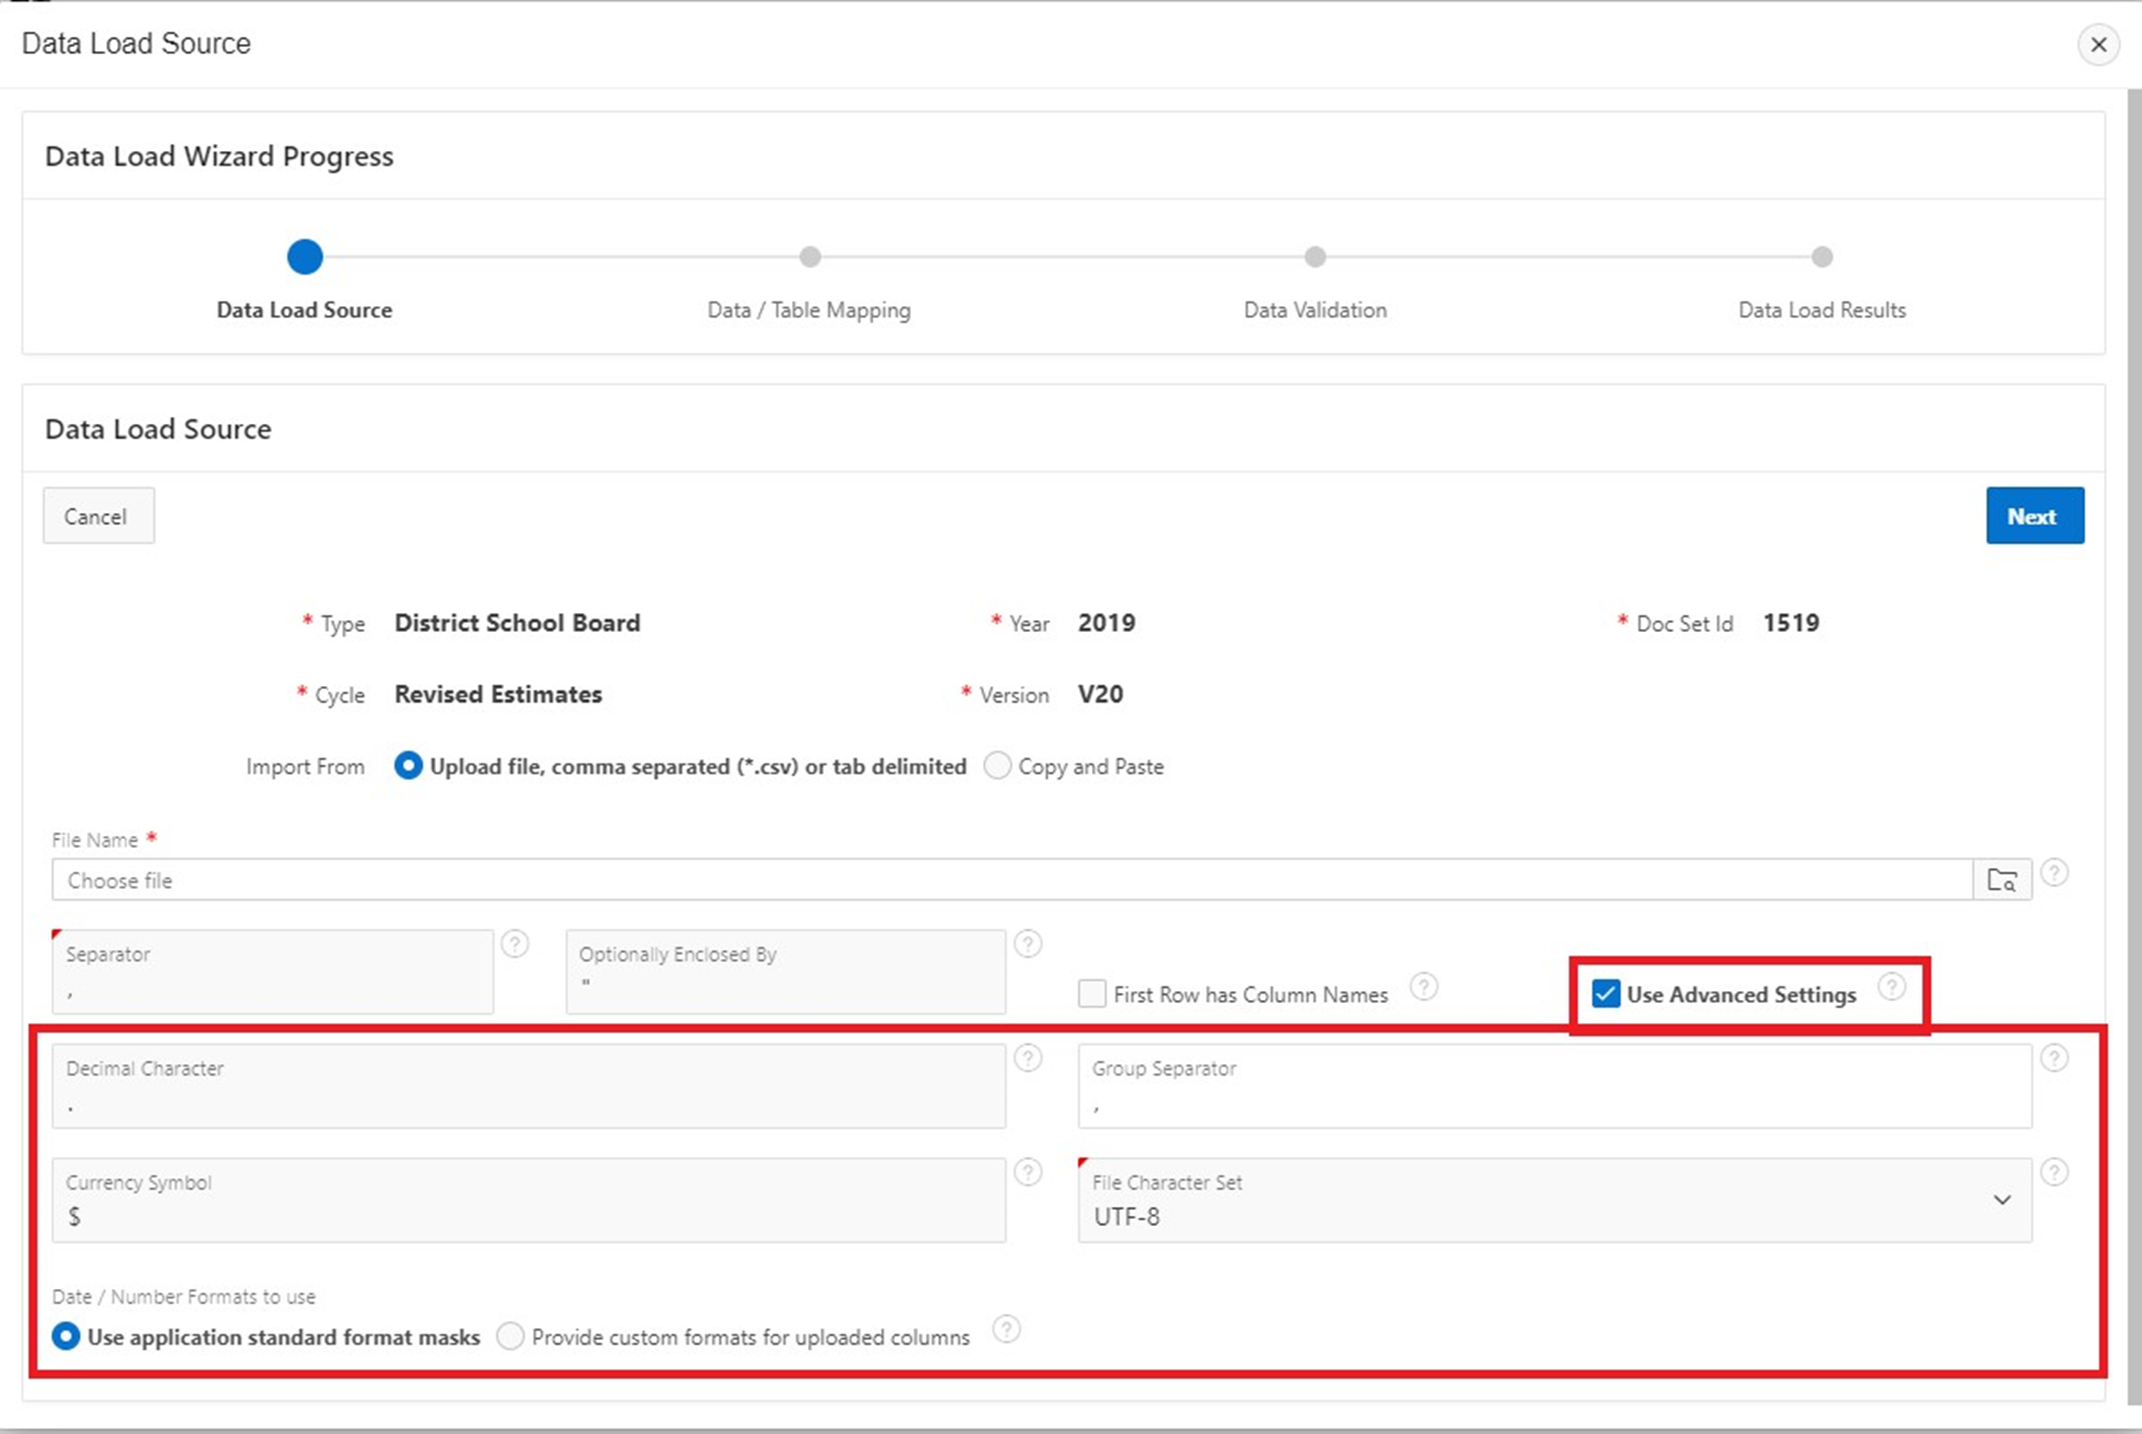
Data Load Source
- Type, Doc Set ID, Version - these are selected by the user before initiating legacy load.
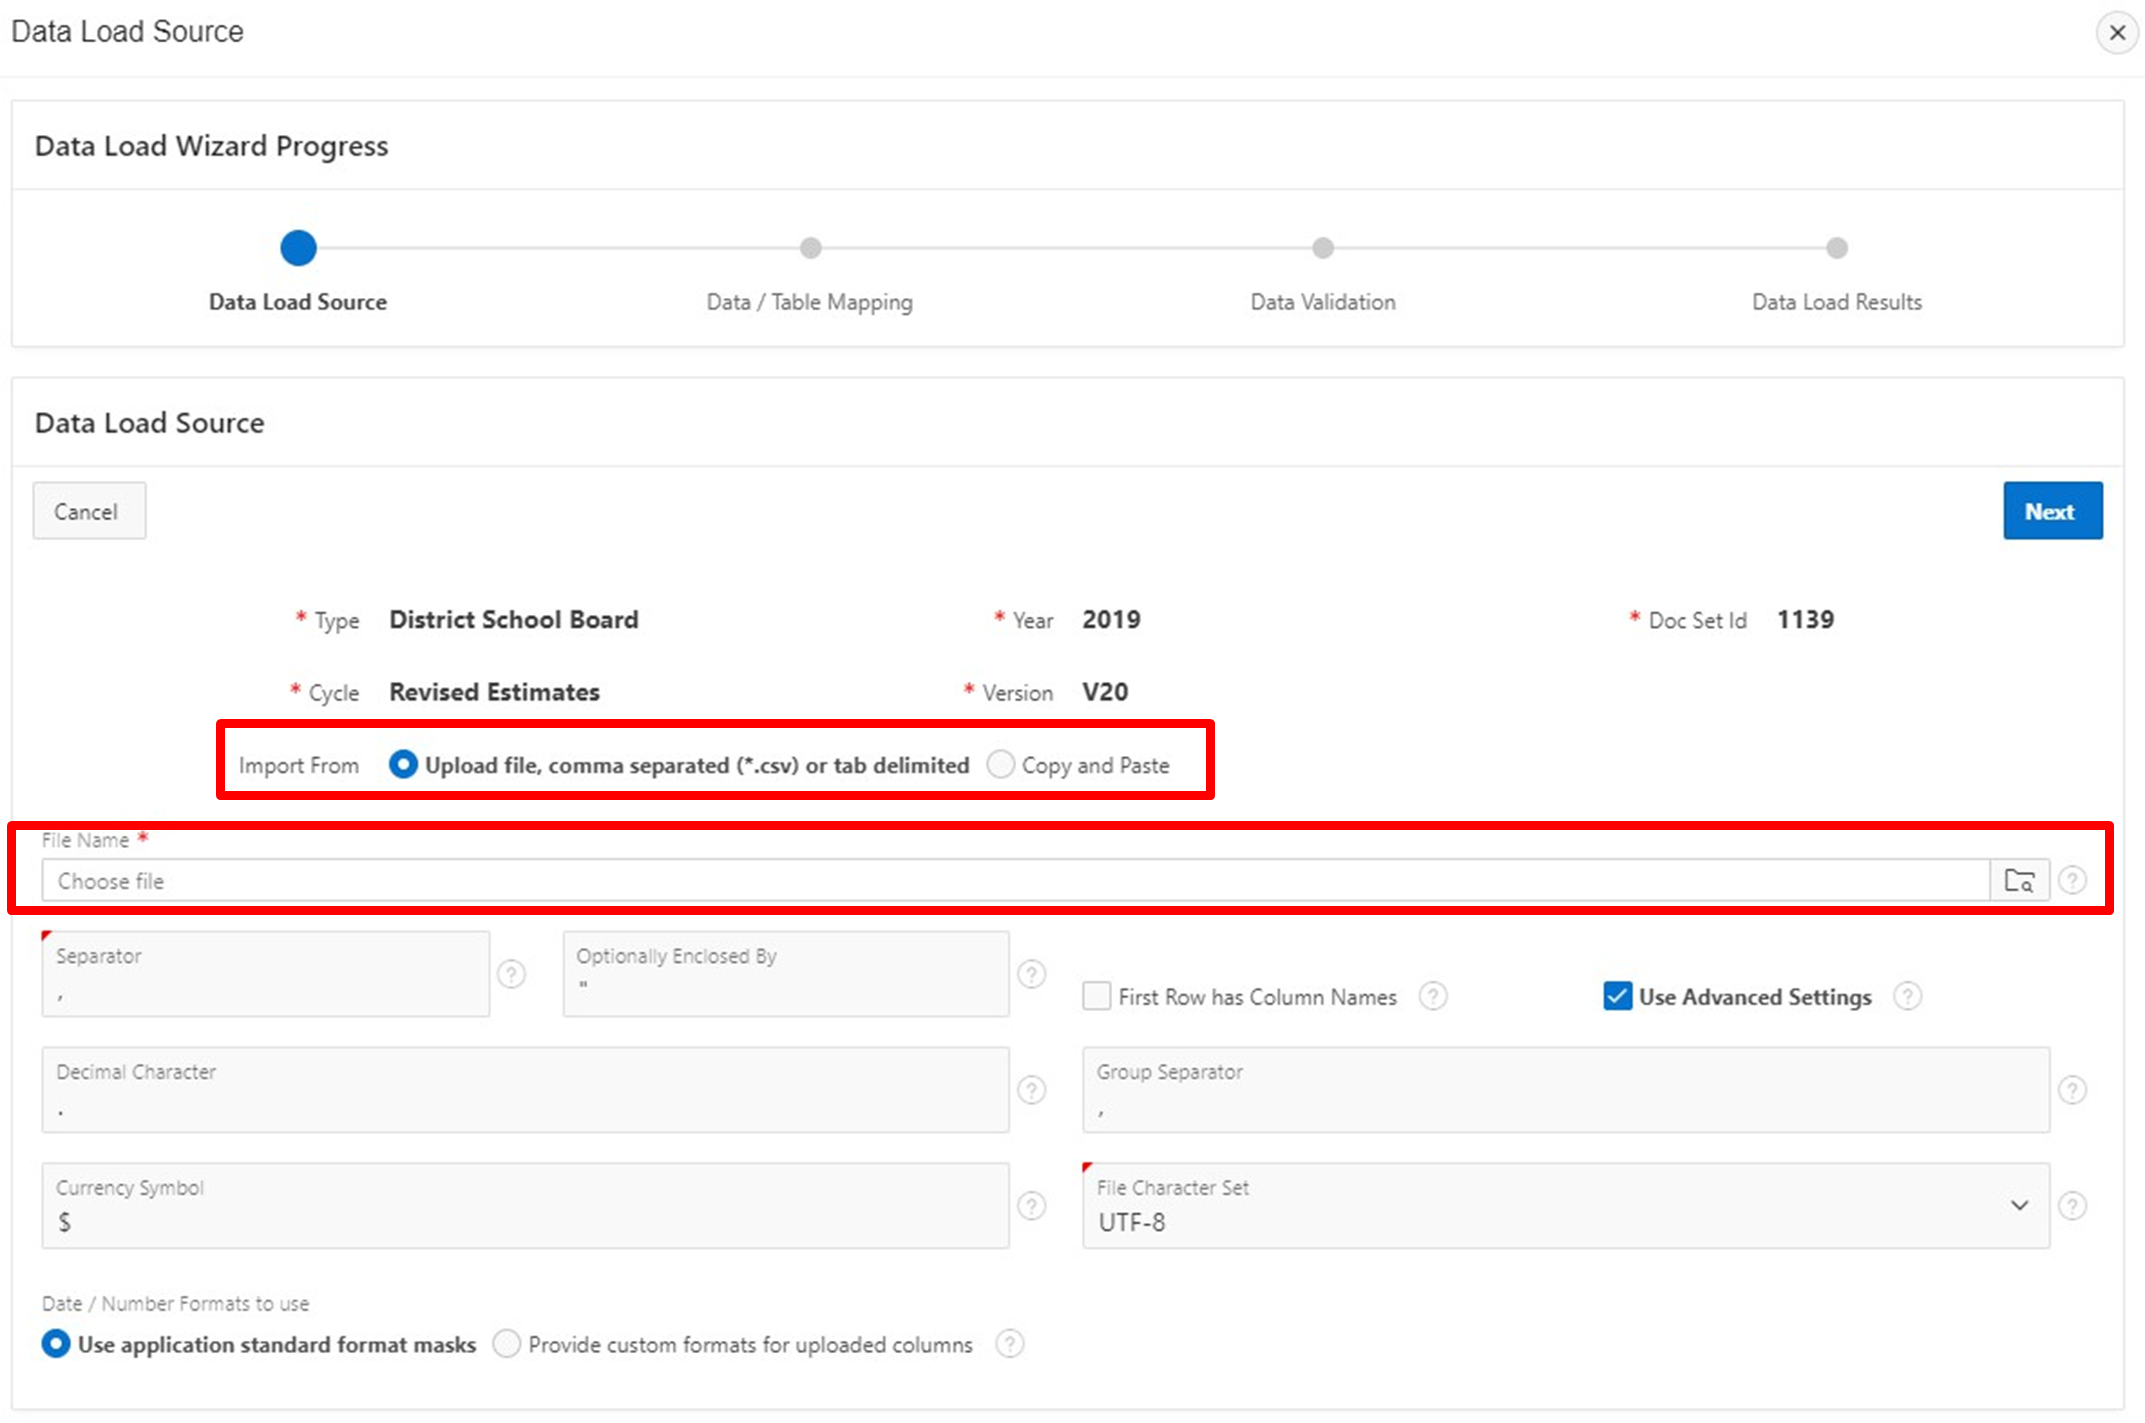
- Import - User may import cell list in the following ways:
- Upload CSV file containing cell details.
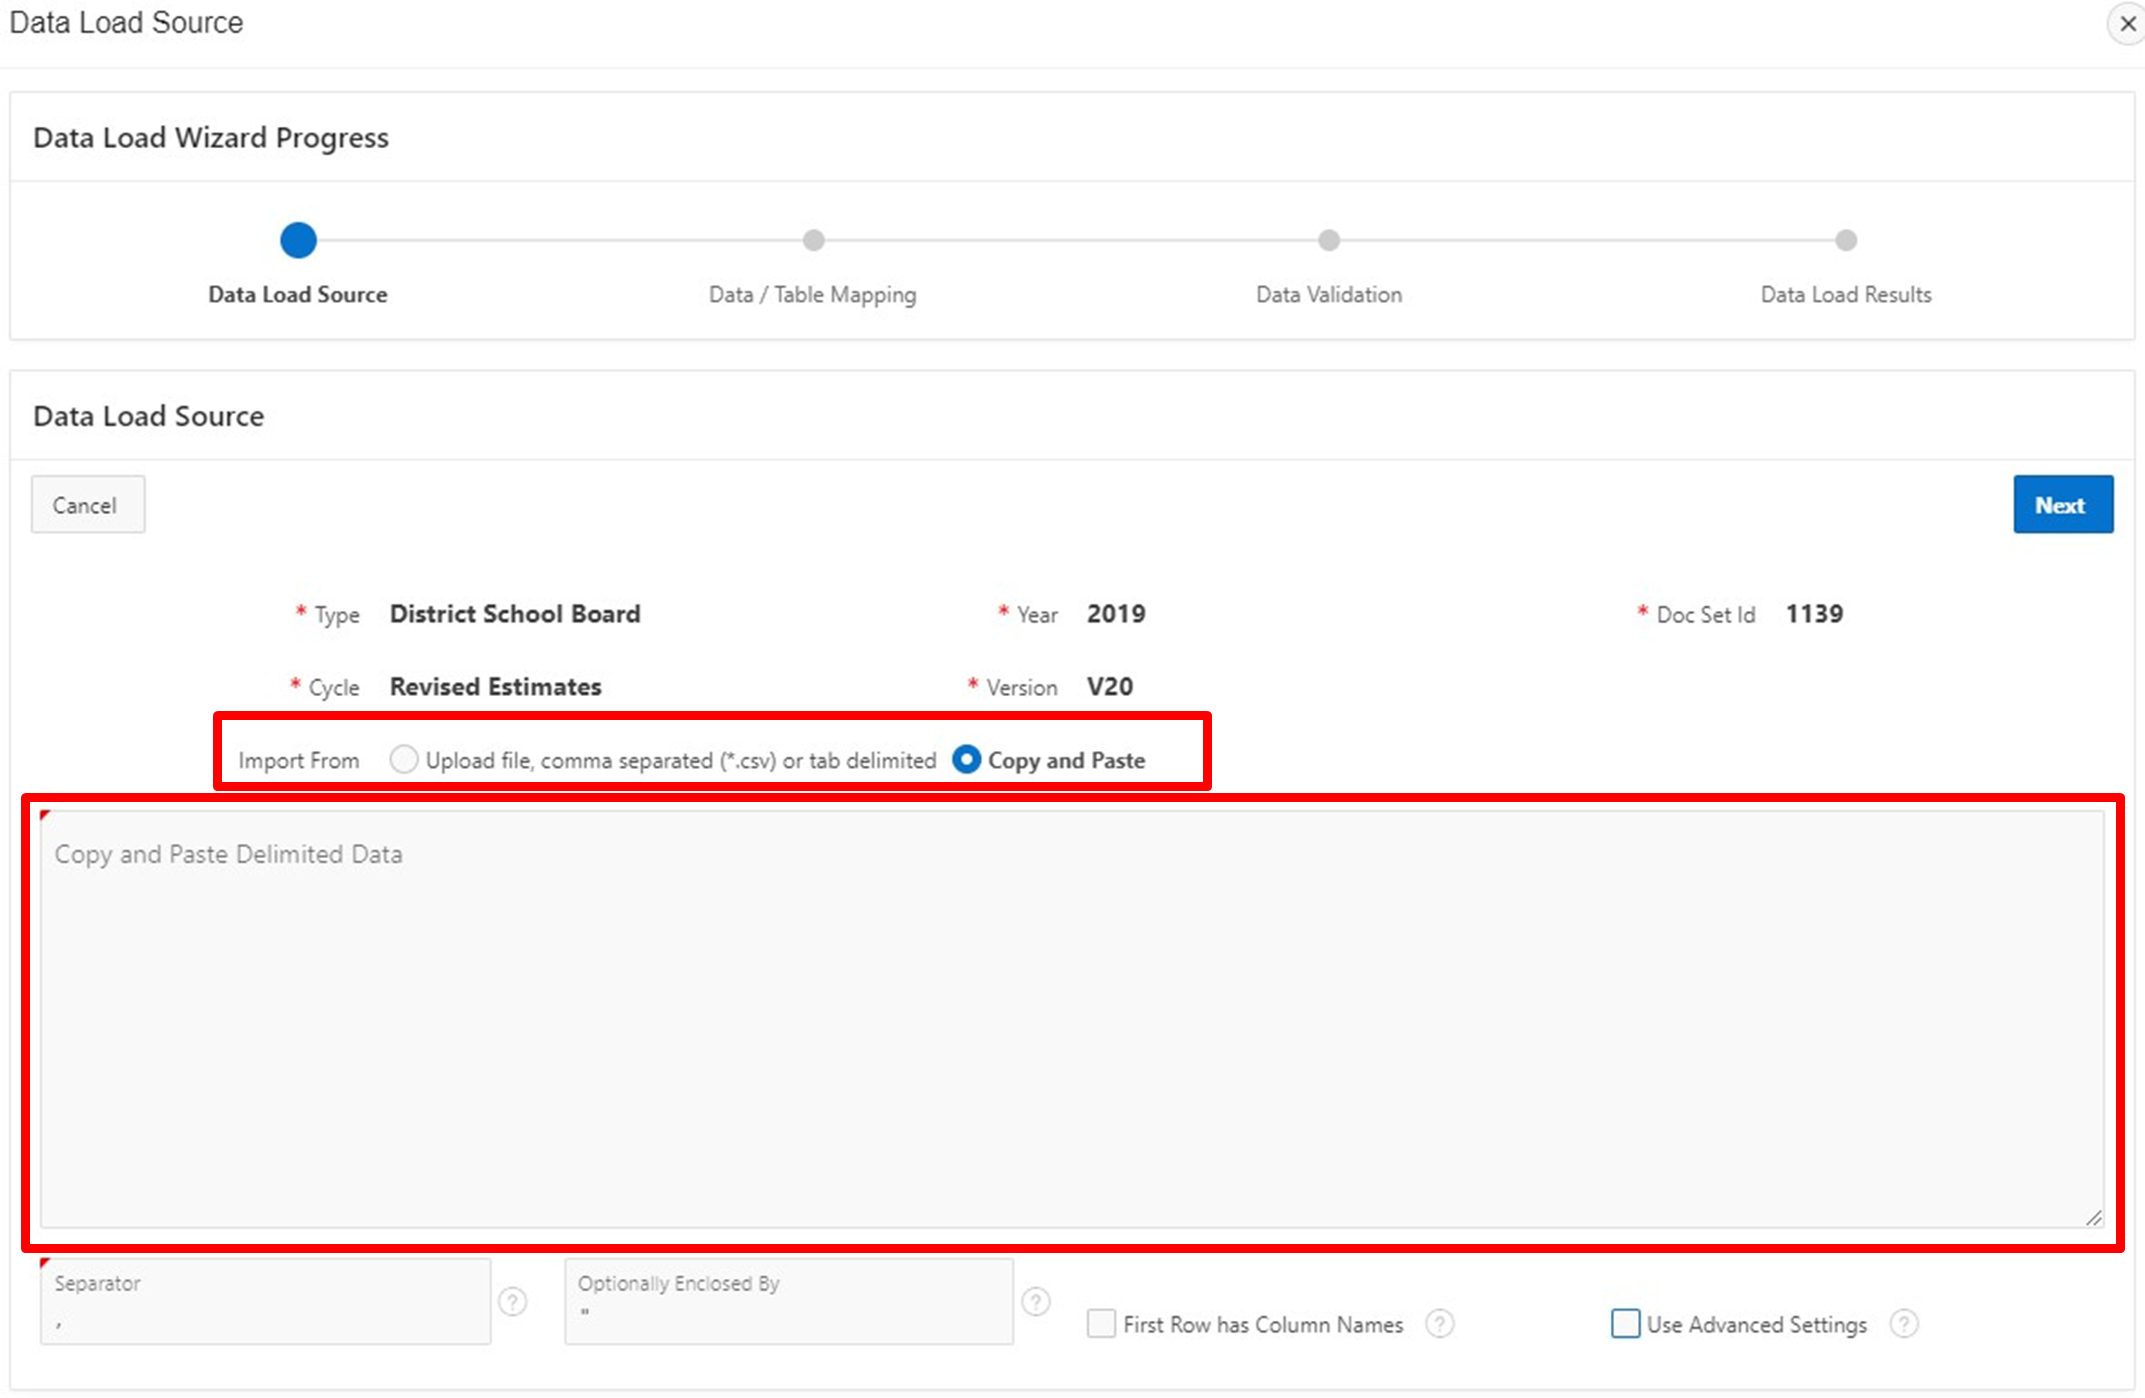
- Copy and Paste cell details.
- Additional file specifications:
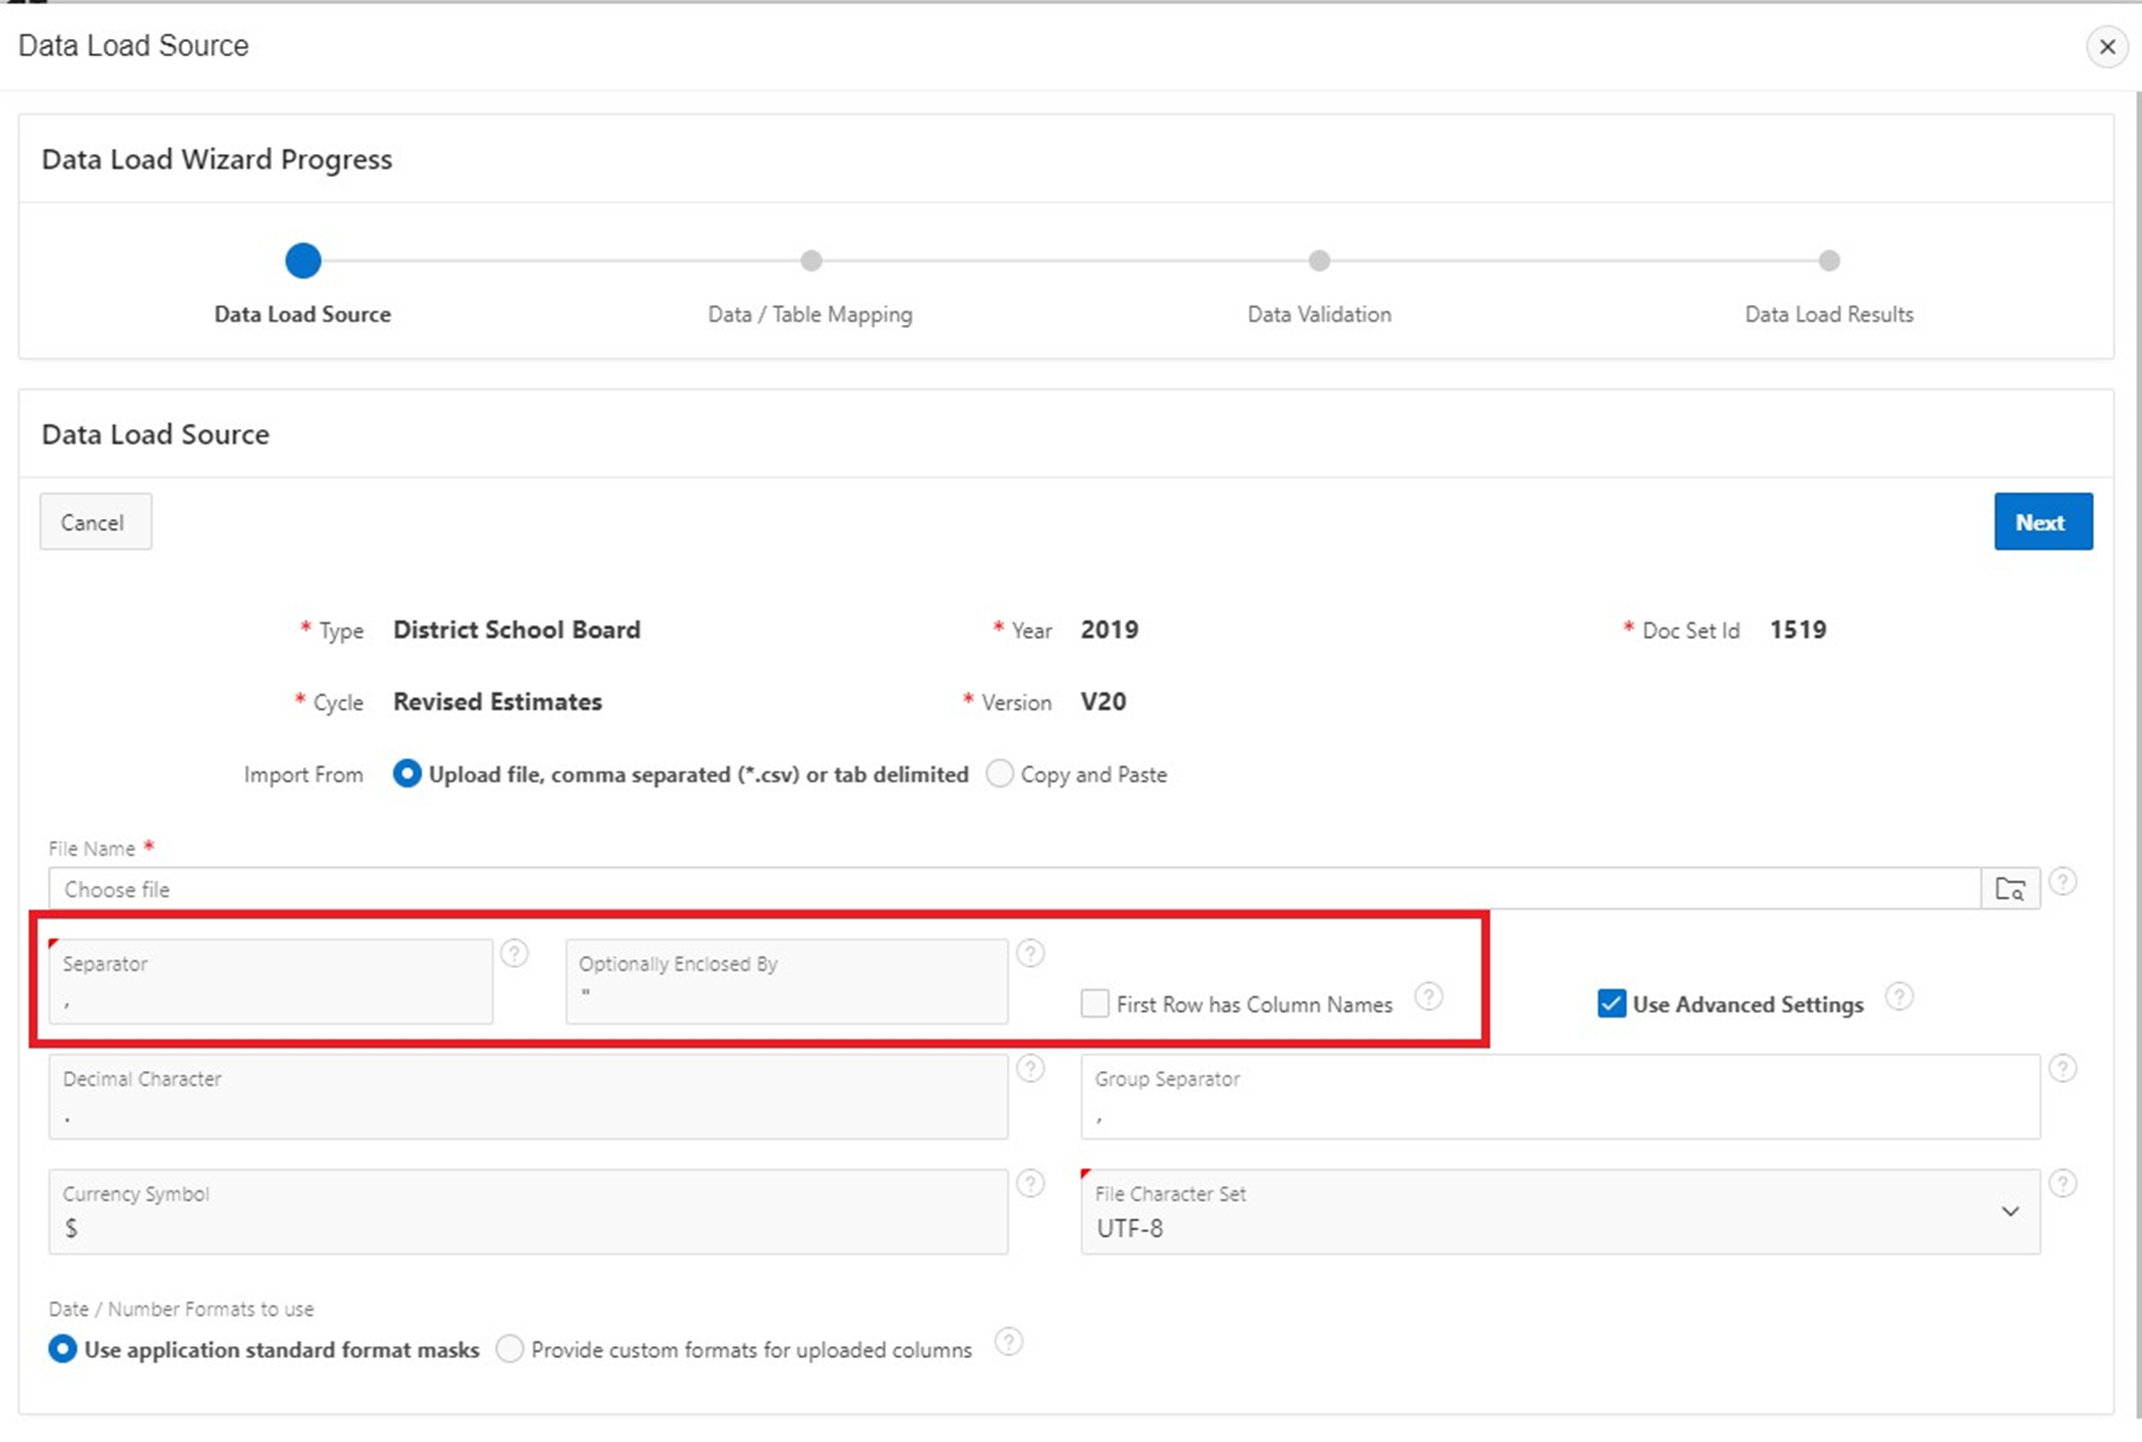
- Indicate column separator and enclosure characters.
- Note that the first row contains column headers.
-
Advanced Settings (optional)
- User can specify further file characters, including decimal, currency and group separator symbols, in addition to customizing the file character set.
- User can choose which date and number formats to use (selecting from standard custom formats).
To load in cells via the Data Load Wizard, please follow the steps below.
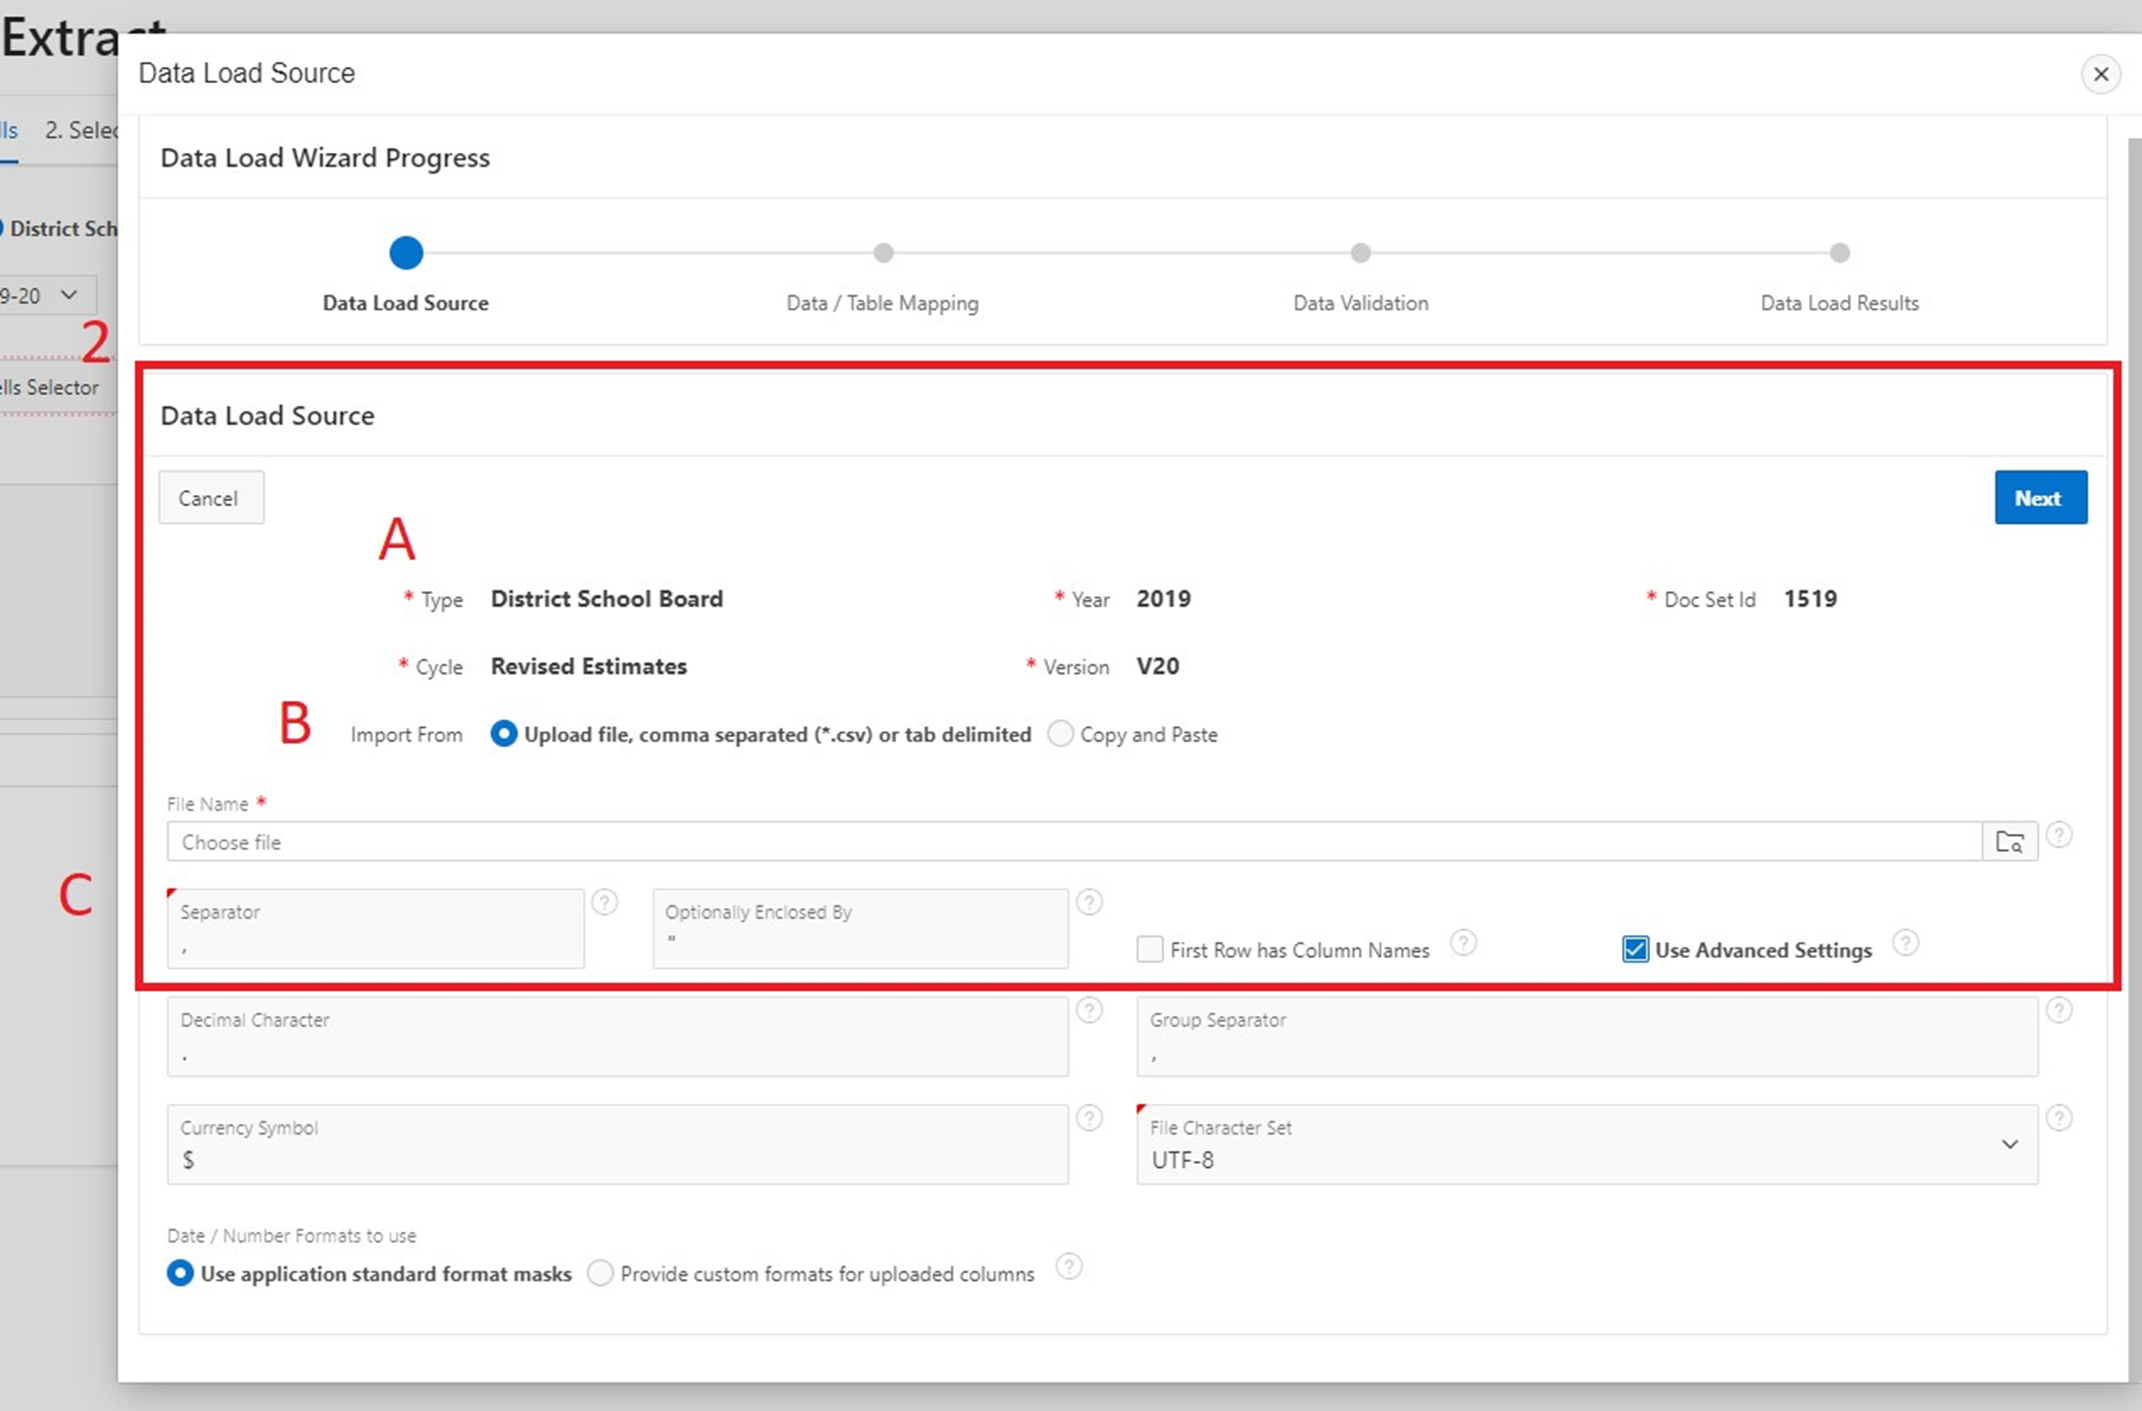
Step 1:
Verify that you have selected the correct Type, Year, Doc Set ID, Cycle, and Version for the cells for which you want to load in data. Note: Steps 1 - 4 are part of the Data Load Source stage in the progress bar.
Step 2:
Select the method by which you would like to import your cells. Recall that you have the option to both upload a CSV file or to copy and paste your list of cells.
-
File Method - navigate to your chosen file.
-
Copy and Paste Method - enter your list of cells into the provided box.
Step 3:
Confirm the separator and optional enclosure characters. A comma and quote are the default characters, respectively (note that these do not need to be changed for CSV files). You may also check the box to indicate that the first row will contain column headers.
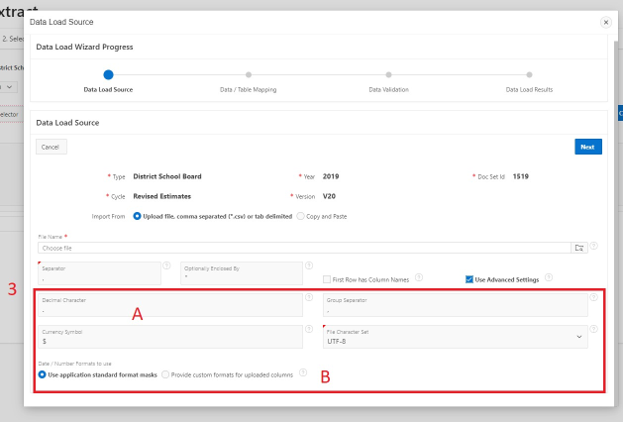
Step 4 (Optional):
You may use the Advanced Settings to further specify characters, including the symbols used to represent decimal values, currencies, group separators, as well as the file character set. You may also select the date and number formats to use (standard or custom format masks). Note that these settings do not need to be changed for CSV files and can be left with default values in order to load in the file.
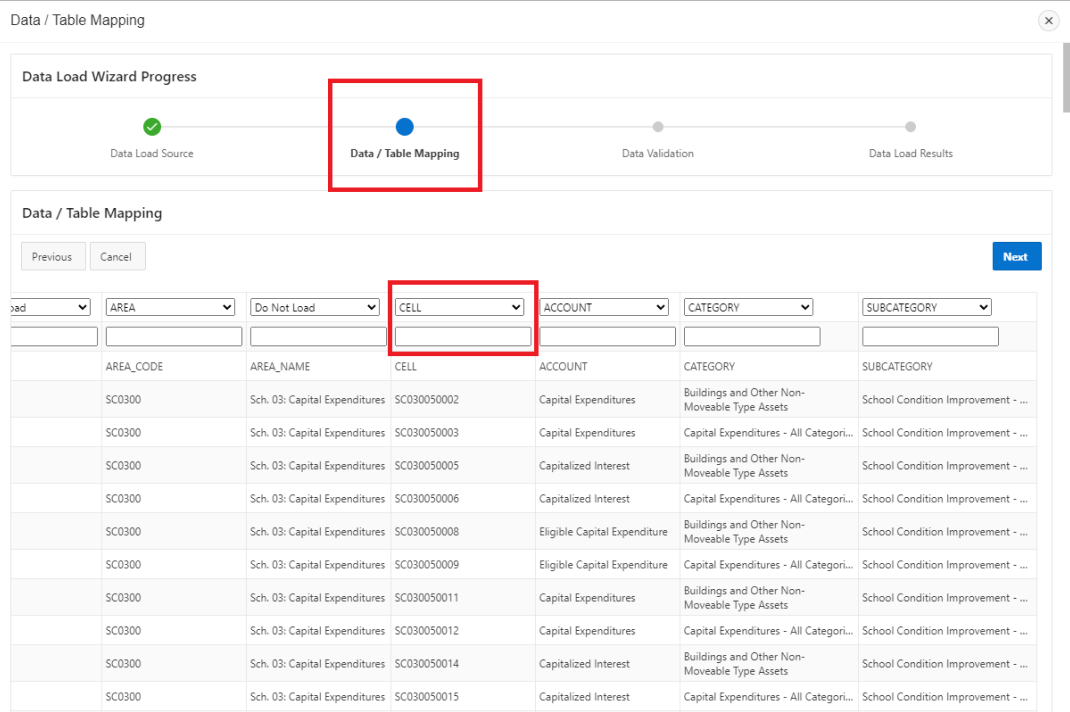
Step 5:
Once you have added in your cell details, click on Next to proceed to the Data Mapping stage. Here, you may confirm that columns were loaded correctly (ex. the Cell Name column corresponds with the Cell heading in the Data Wizard). You may also note which columns are not required to be loaded. In the example below, cells have been loaded using a .CSV file.
Note
Only the Cell column must be provided for the Legacy CSV file to be loaded successfully.
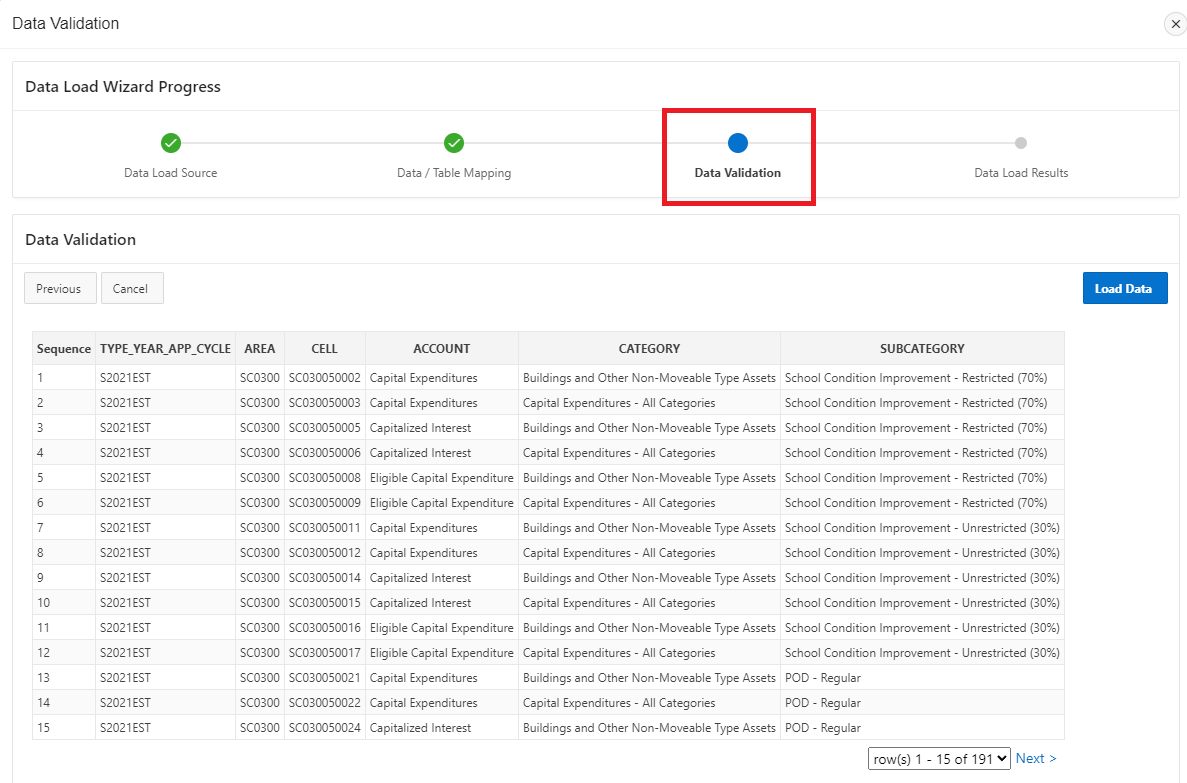
Step 6:
Once the data mapping is complete, click on Next to proceed to the Data Validation stage. Here you may confirm that the cell details are correct before completing the data load. In the example below, four cells were loaded.
Step 7:
Click on Load Data to finish. A message will appear to confirm the count of cells that were loaded correctly.
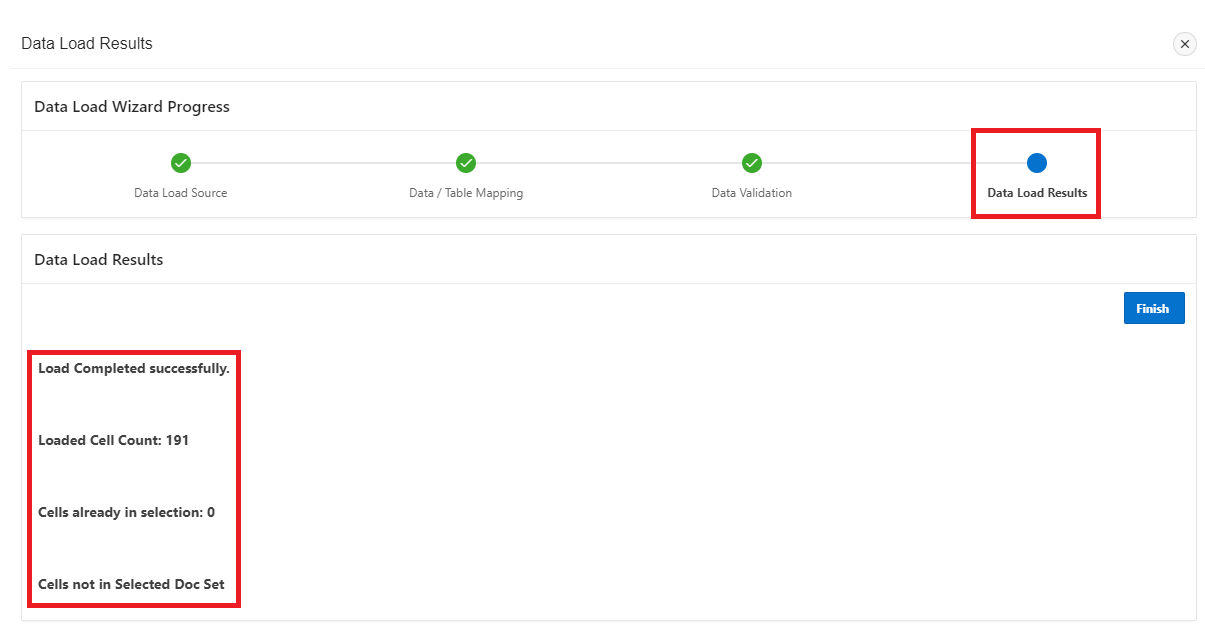
Click on Finish to view your results. You may now proceed with the steps to extract data.
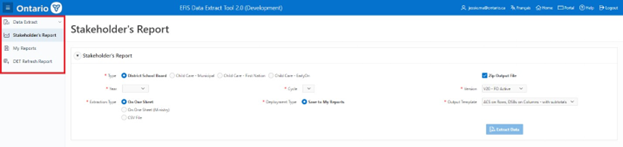
5 Stakeholder's Report
The Stakeholder's Report extracts all cells for a Type for a selected doc set (Year, Cycle, and Version combination).
Overview of steps:
- Step 1: Select Type
- Step 2: Zip Output File
- Step 3: Select Year
- Step 4: Select Cycle
- Step 5: Select Version
- Step 6: Select Extraction Type
- Step 7: Select Deployment Type
- Step 8: Select Output Template
A detailed explanation of each step is provided next.
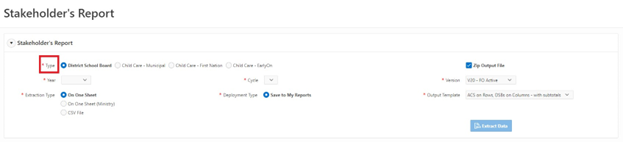
5.1 Select Type
User selects Type. District School Board (DSB) is the default recipient type. Internal users may switch to:
- Child Care - Municipal (CCM)
- Child Care - First Nation (CCF)
- Child Care - EarlyOn (OTP)
Only one Type can be chosen.
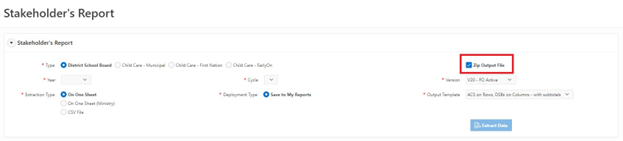
5.2 Zip Output File
The user has a choice to zip the output file. The default version is to leave this box ticked, which is having a zipped file.
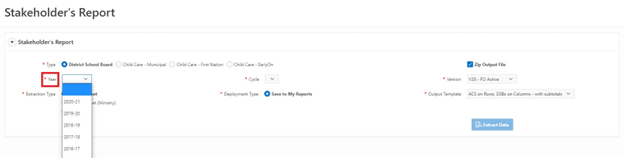
5.3 Select Year
All available years for the Type selected will be displayed. User clicks on relevant Year. Only one Year can be chosen.
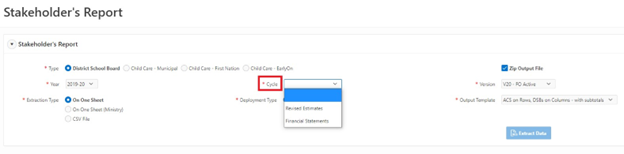
5.4 Select Cycle
Available Cycles for that Type and Year will be automatically displayed.
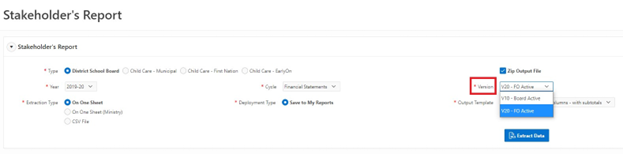
5.5 Select Version
Users can choose from V20-FO Active or V10 Board Active. Only one version can be selected.
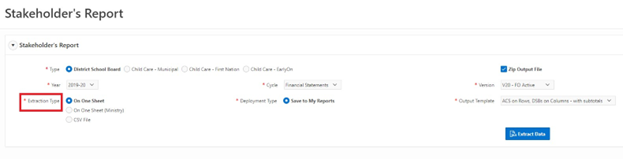
5.6 Select Extract Type
Four options are available. The default version is On One Sheet.
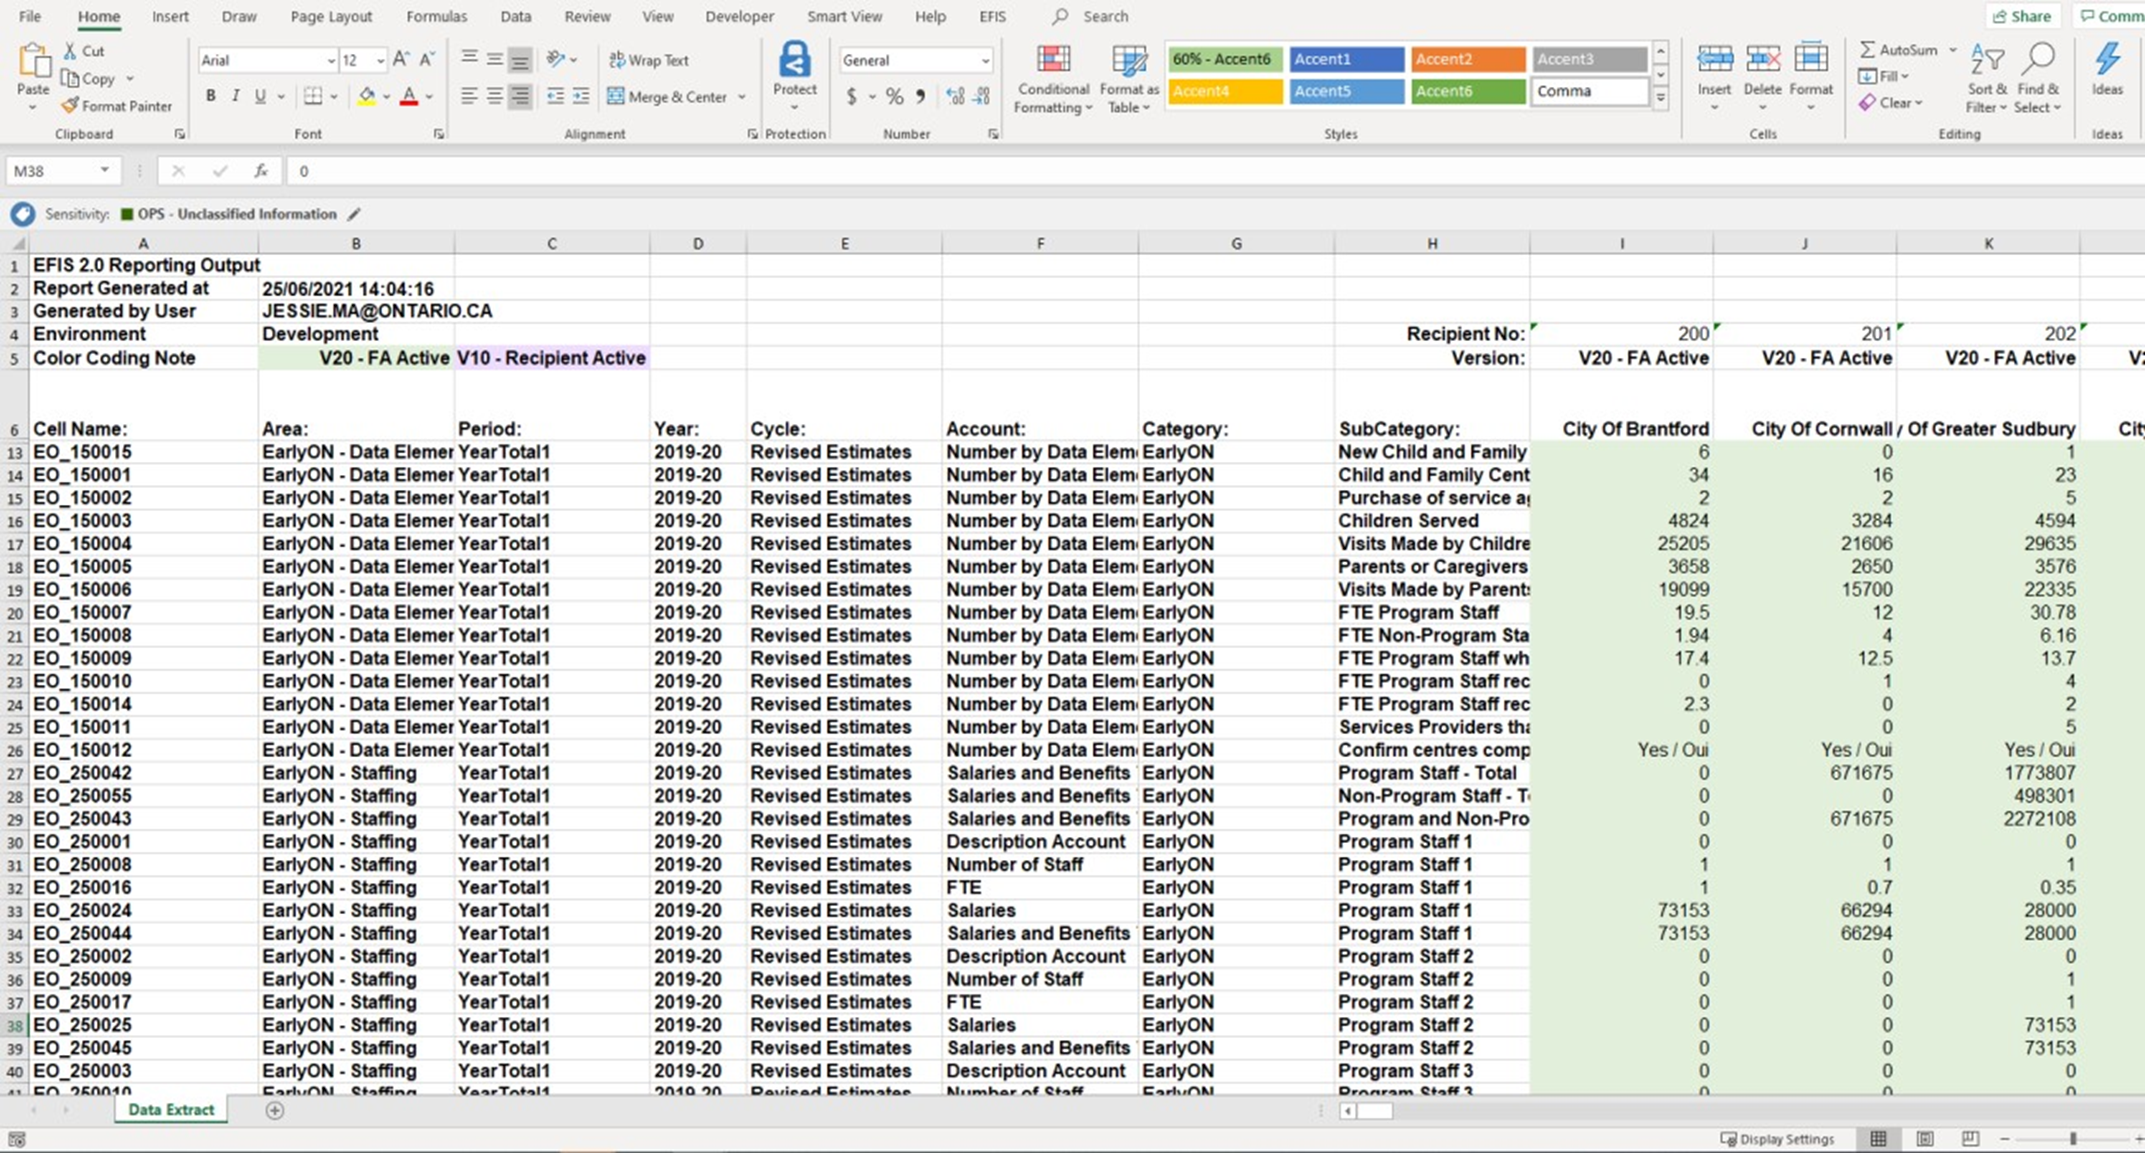
- On One Sheet will extract the data to a single Excel tab using Alias names for ACS.
-
By Area will extract the data with one tab for each area using Alias names for ACS.
- This option is only available for Admin Users in Release 1.
- On One Sheet (Ministry) will extract the data to a single Excel tab using Member names for ACS.
- CSV File will extract the data to a CSV file.
5.7 Deployment Type
The default setting is to Save to My Reports.
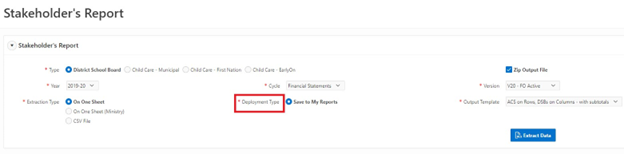
5.8 Output Template
Default version for DSB Type is ACS on Rows, DSBs on Columns - with subtotals. By clicking on the arrow button, users can select other templates.
Once all the selections have been made, users can click Extract Data button.
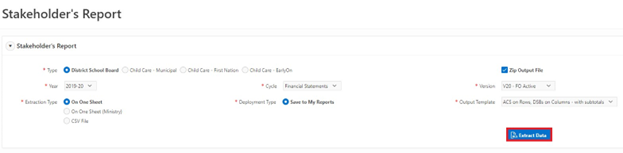
The extraction of the report can take between 10-30 minutes to complete, depending on the number of relevant cells in the selected Year and Cycle. Once the process has completed successfully, a message box will appear. Users will also receive an email when the extract is completed.
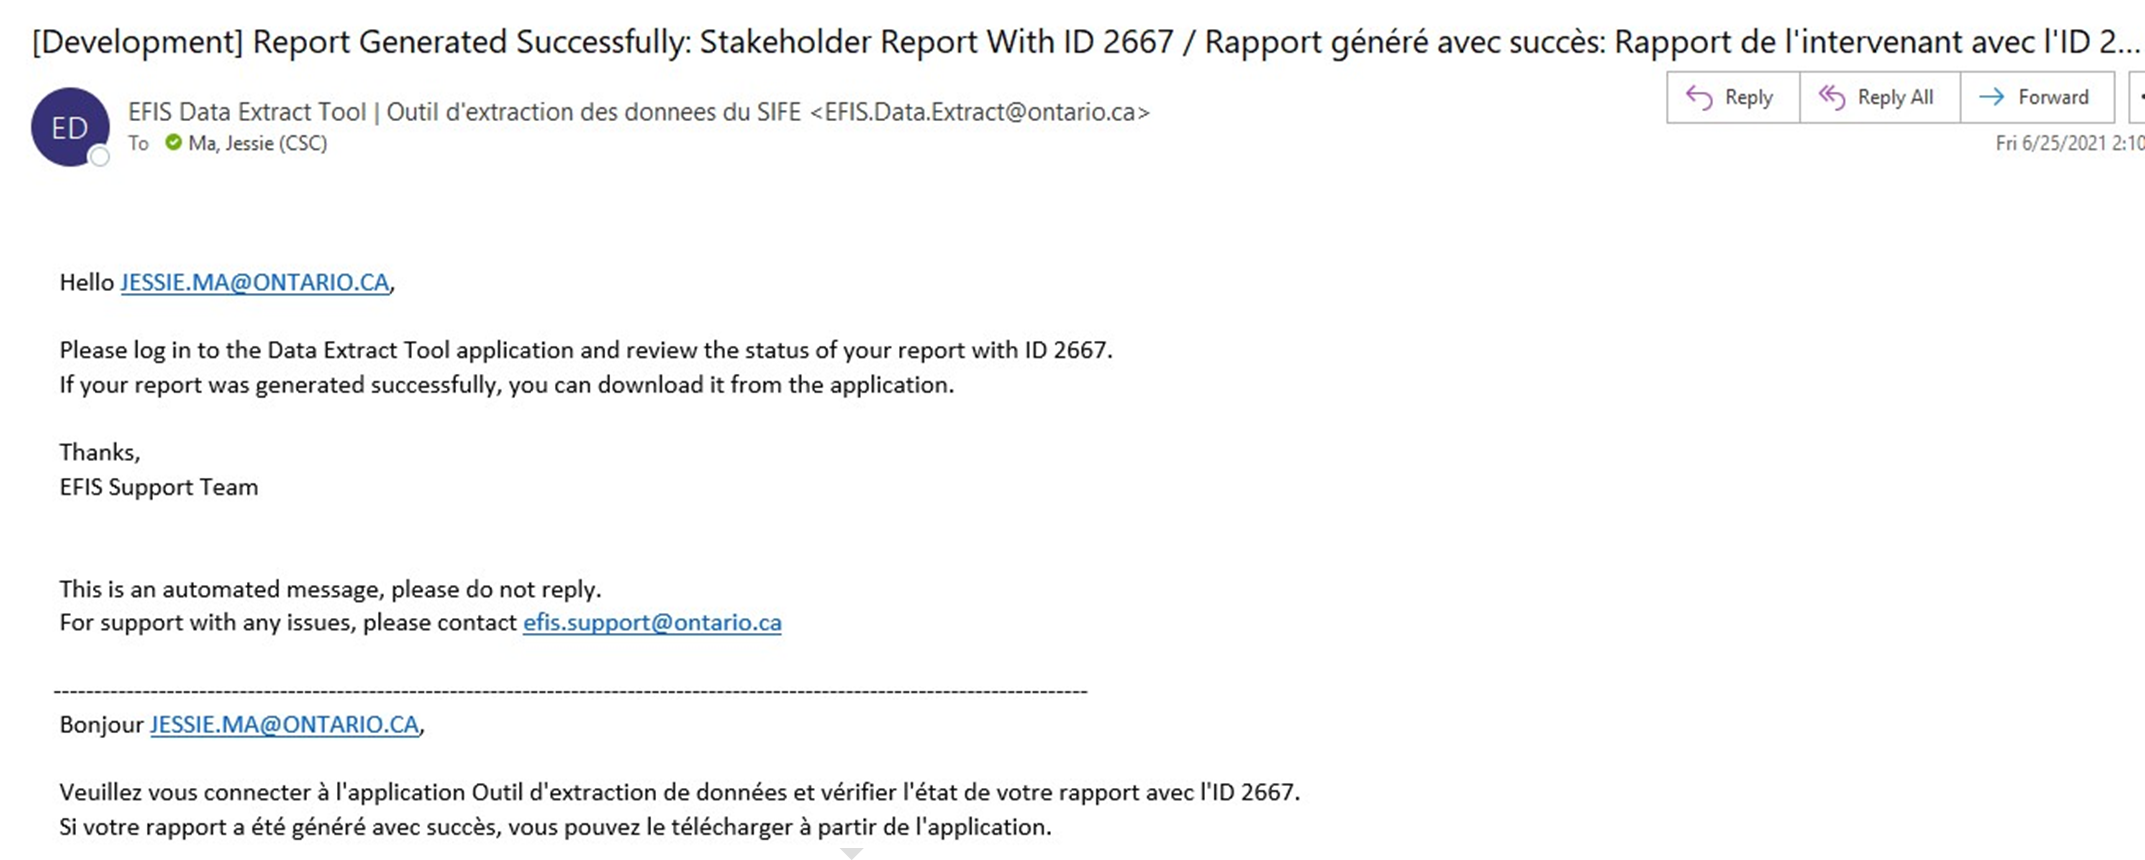
Users will be able to log back into DET and download the extract via the My Reports page (see next section).
Stakeholder Report On One Sheet
Stakeholder Report by Area
Stakeholder Report On One Sheet (Ministry)
Stakeholder Report CSV File
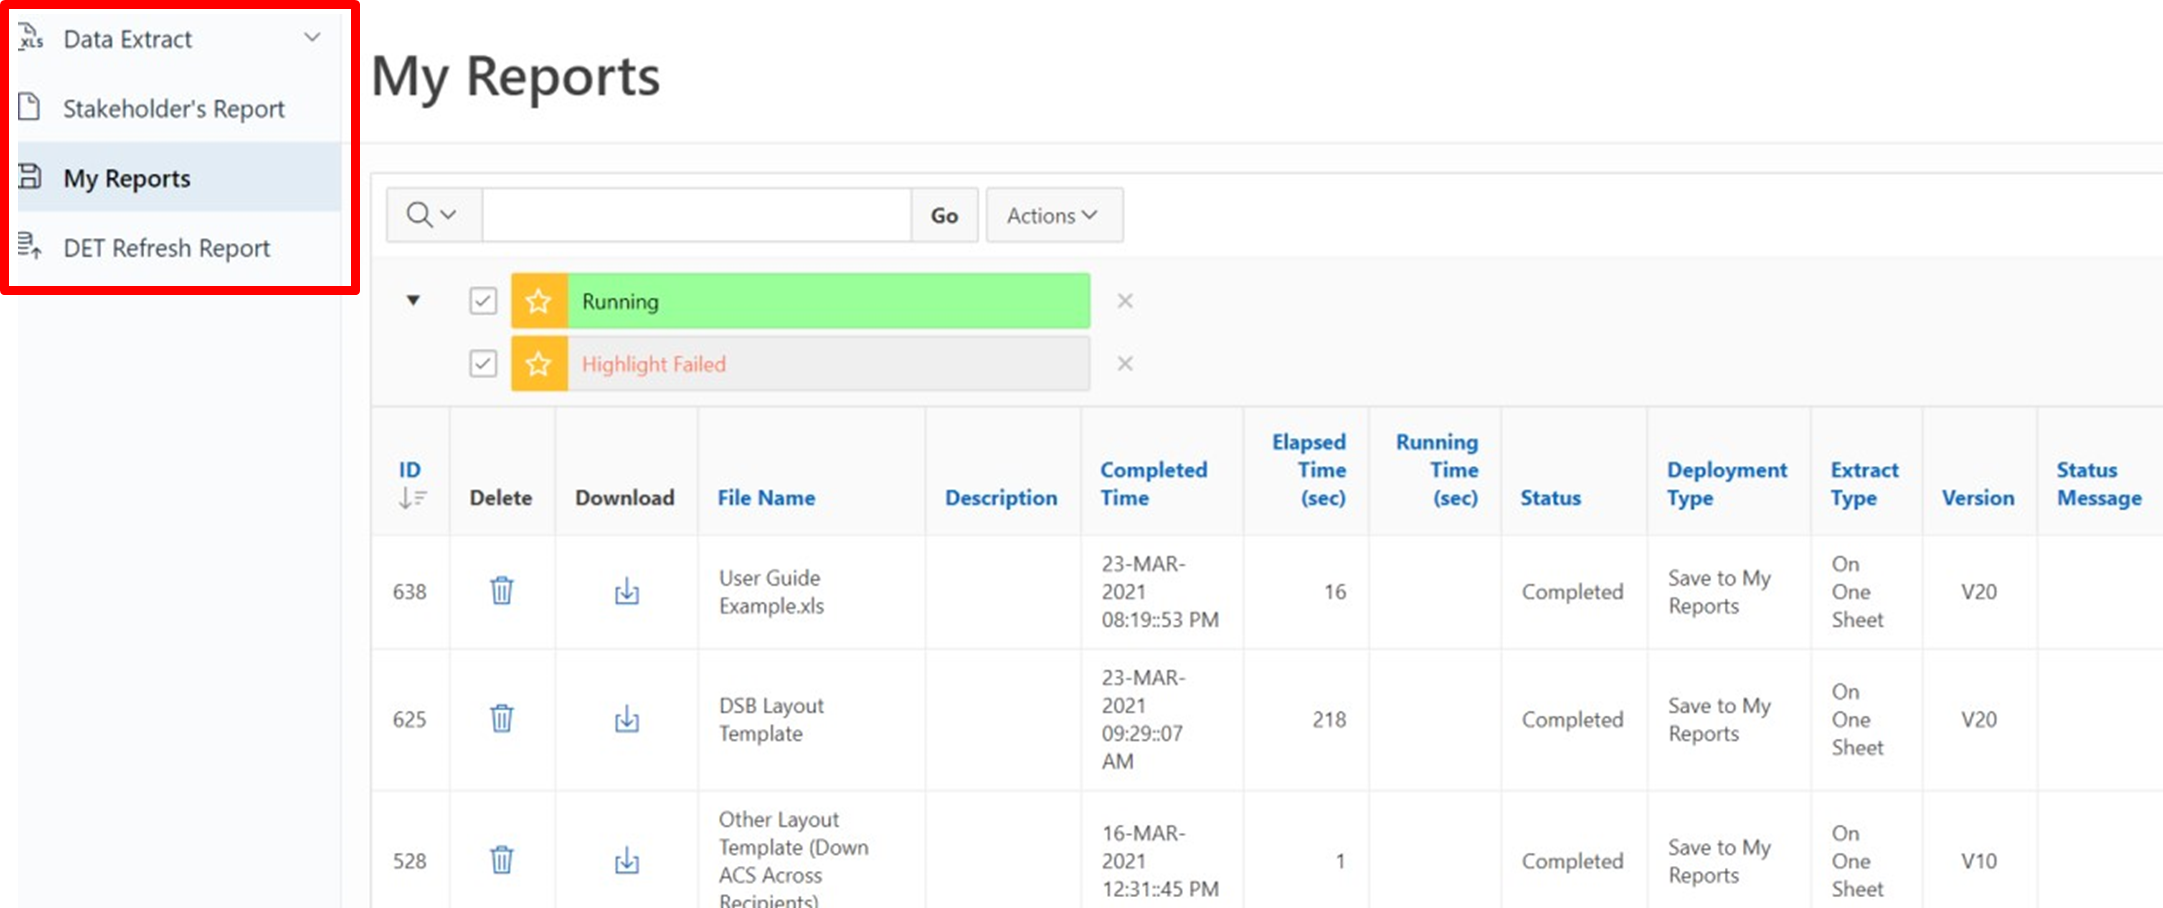
6 My Reports
The My Reports is where user reports are saved and available to be downloaded.
Each user has a limit on the number of My Reports and the maximum total file size allowed. At the bottom of the page, users can compare their current status to the maximum limits.
If a user keeps submitting Data Extracts or Stakeholder's Reports after one of the limits is reached, the oldest reports will be killed and purged to keep under the constraints.

User will be able to download or delete the extract using the icons noted in the image below.
User will select and click on the file which will open in Excel. Note for Release 1, the following Excel format error will be displayed. Select Yes.

7 DET Refresh Report
DET Refresh Report will display the last time a specific Doc Set was updated to the DET Data warehouse.
Overview of steps:
- Select Report
- Review Report
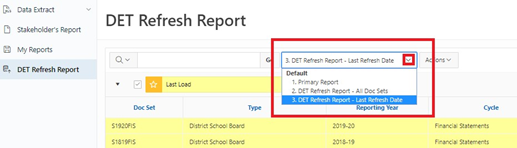
7.1 Select Report
Users have three Refresh Reports to choose from:
-
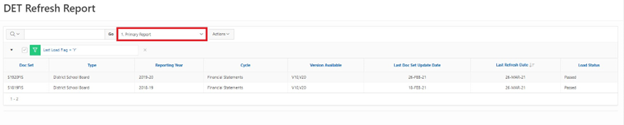
Primary Report
- Displays only the Doc Sets from the last refresh.
-
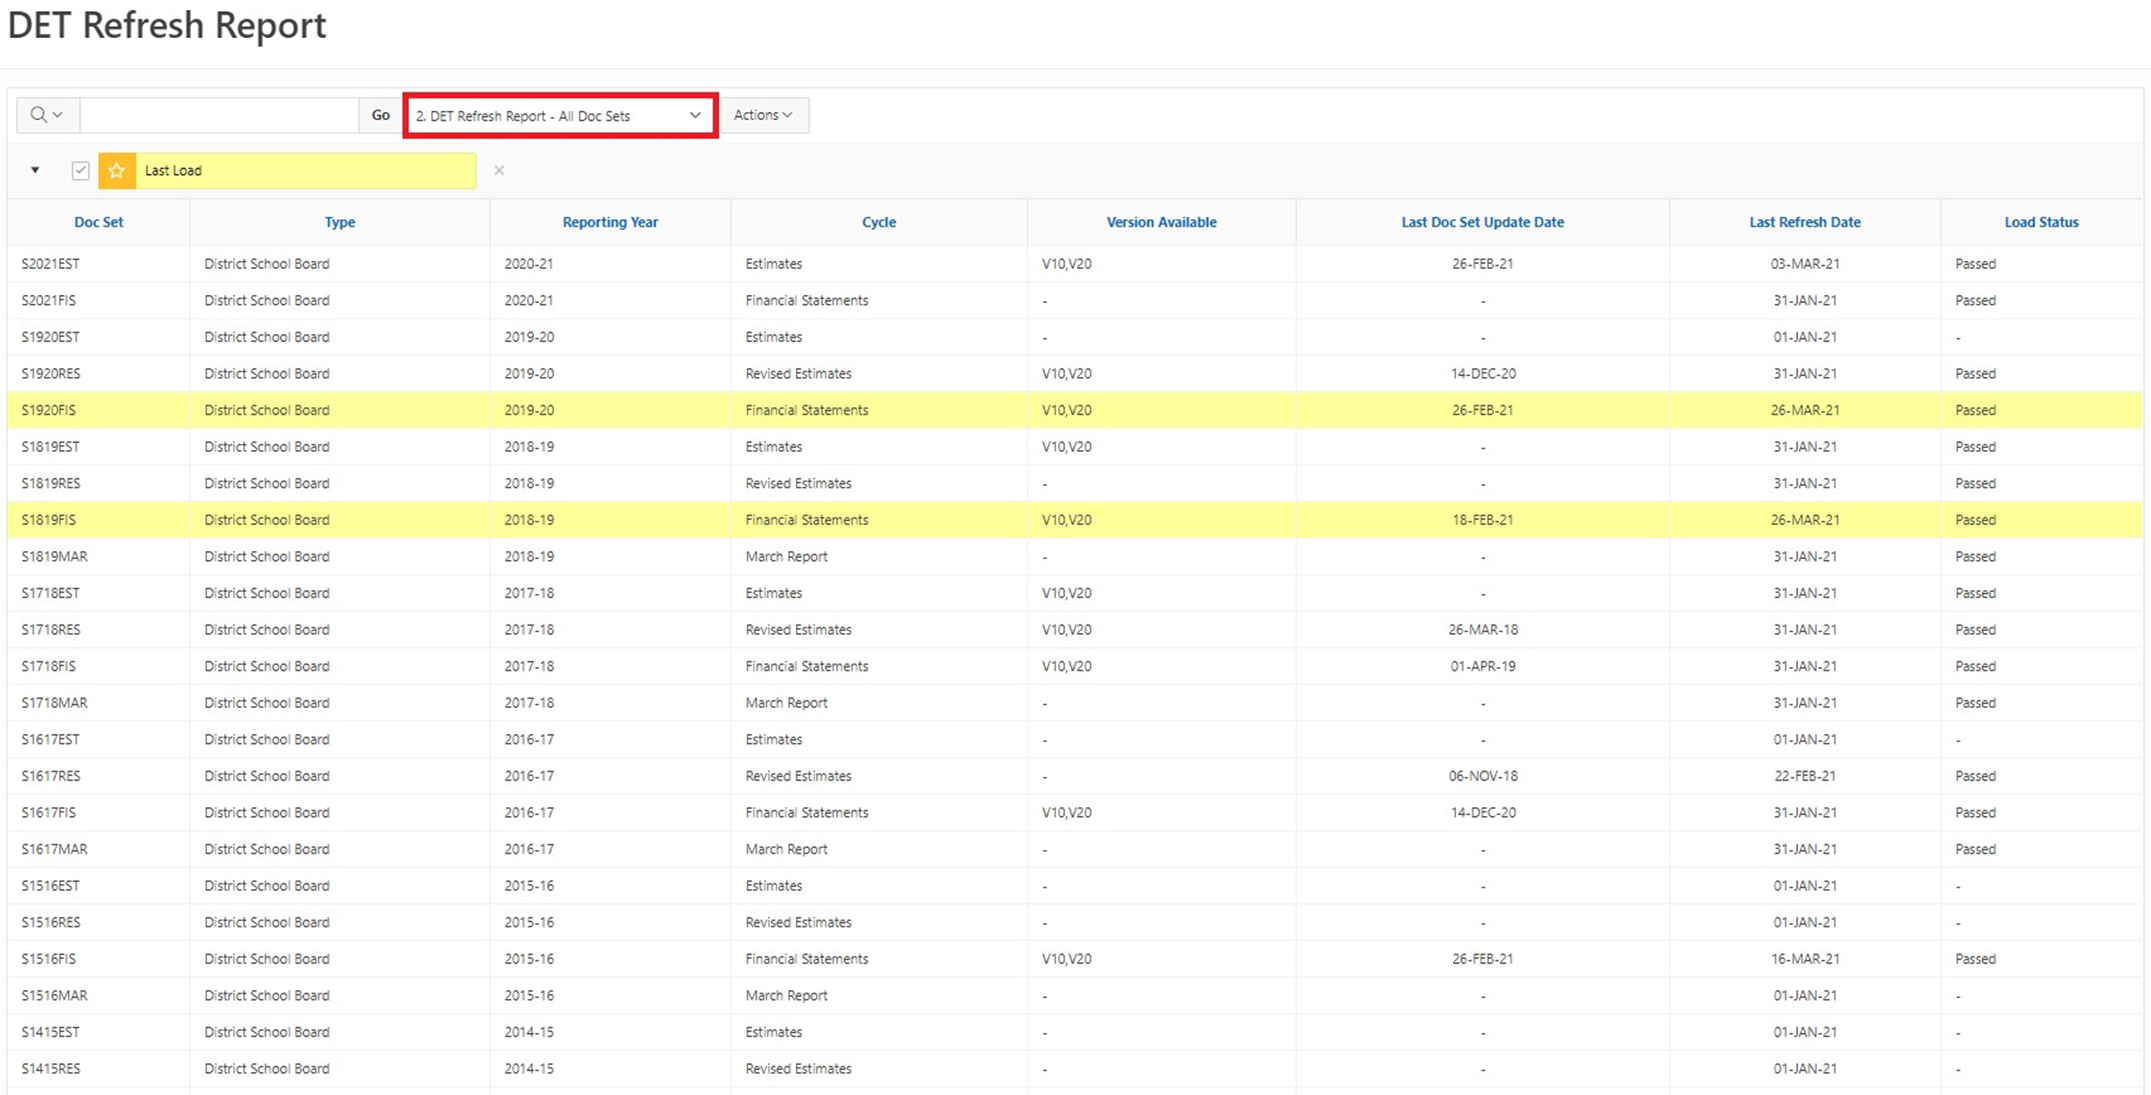
Det Refresh Report - All Doc Sets
- Displays all Doc Sets in chronological order with the most recent Doc Set listed first.
-
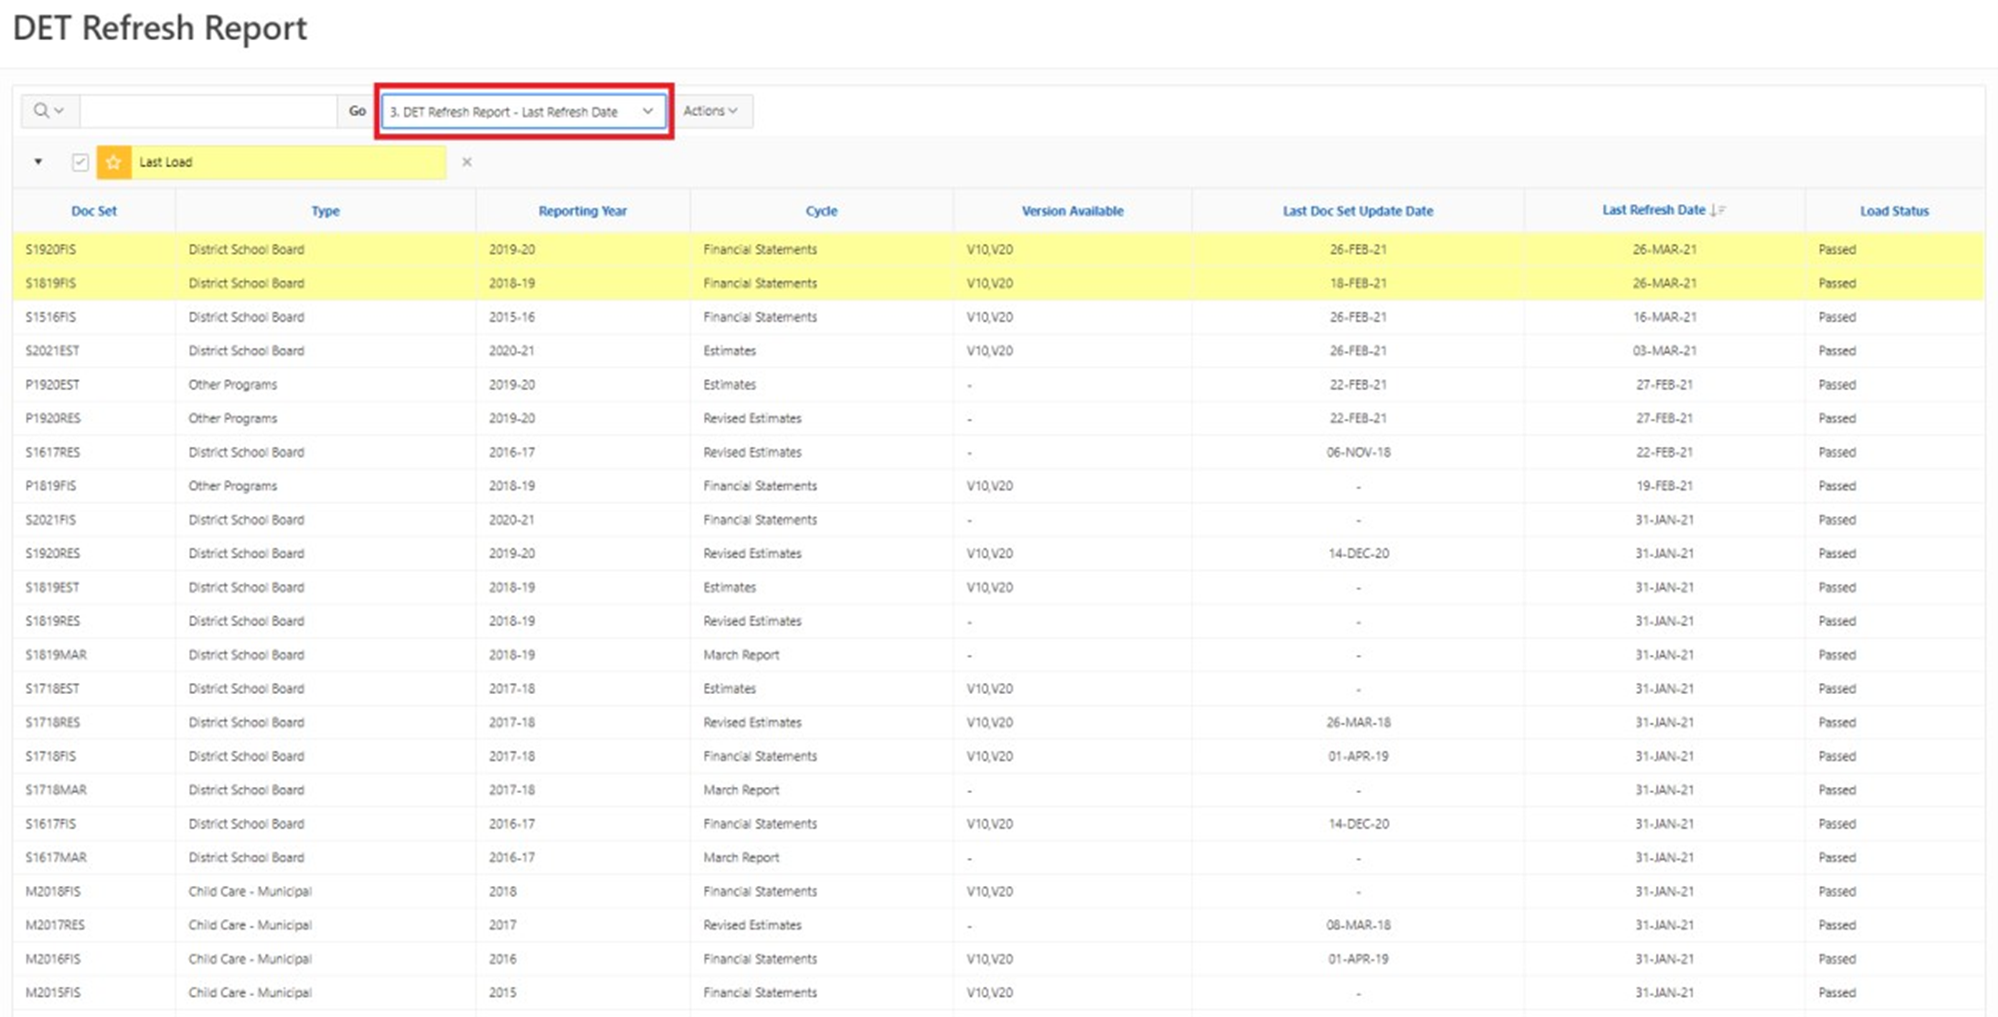
DET Refresh Report - Last Refresh Date
- Displays all Doc Sets ordered by Last Refresh Date.
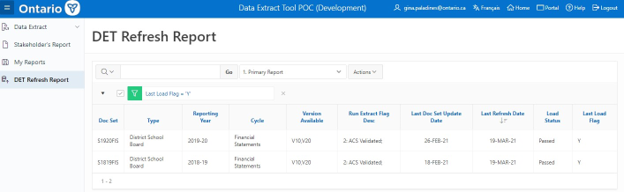
7.2 Review Reports
User can select one of the three reports to view. For Reports 2 and 3, Yellow Highlighted rows identify the Doc Sets from the most recent data refresh.
Sample 1. Primary Report
Sample 2. DET Refresh Report - All Doc Sets
Sample 3. DET Refresh Report - Last Refresh Date
Changelog
| Version | Date | Changed by | Description |
|---|---|---|---|
| V 1.0 | January 12, 2021 | Gina Paladines | Draft |
| V 1.1 | February 23, 2021 | Gina Paladines | |
| V 1.2 | March 15, 2021 | Al McLaren | Version review |
| V 1.3 | March 16, 2021 | Gina Paladines | |
| V 1.4 | March 18, 2021 | Zunaira Amin | Updated formatting, screenshots |
| V 1.5 | March 23, 2021 | Gina Paladines | |
| V 1.6 | March 28, 2021 | Zunaira Amin | Implemented feedback, clarified steps, updated screenshots |
| V 1.7 | March 29, 2021 | Al McLaren | Review |
| V 1.8 | April 1, 2021 | Zunaira Amin | Implemented feedback, clarified steps, updated screenshots |
| V 1.9 | April 13, 2021 | Zunaira Amin | Implemented feedback, added template description, screenshot and formatting fixes |
| V 2.0 | April 15, 2021 | Karen Yeung | Review and update |
| V 2.1 | April 19, 2021 | Zunaira Amin | Included version colour-coding, fixed table of contents |
| V 2.2 | June 16, 2021 | Karen Yeung and Emily Wells | Update after UAT |
| V 2.3 | June 25, 2021 | Jessie Ma | Updated screenshots |
| V 2.4 | July 5, 2021 | Karen Yeung and Jessie Ma | Updated alt text for AODA compliance |
| V 2.5 | March 21, 2025 | Angelie S. | Modified "Contact Us" footnote |